
Introduction
Welcome to Rememberizer! This guide outlines creating a custom OpenAI GPT, Demo GPT—an exercise showcasing how Rememberizer enhances your GPT service to users. We'll cover app registration and seamless Rememberizer integration as an action. Then, your users consolidate their content sources into personalized, dynamic knowledge bases for interaction with your GPT.
*If you’re planning to create your own AI application rather than using a custom GPT, please check out the last section of this blog.
Watch quick Demo Video here or go through step-by-step guide below:
Requirements
- An OpenAI ChatGPT Plus Account
- One or more of the supported knowledge stores, eg, Slack, Dropbox, or Google Drive, so that you can test your GPT as a user
Account Setup and Initial Steps
Click on the following link, and you will be directed to our Rememberizer website:
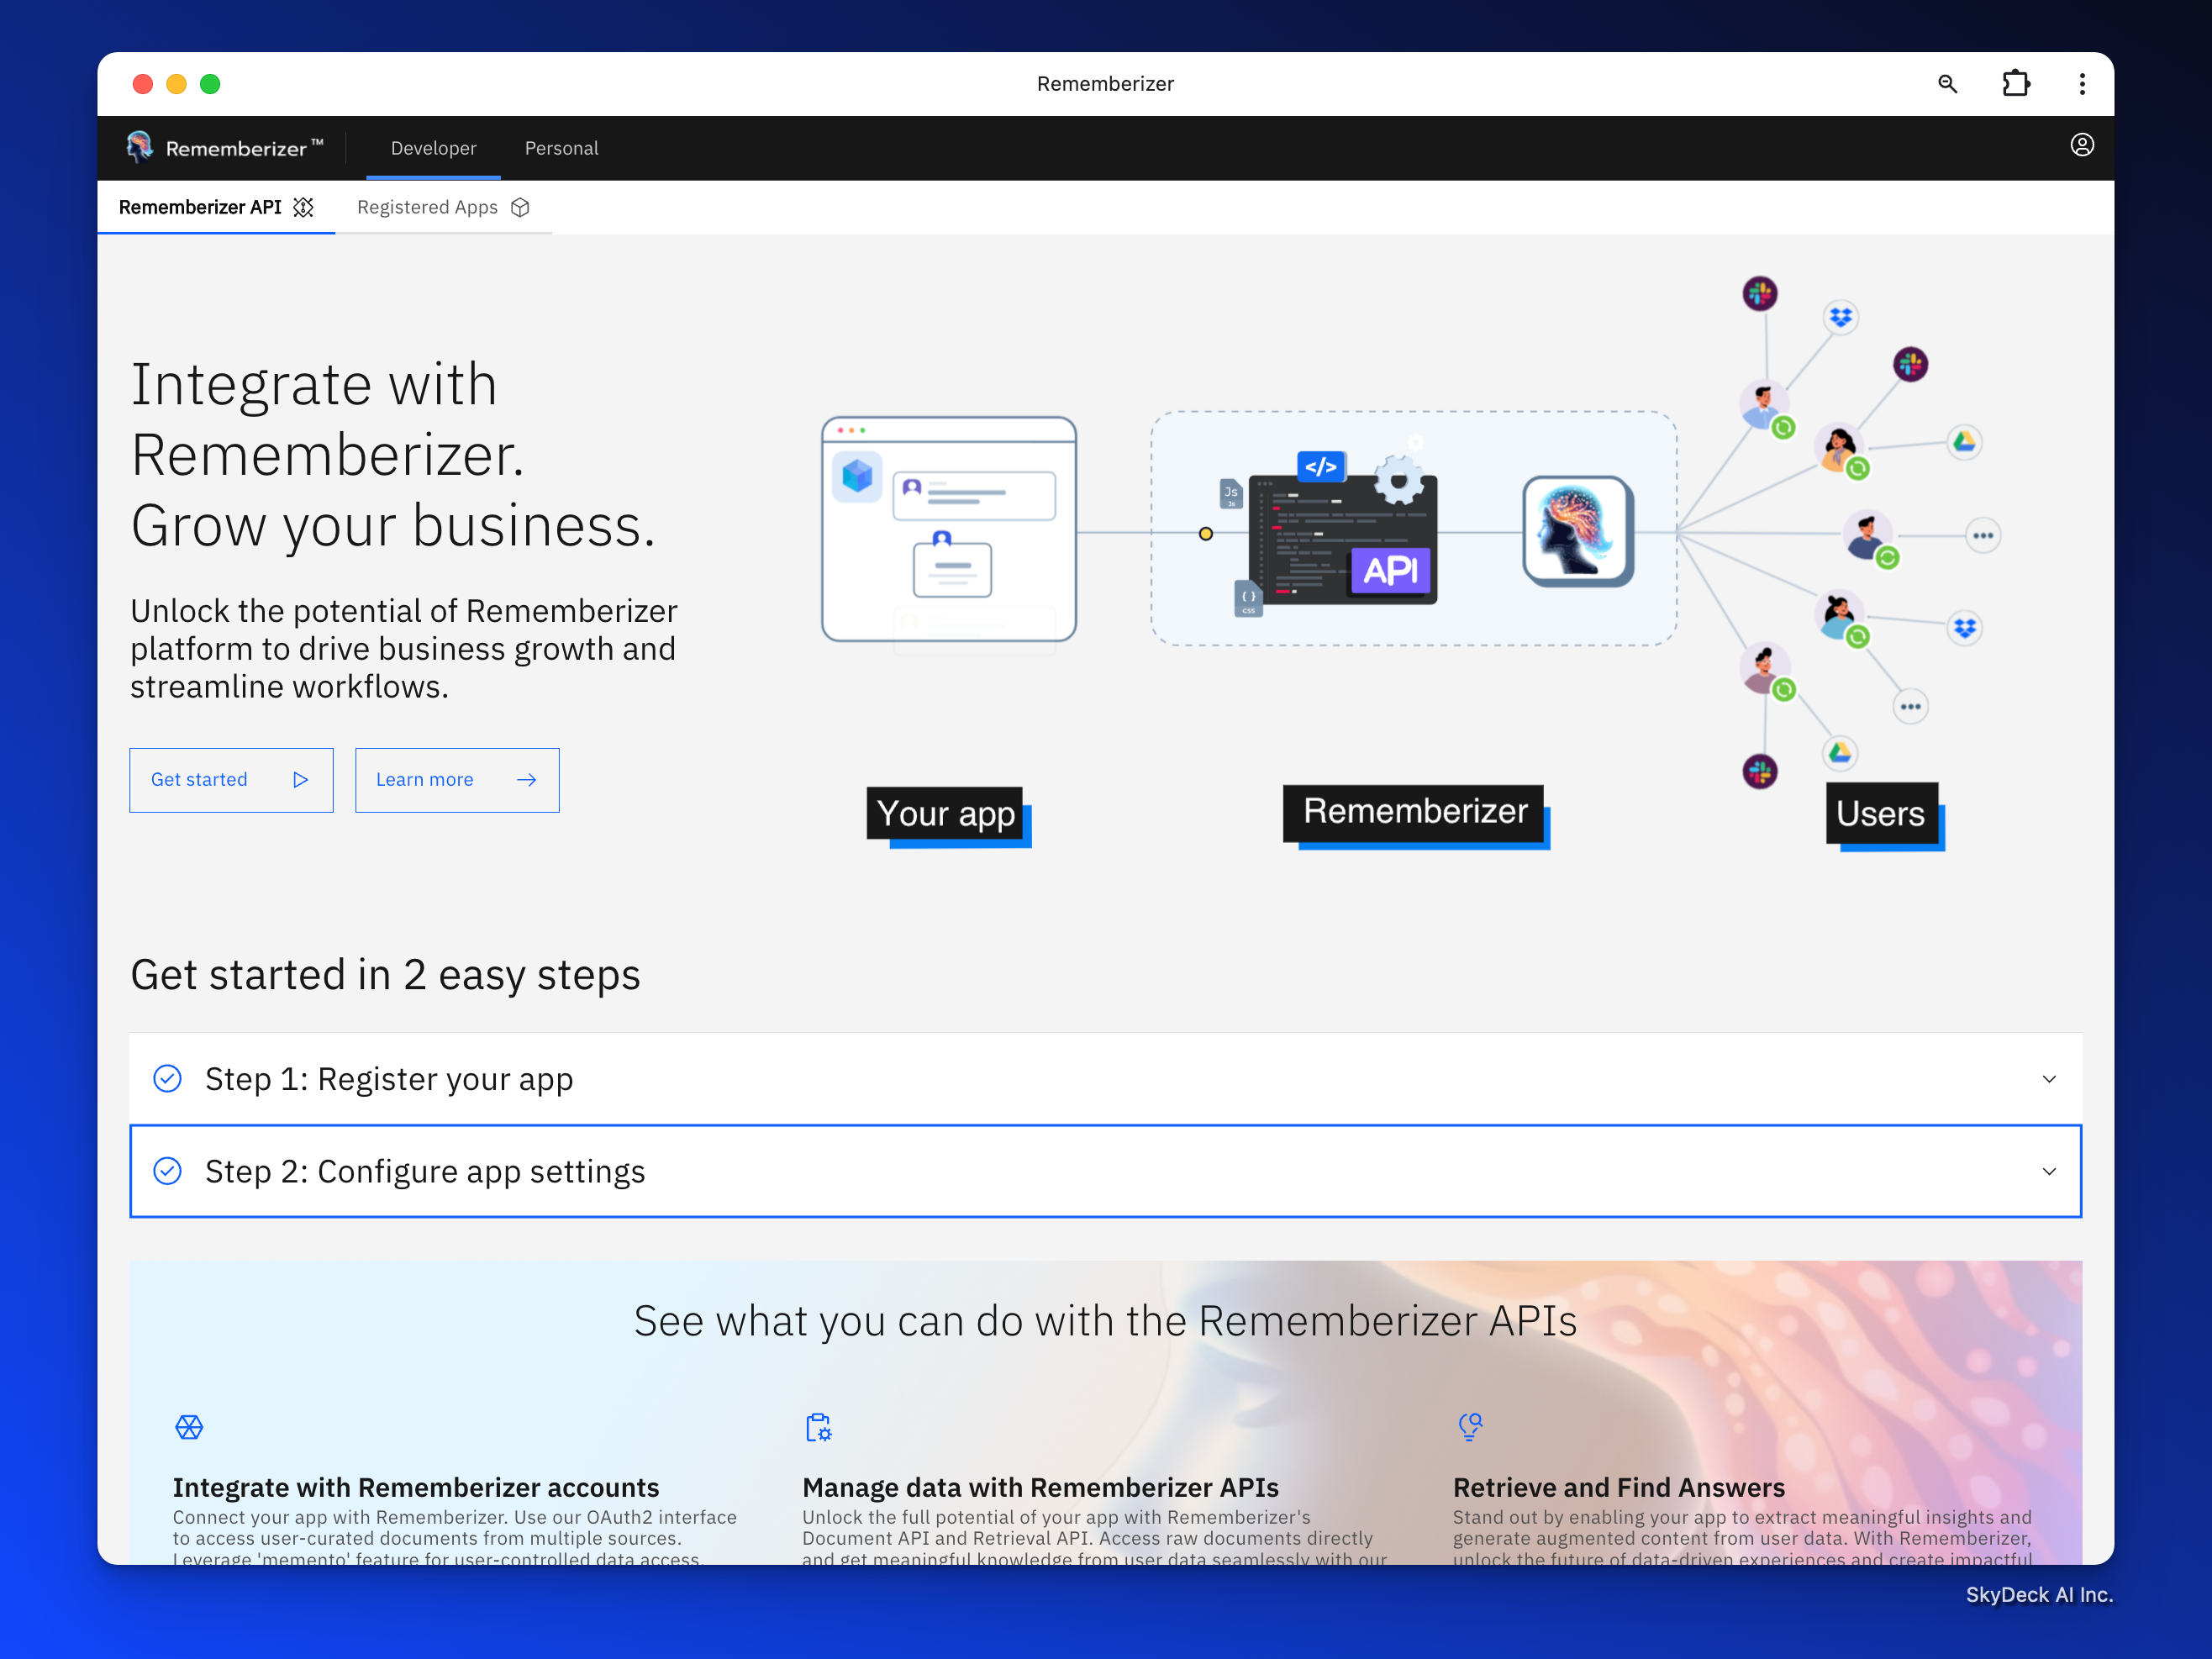
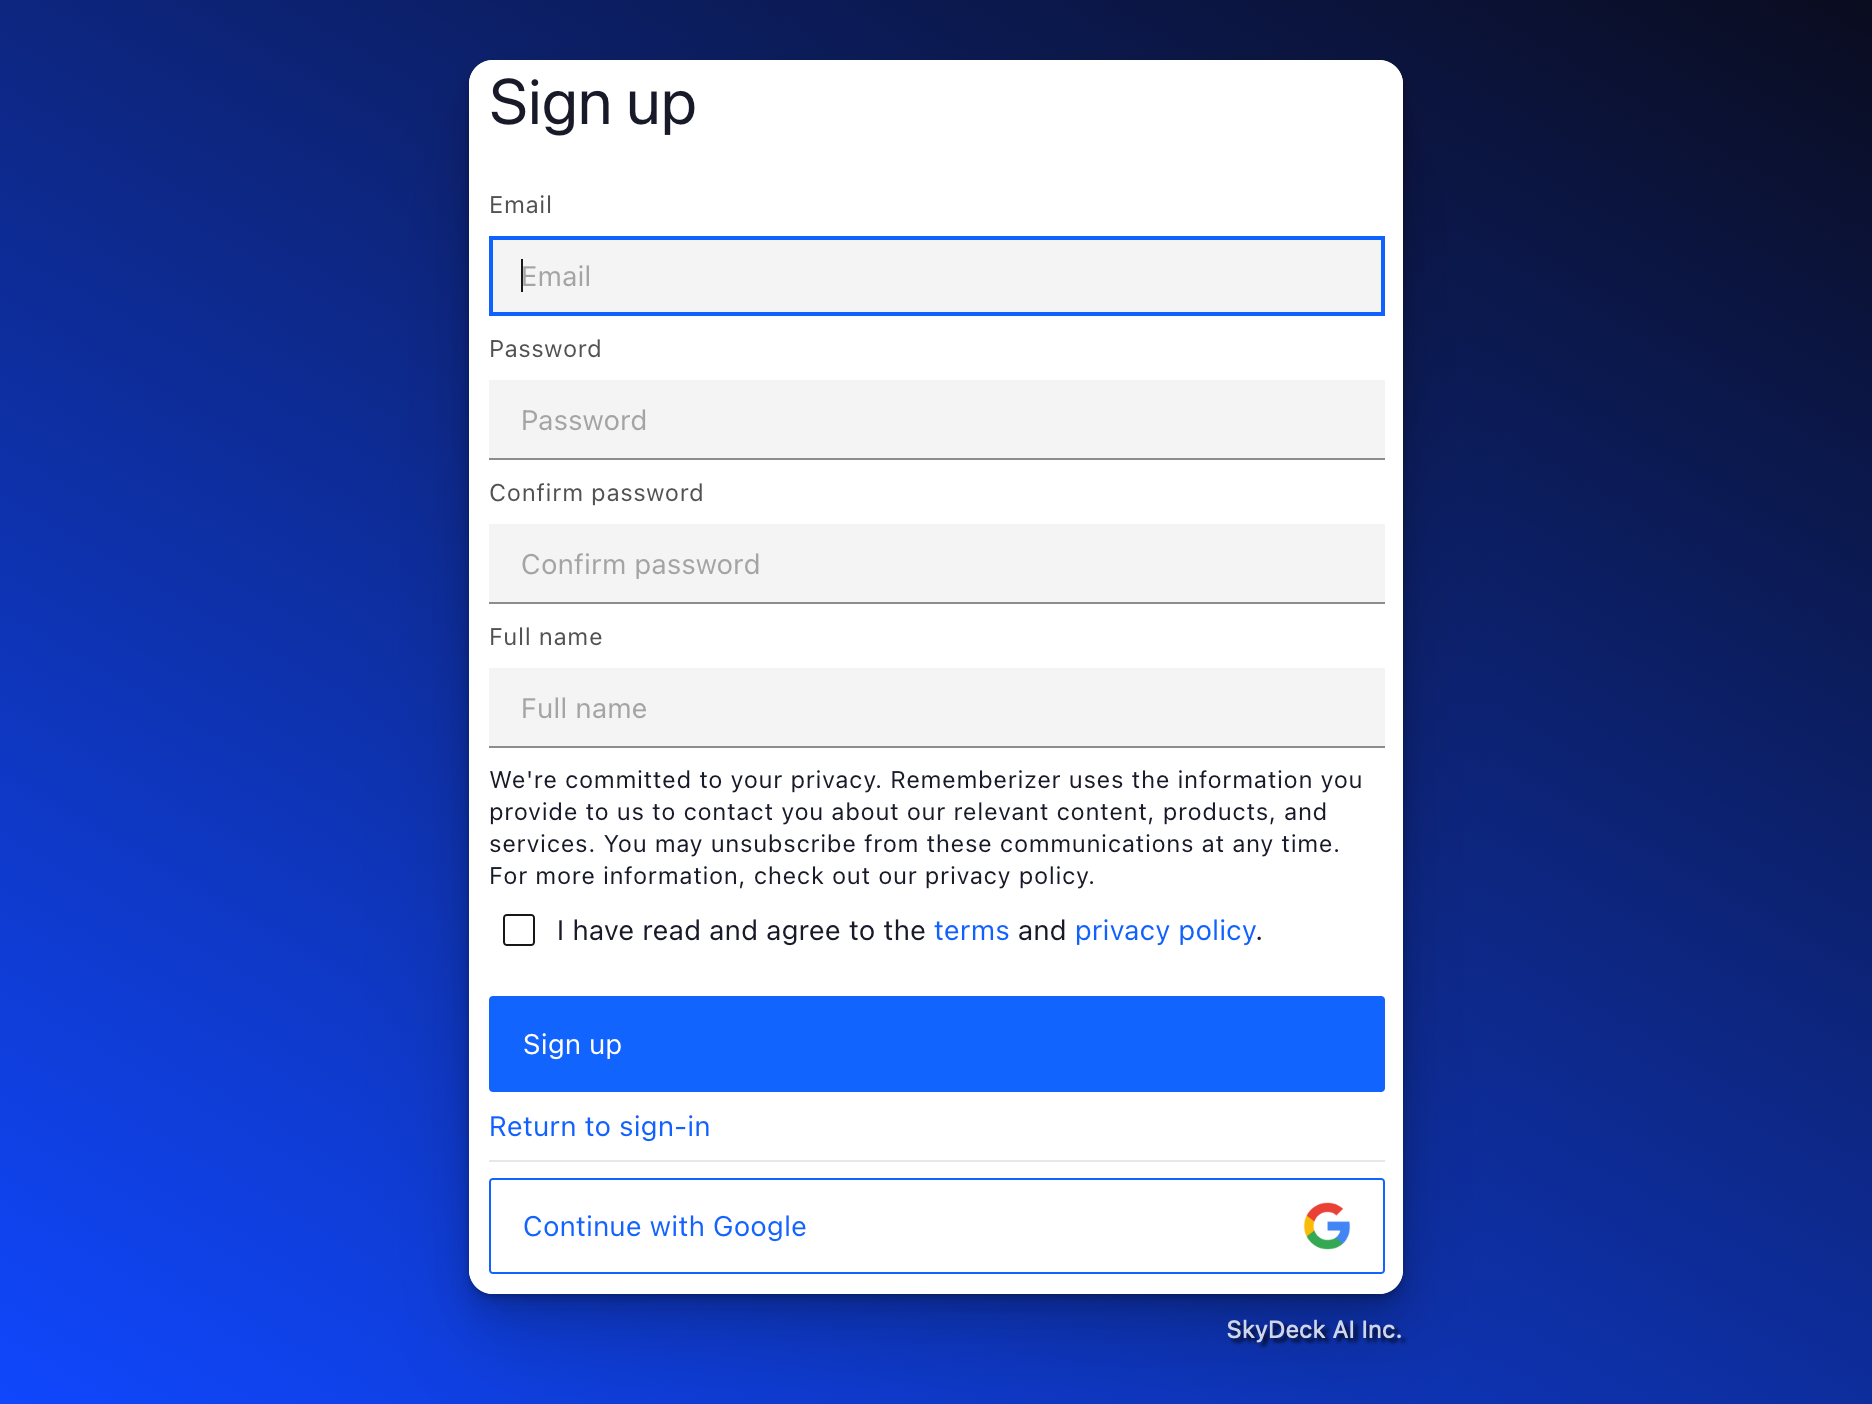
Click on Get Started, and then Click on Register App. At this point, you will be asked to Sign in or Sign up. Complete the sign-up. If you see a Sign In screen, click the ‘Sign up’ option, which looks like “Don't have an account? Sign up”
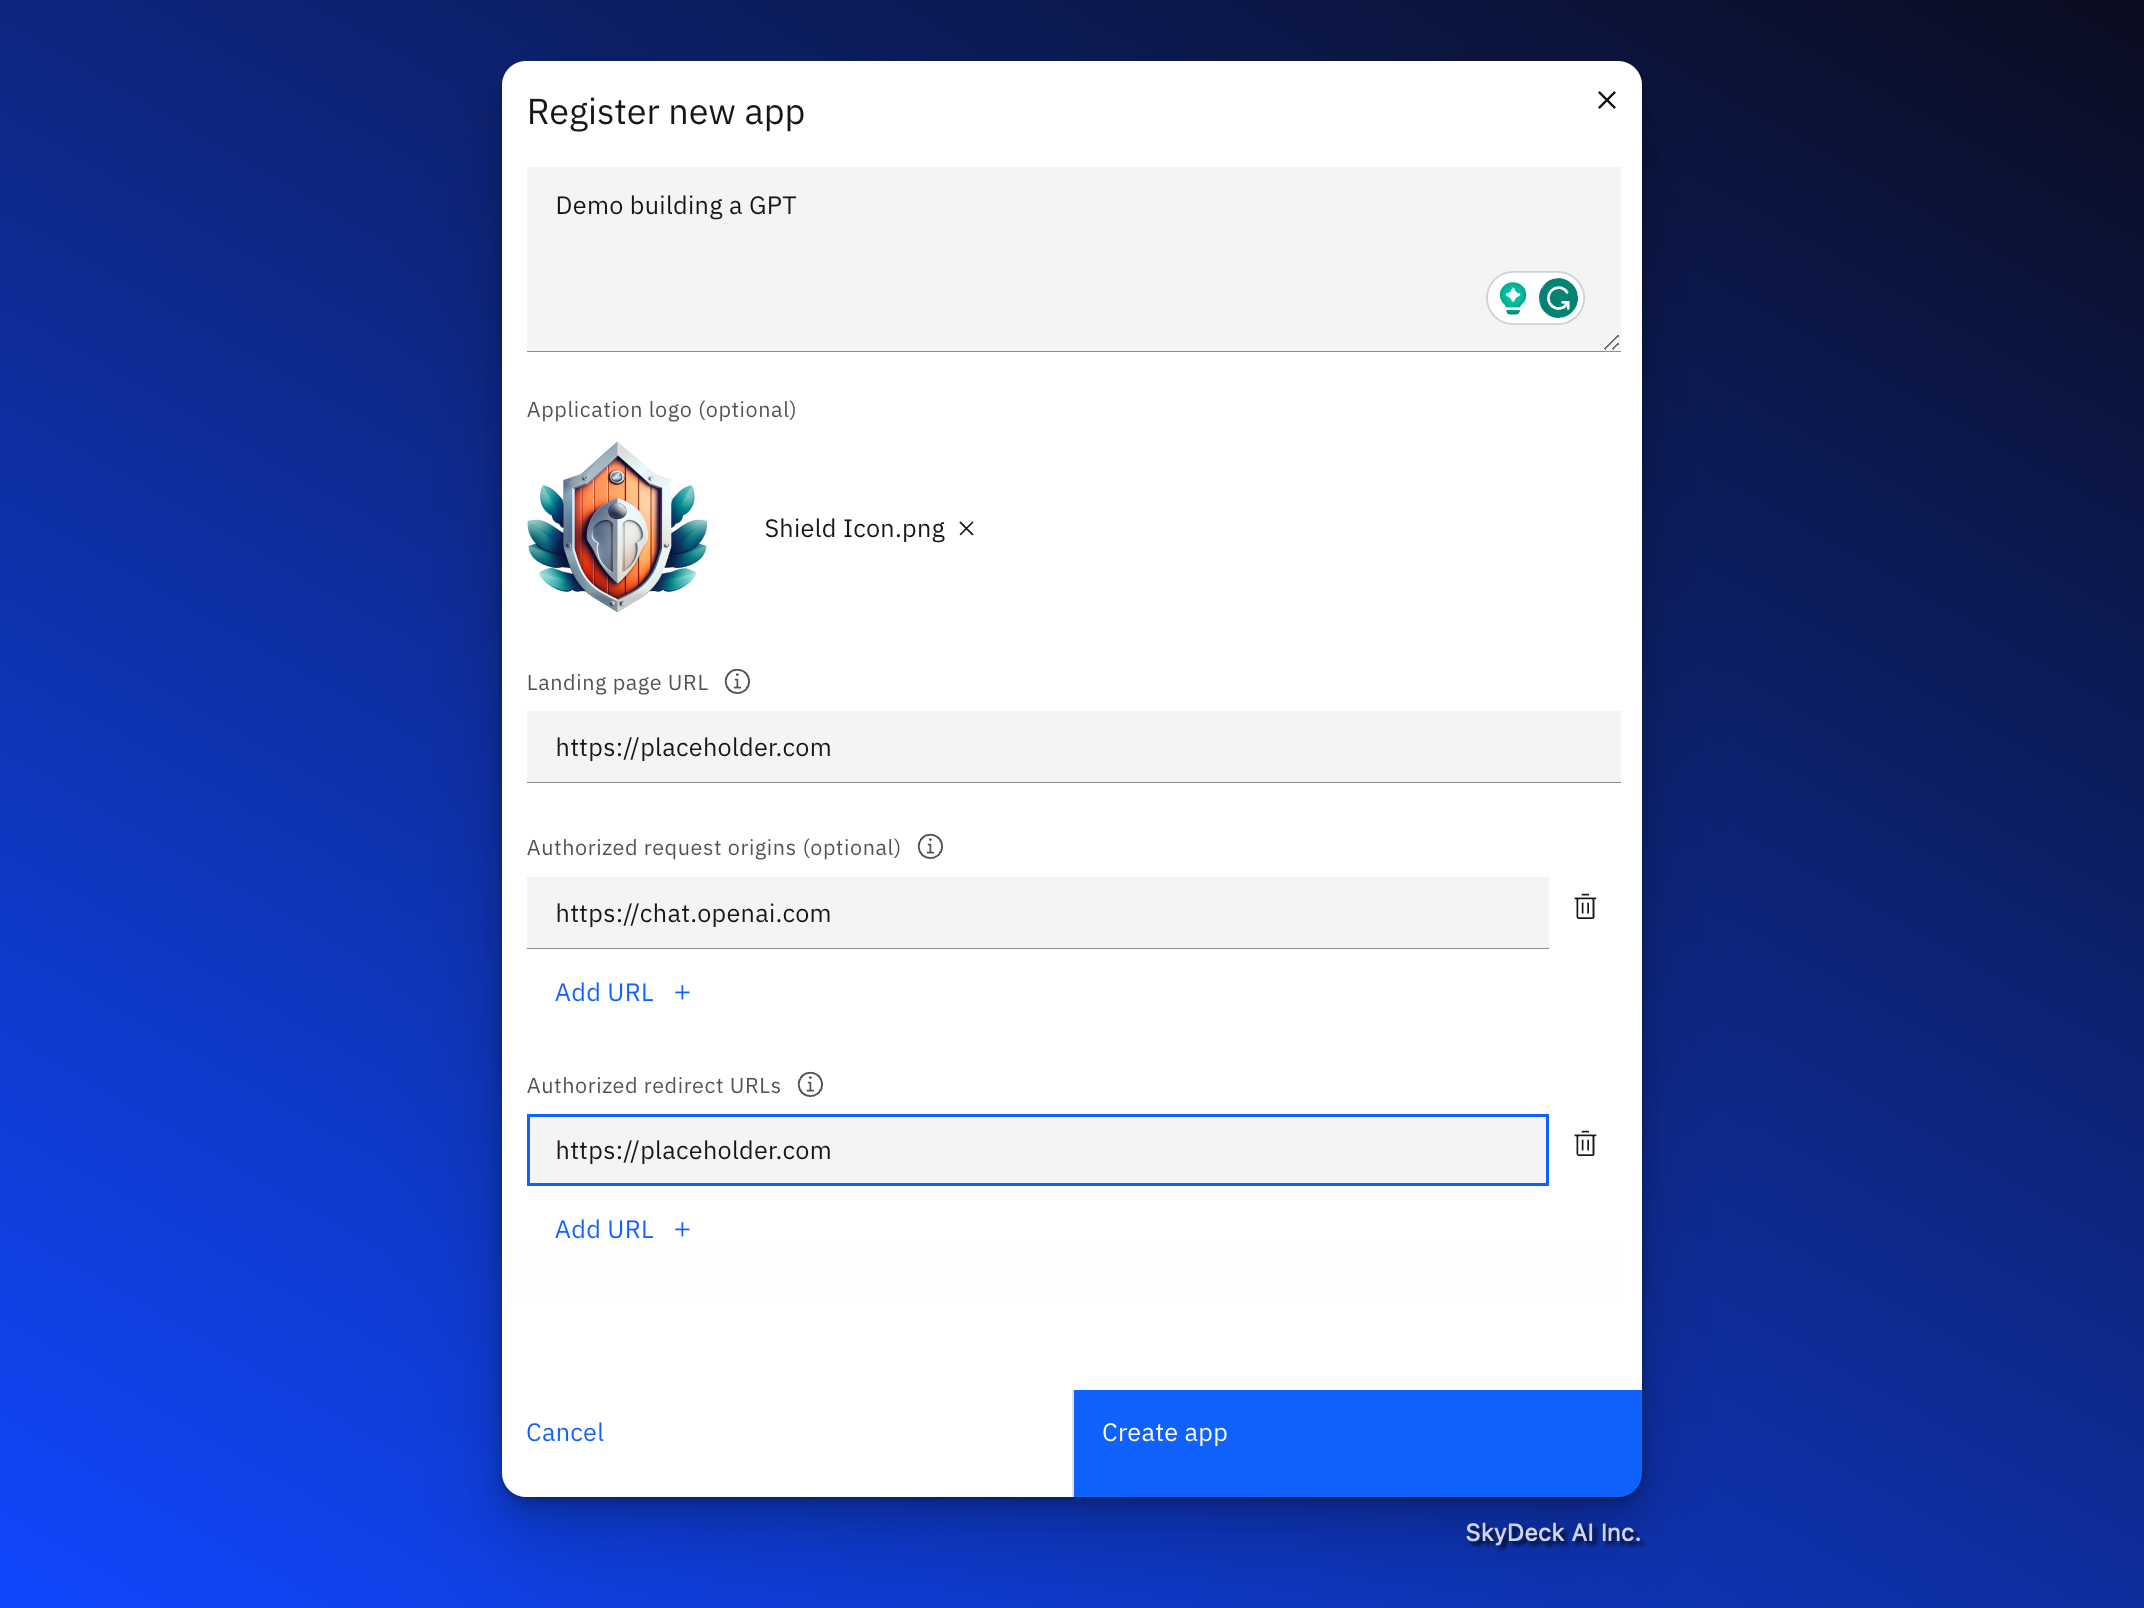
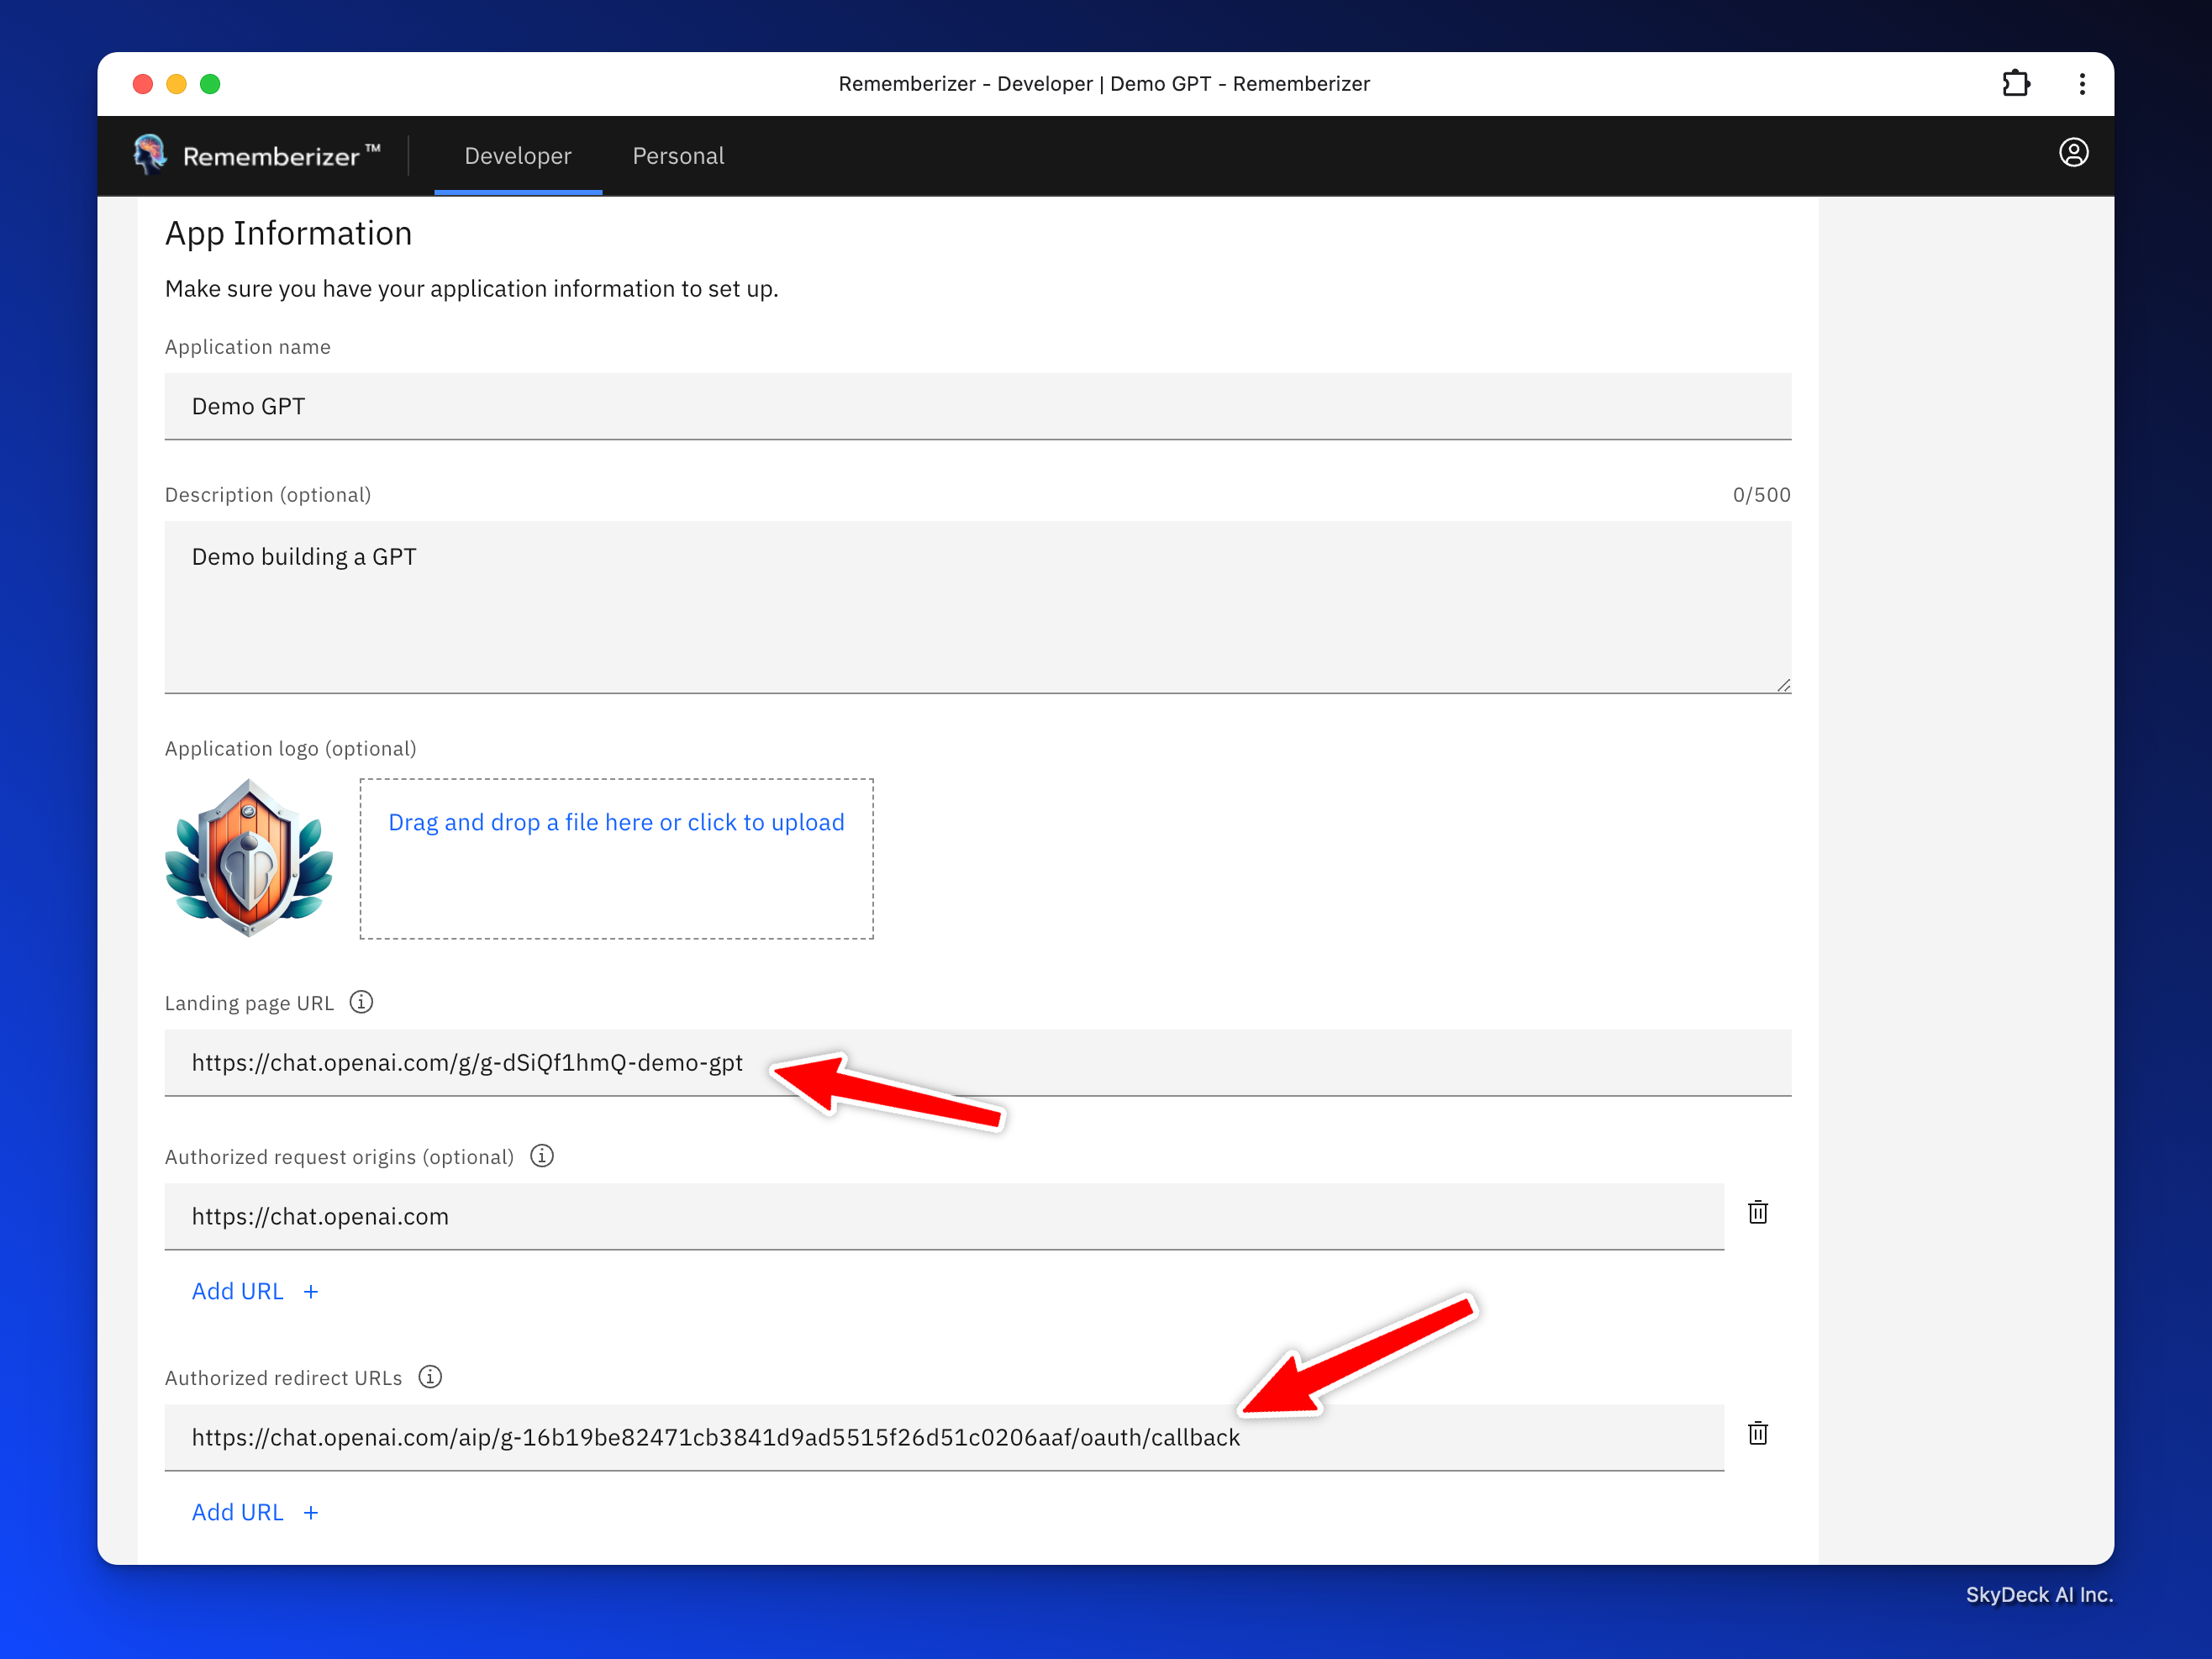
You will then be asked to fill in your app details in the Register New App form.
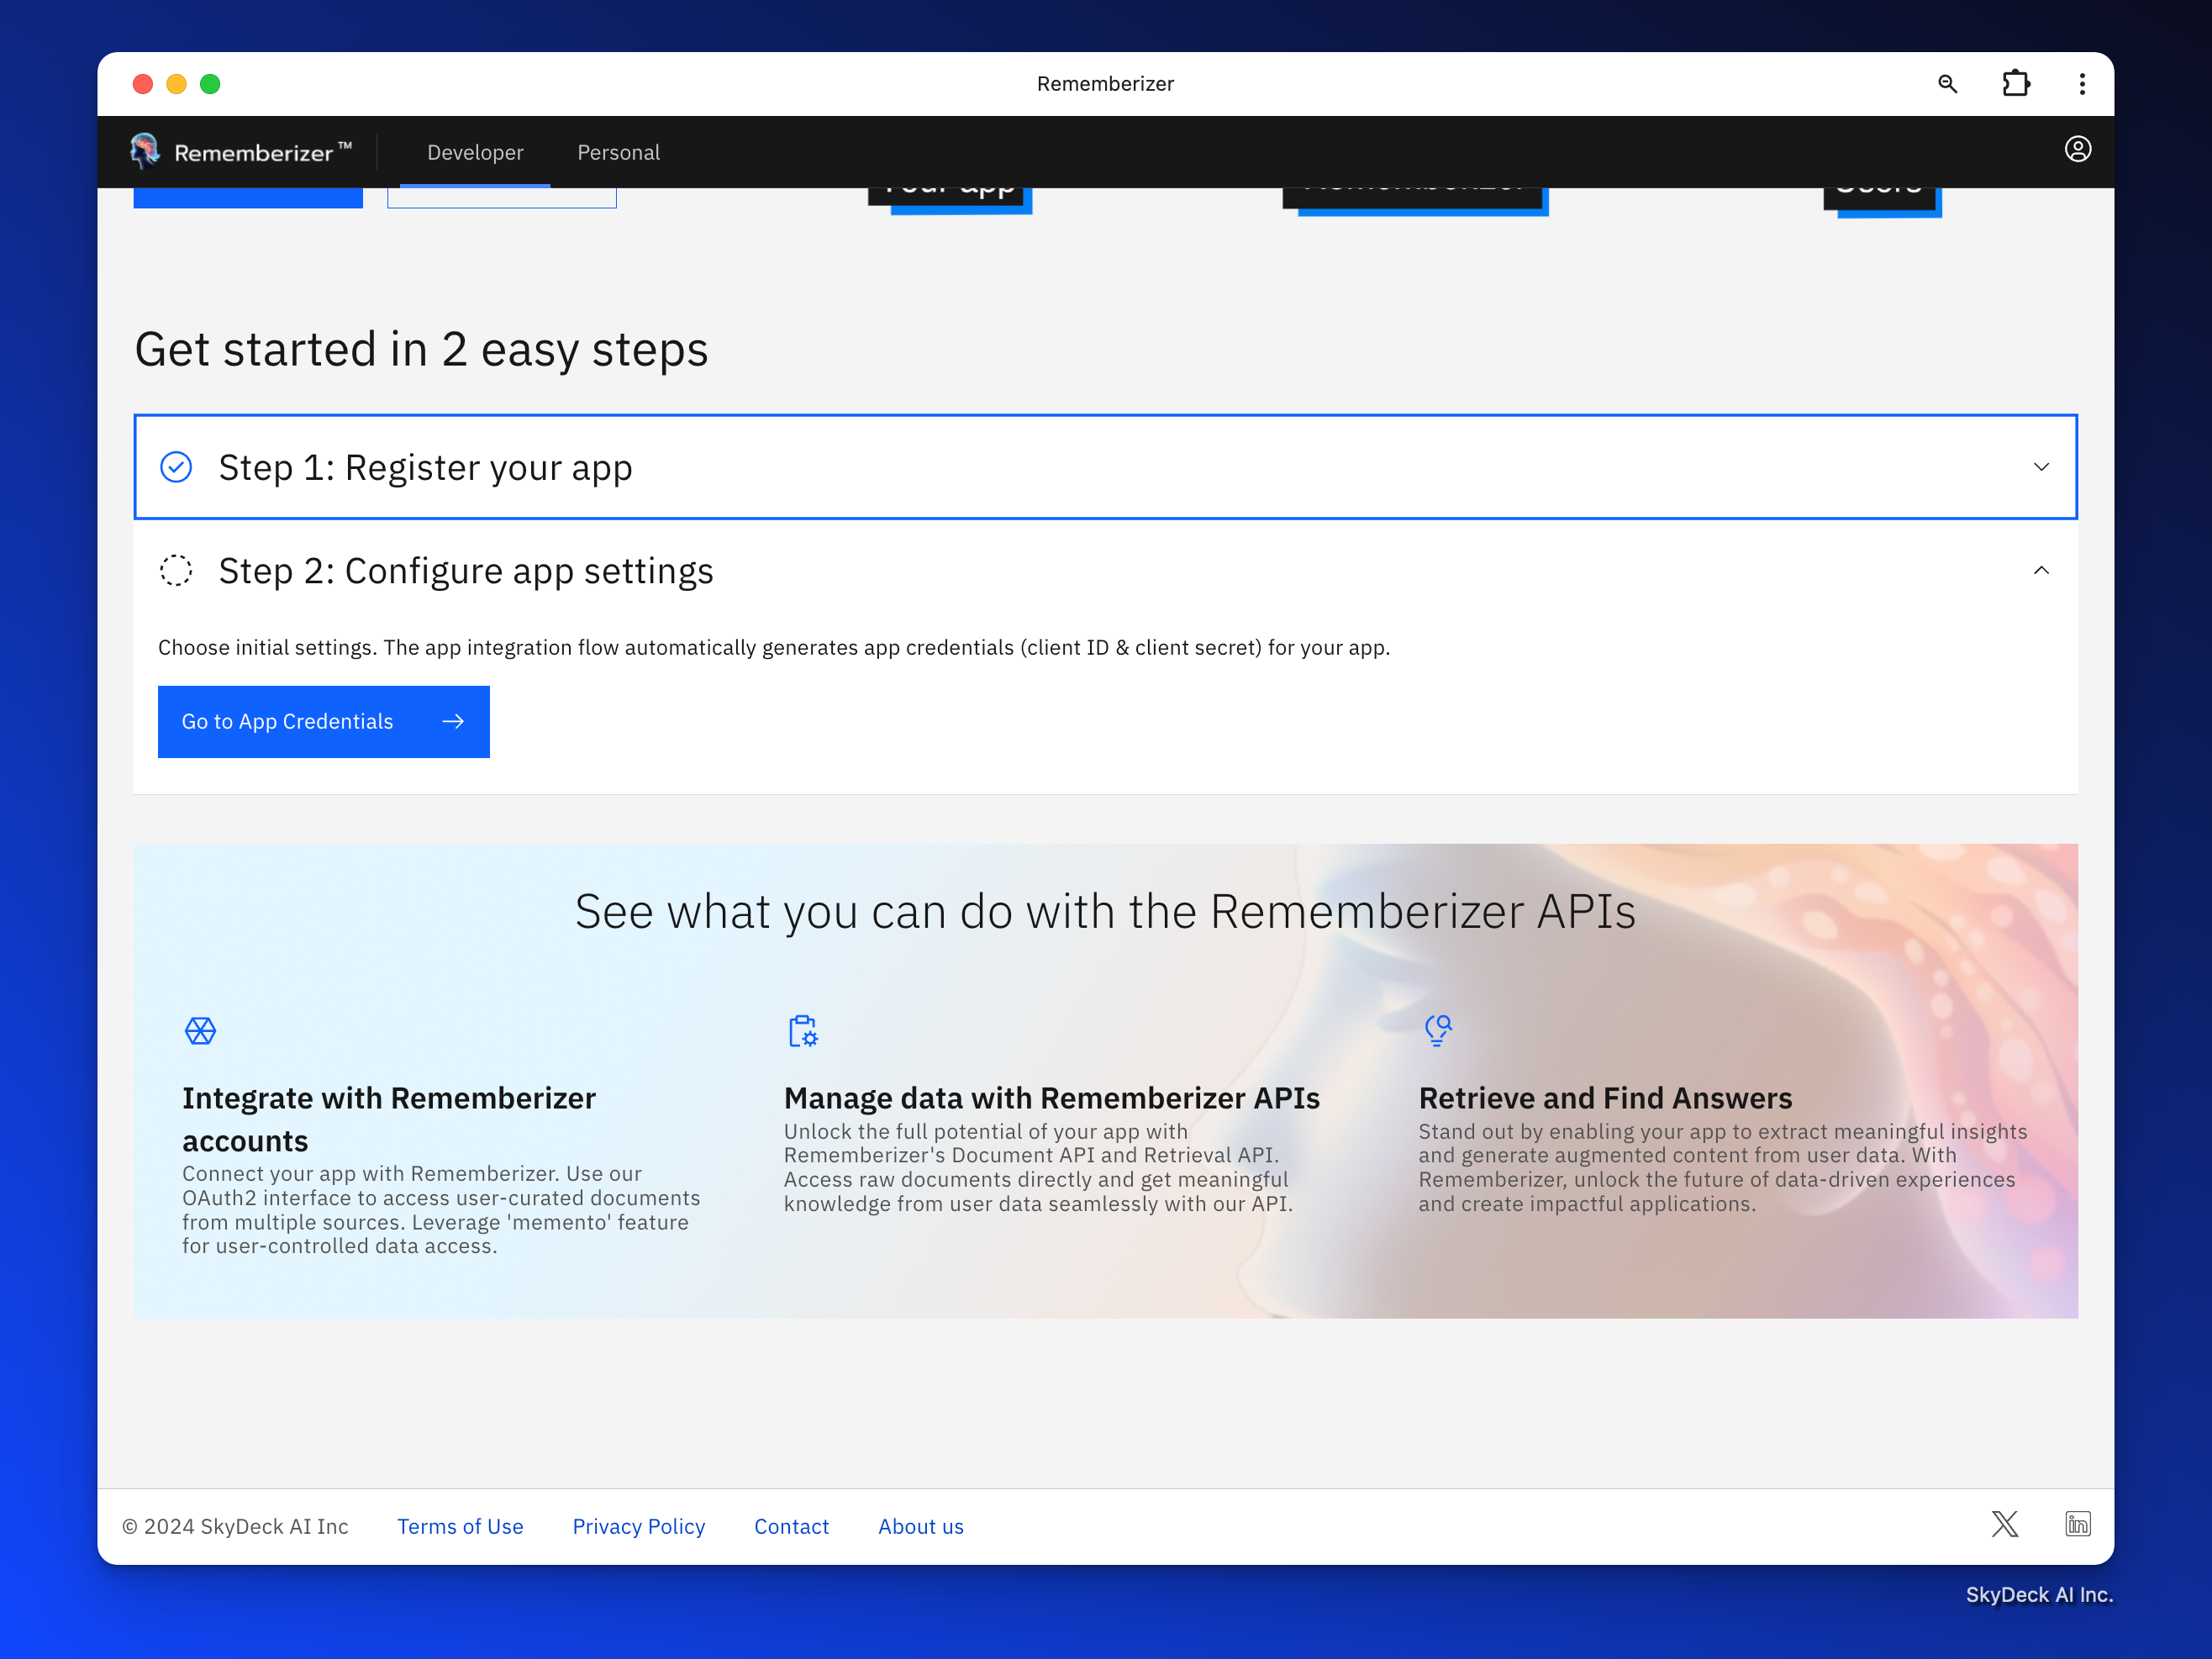
Step 1: Register You App
This requires some back-and-forth between registering the new application, in this case, a GPT, and creating the GPT.
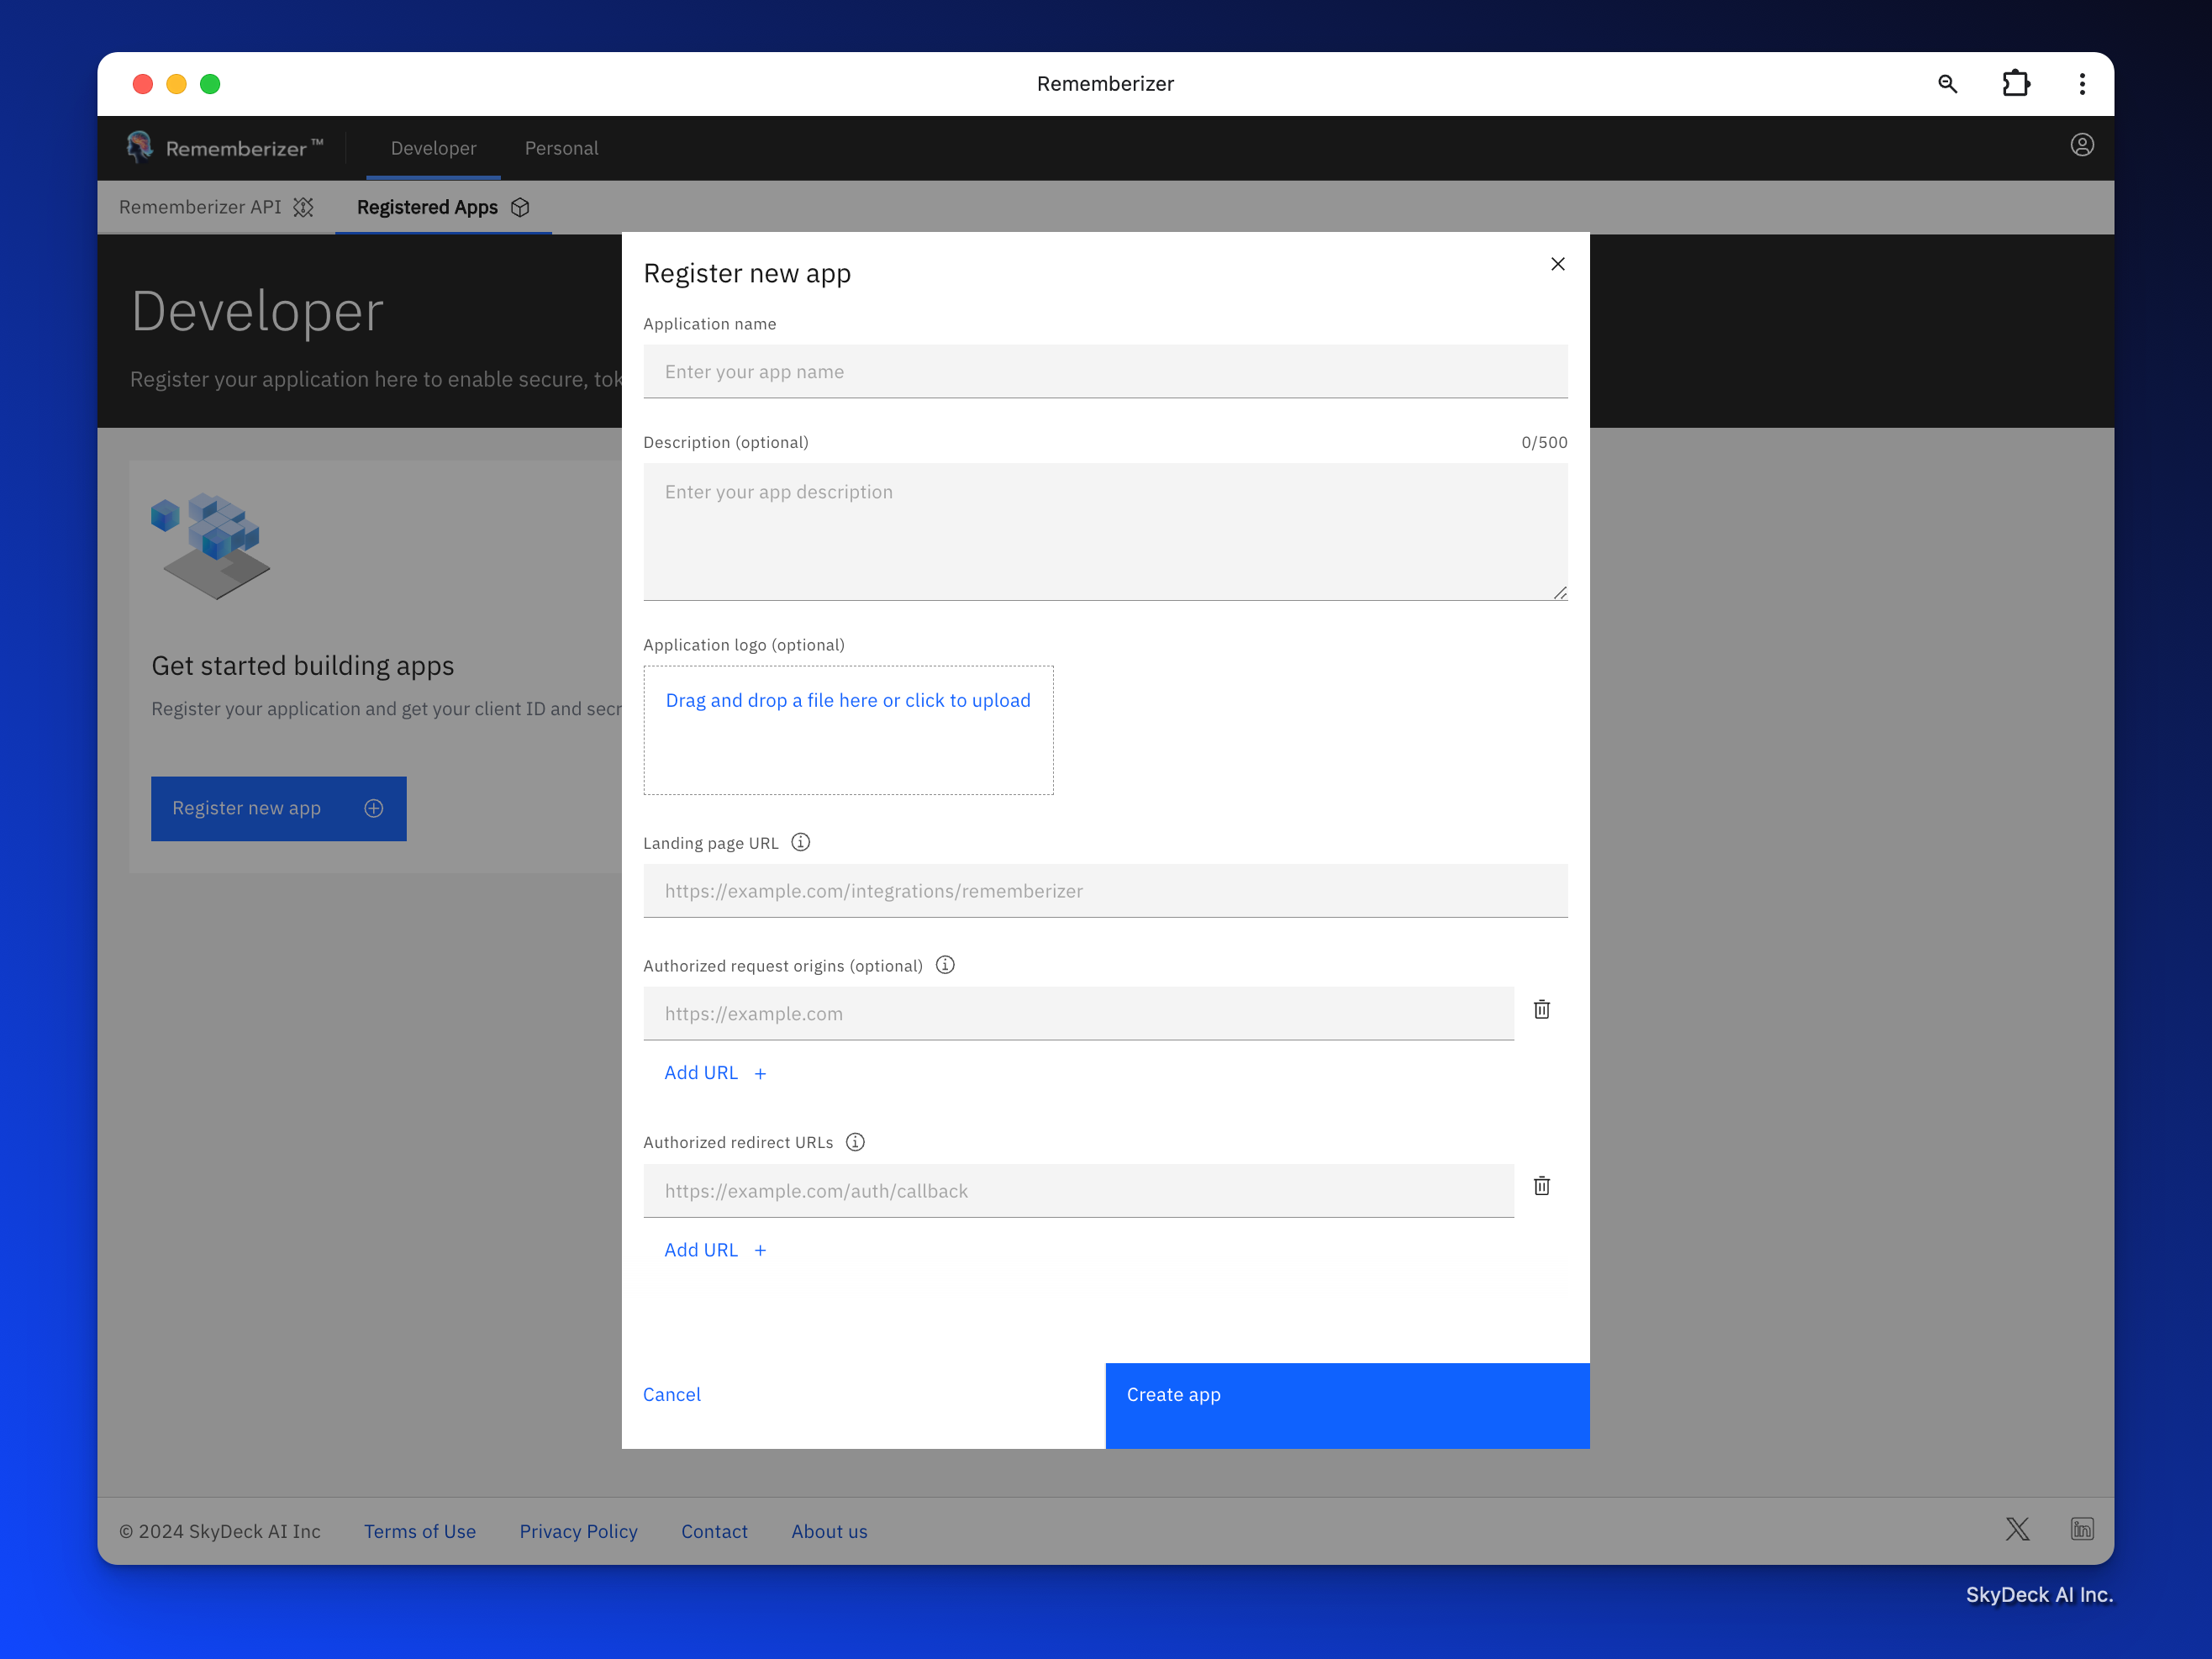
- "Application name,” type the GPT name; we will use Demo GPT in our example.
- “Landing page URL,” the URL of the GPT (we will get this once we create the GPT; for now, add https://placeholder.com)
- "Authorized request origin,” type the domain to the Chat GPT website. https://chat.openai.com
- "Authorized redirect URLs” is the callback URL (we will get this once we create the GPT; for now, add https://placeholder.com)
- Click "Create app.”
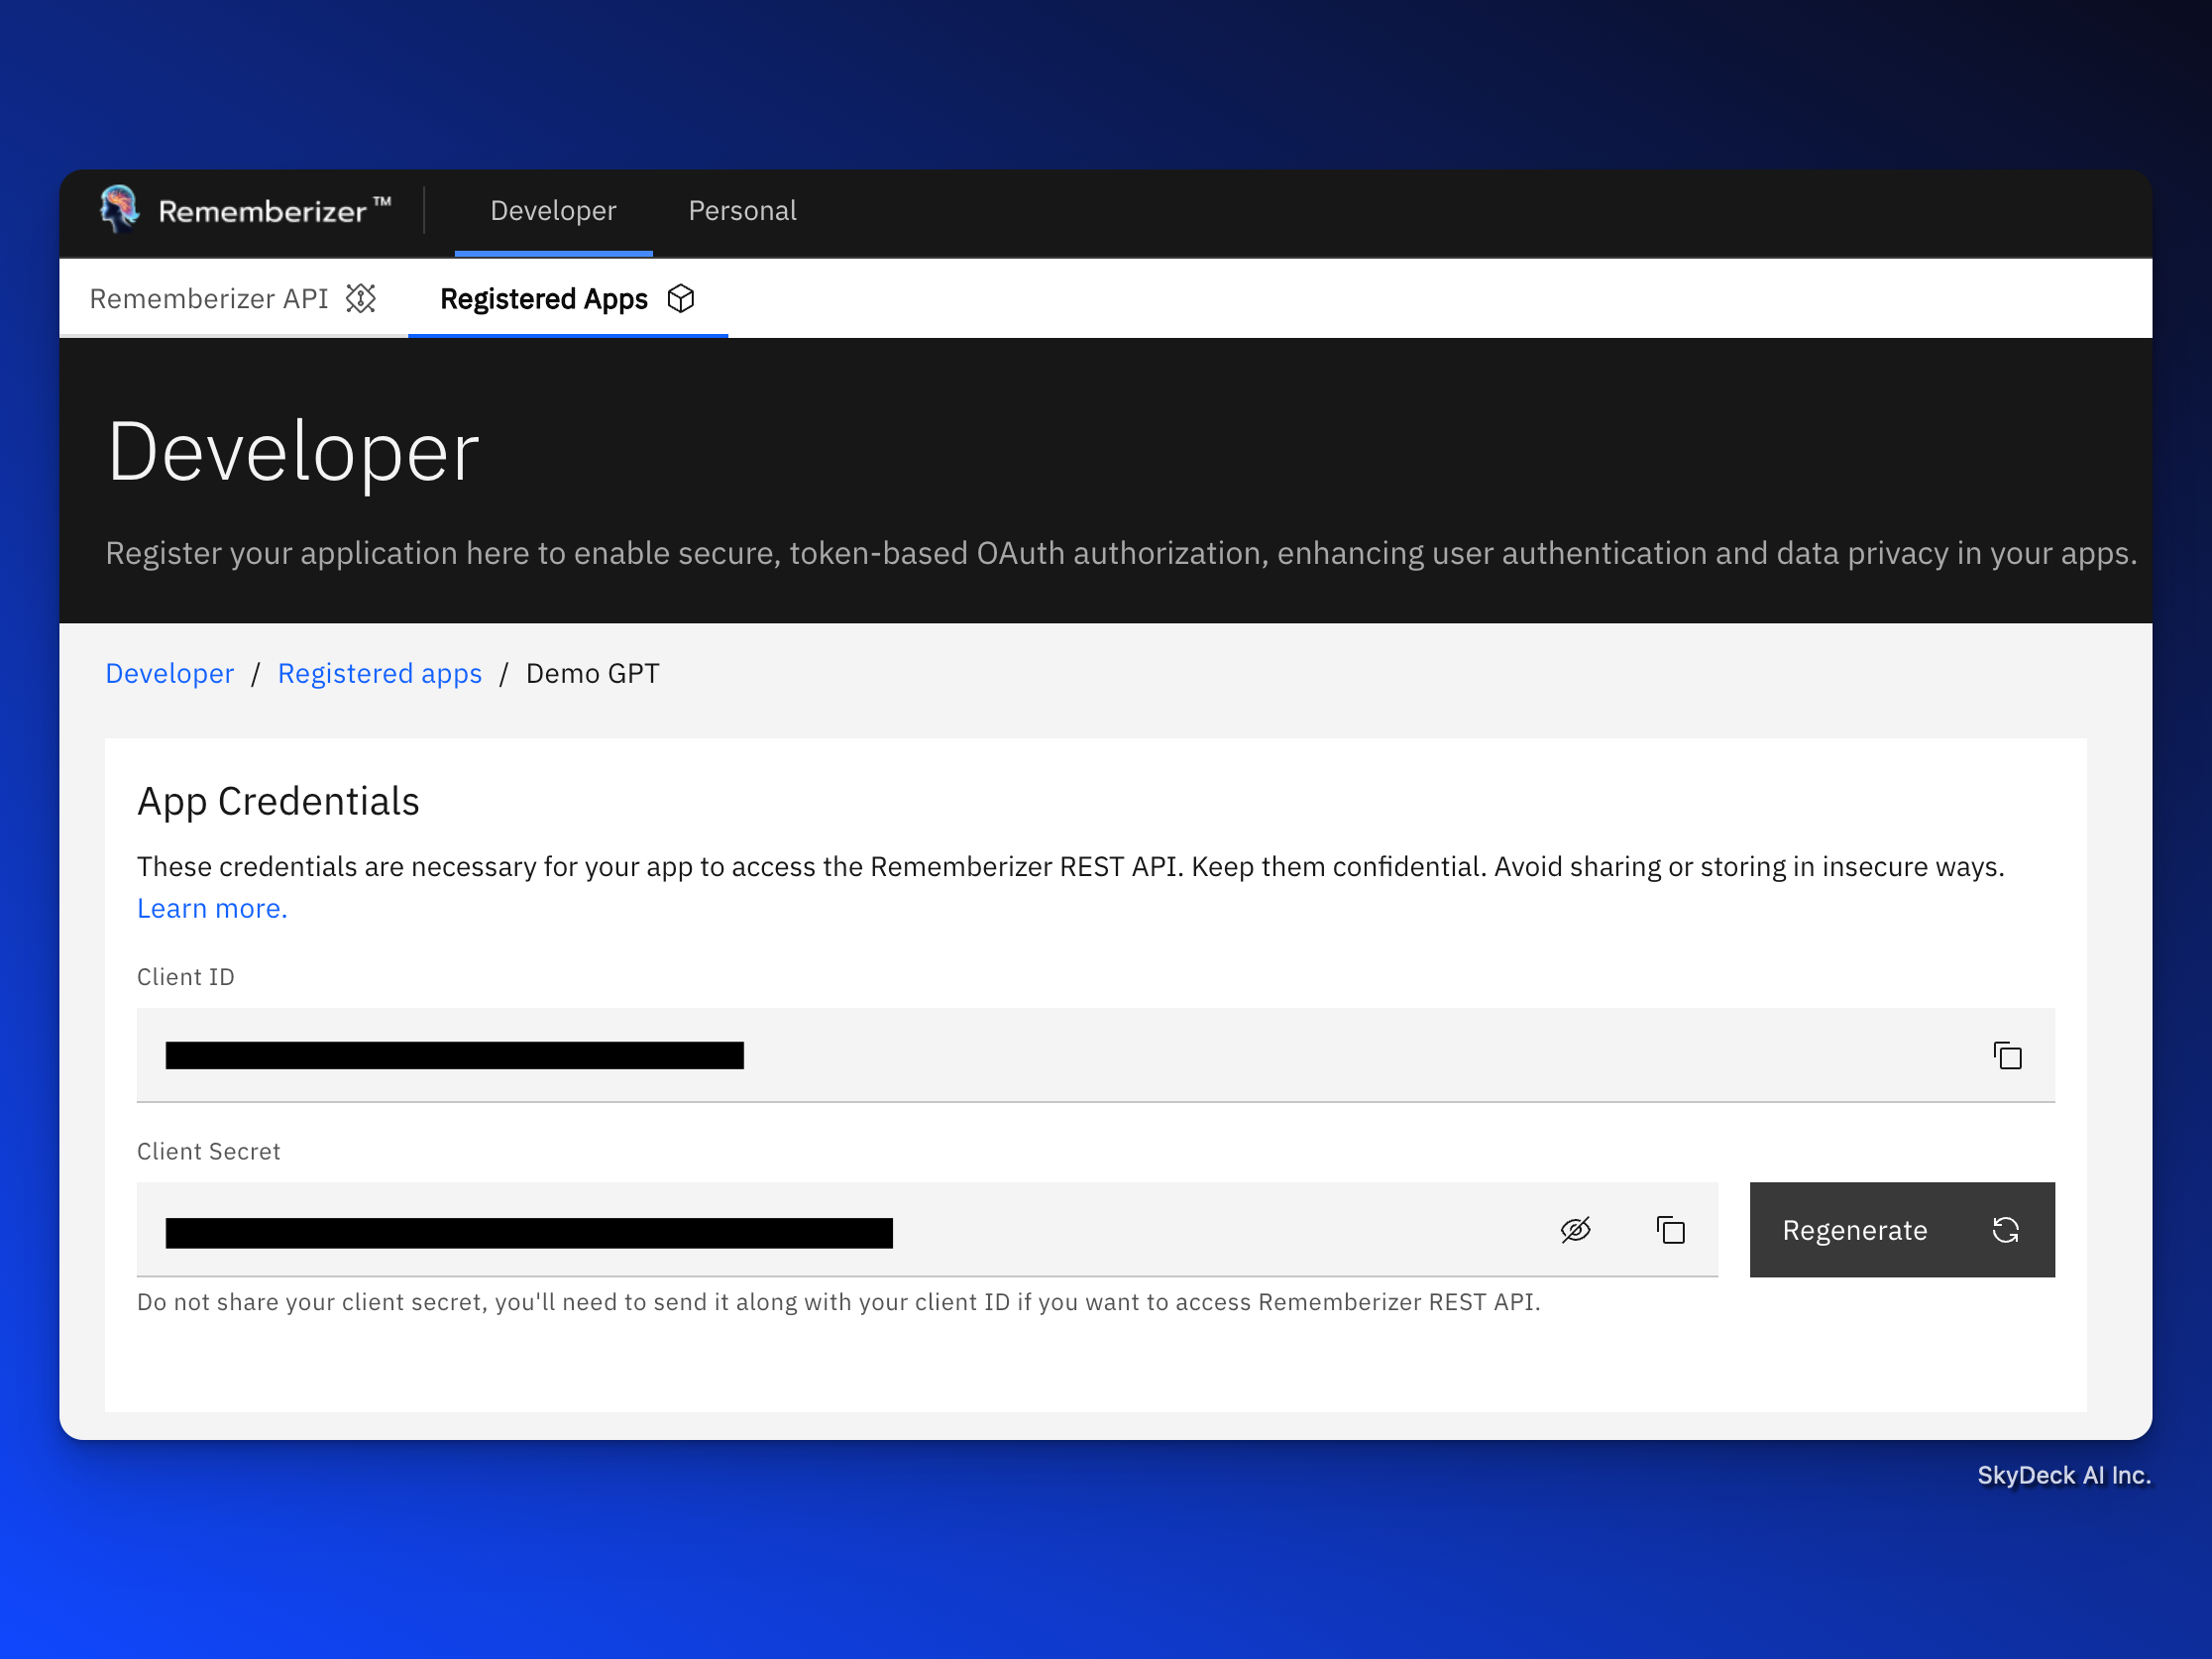
Step 2: Configure Application Settings and Credentials.
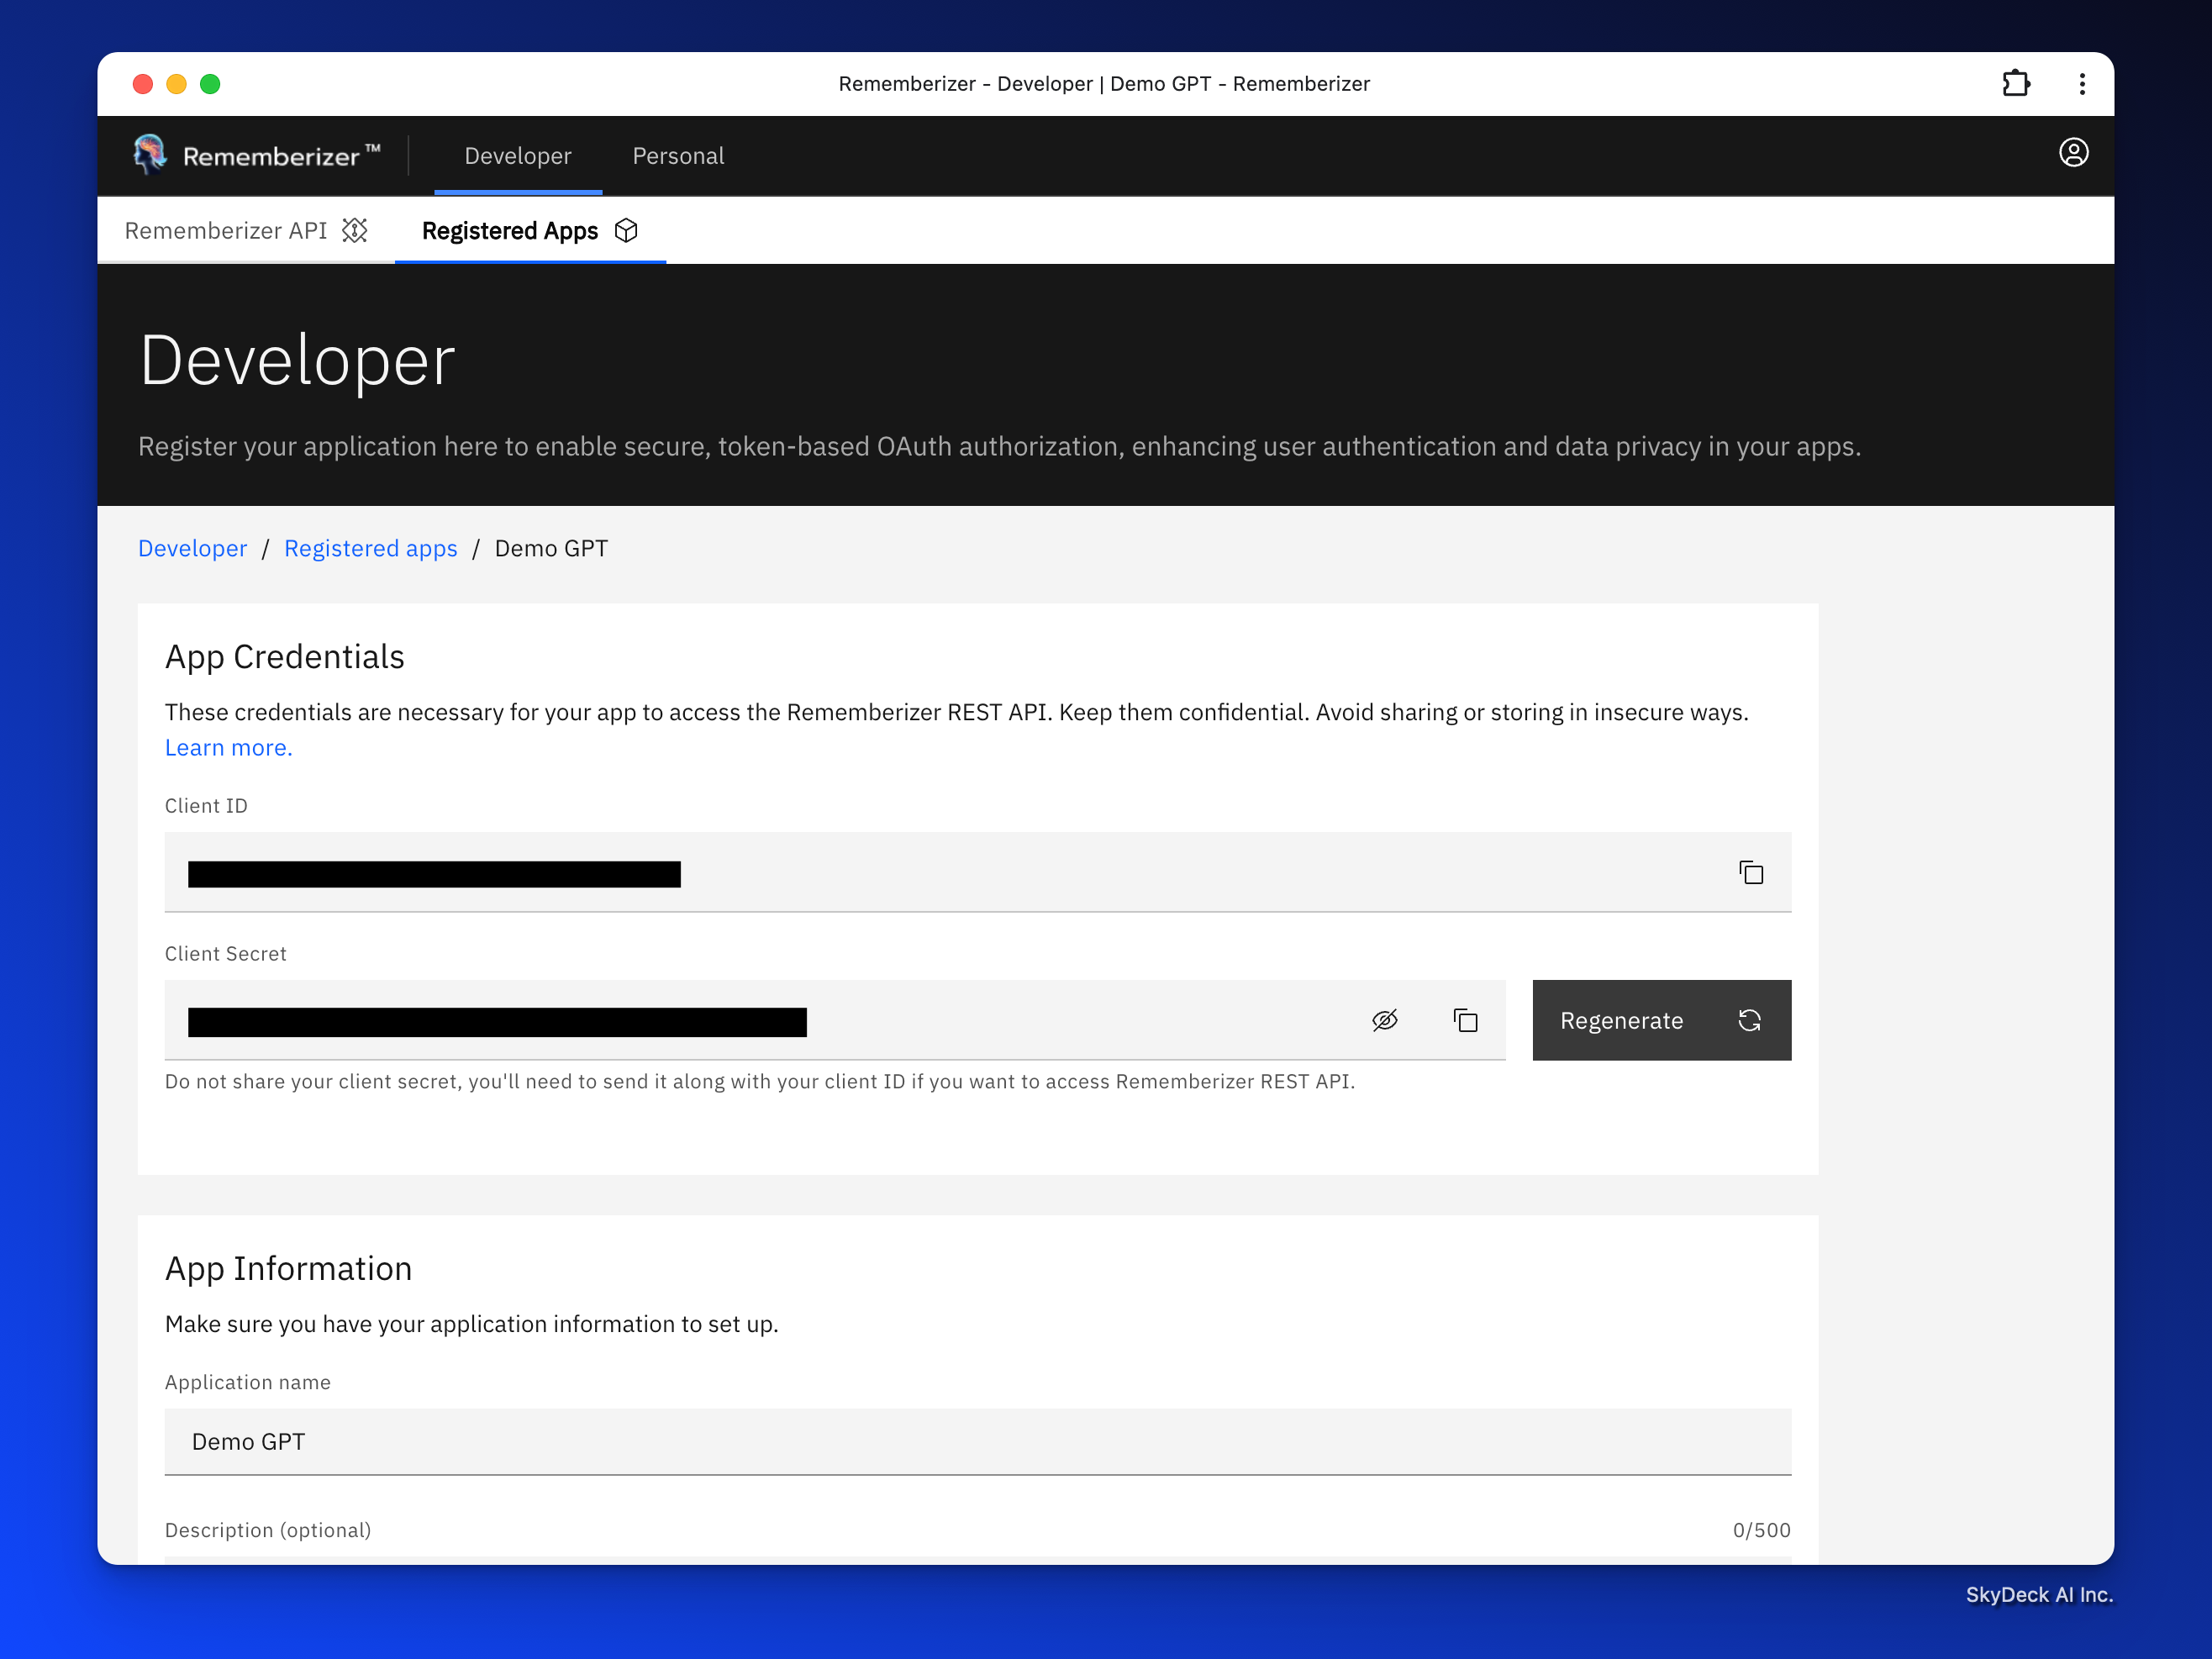
Open your recently created Demo GPT app.

Take note of the App Credentials because we need to copy them into our GPT when we build it.
Create a GPT
You can start by creating a GPT in the ChatGPT UI.
GPT configurations
You can fill in the information as you wish. Here is a basic example that you can try out:
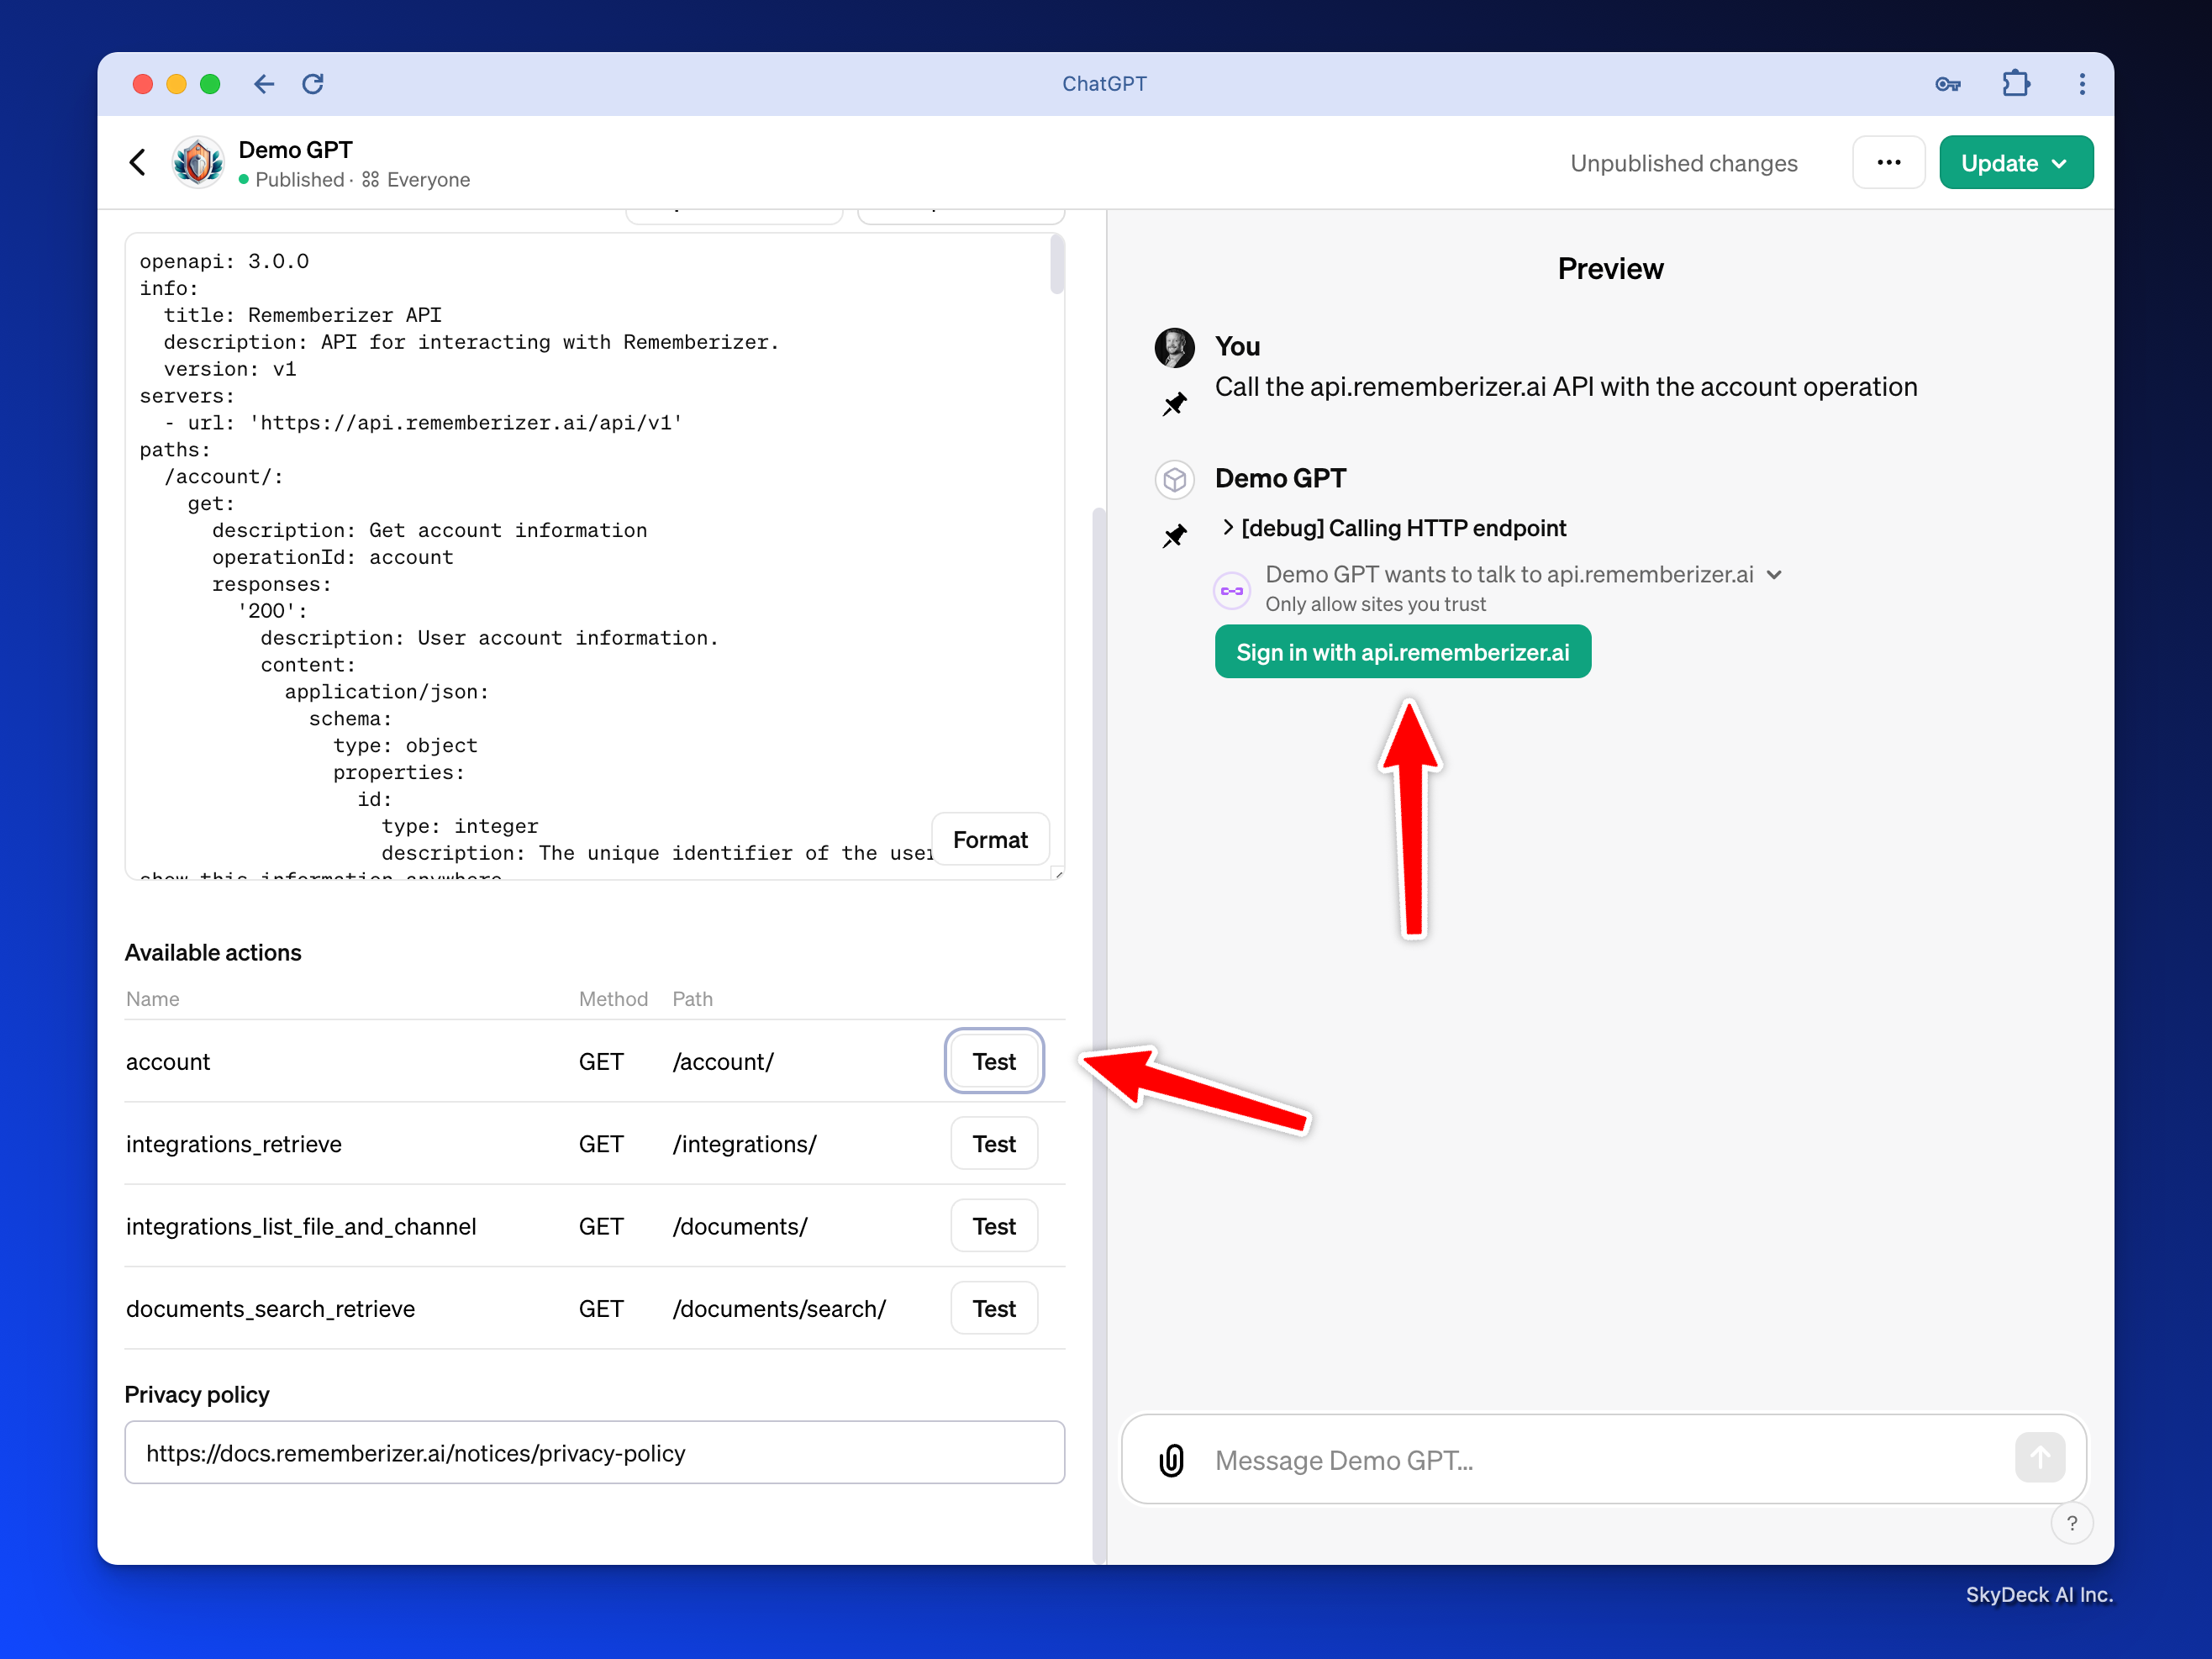
Create Rememberizer action
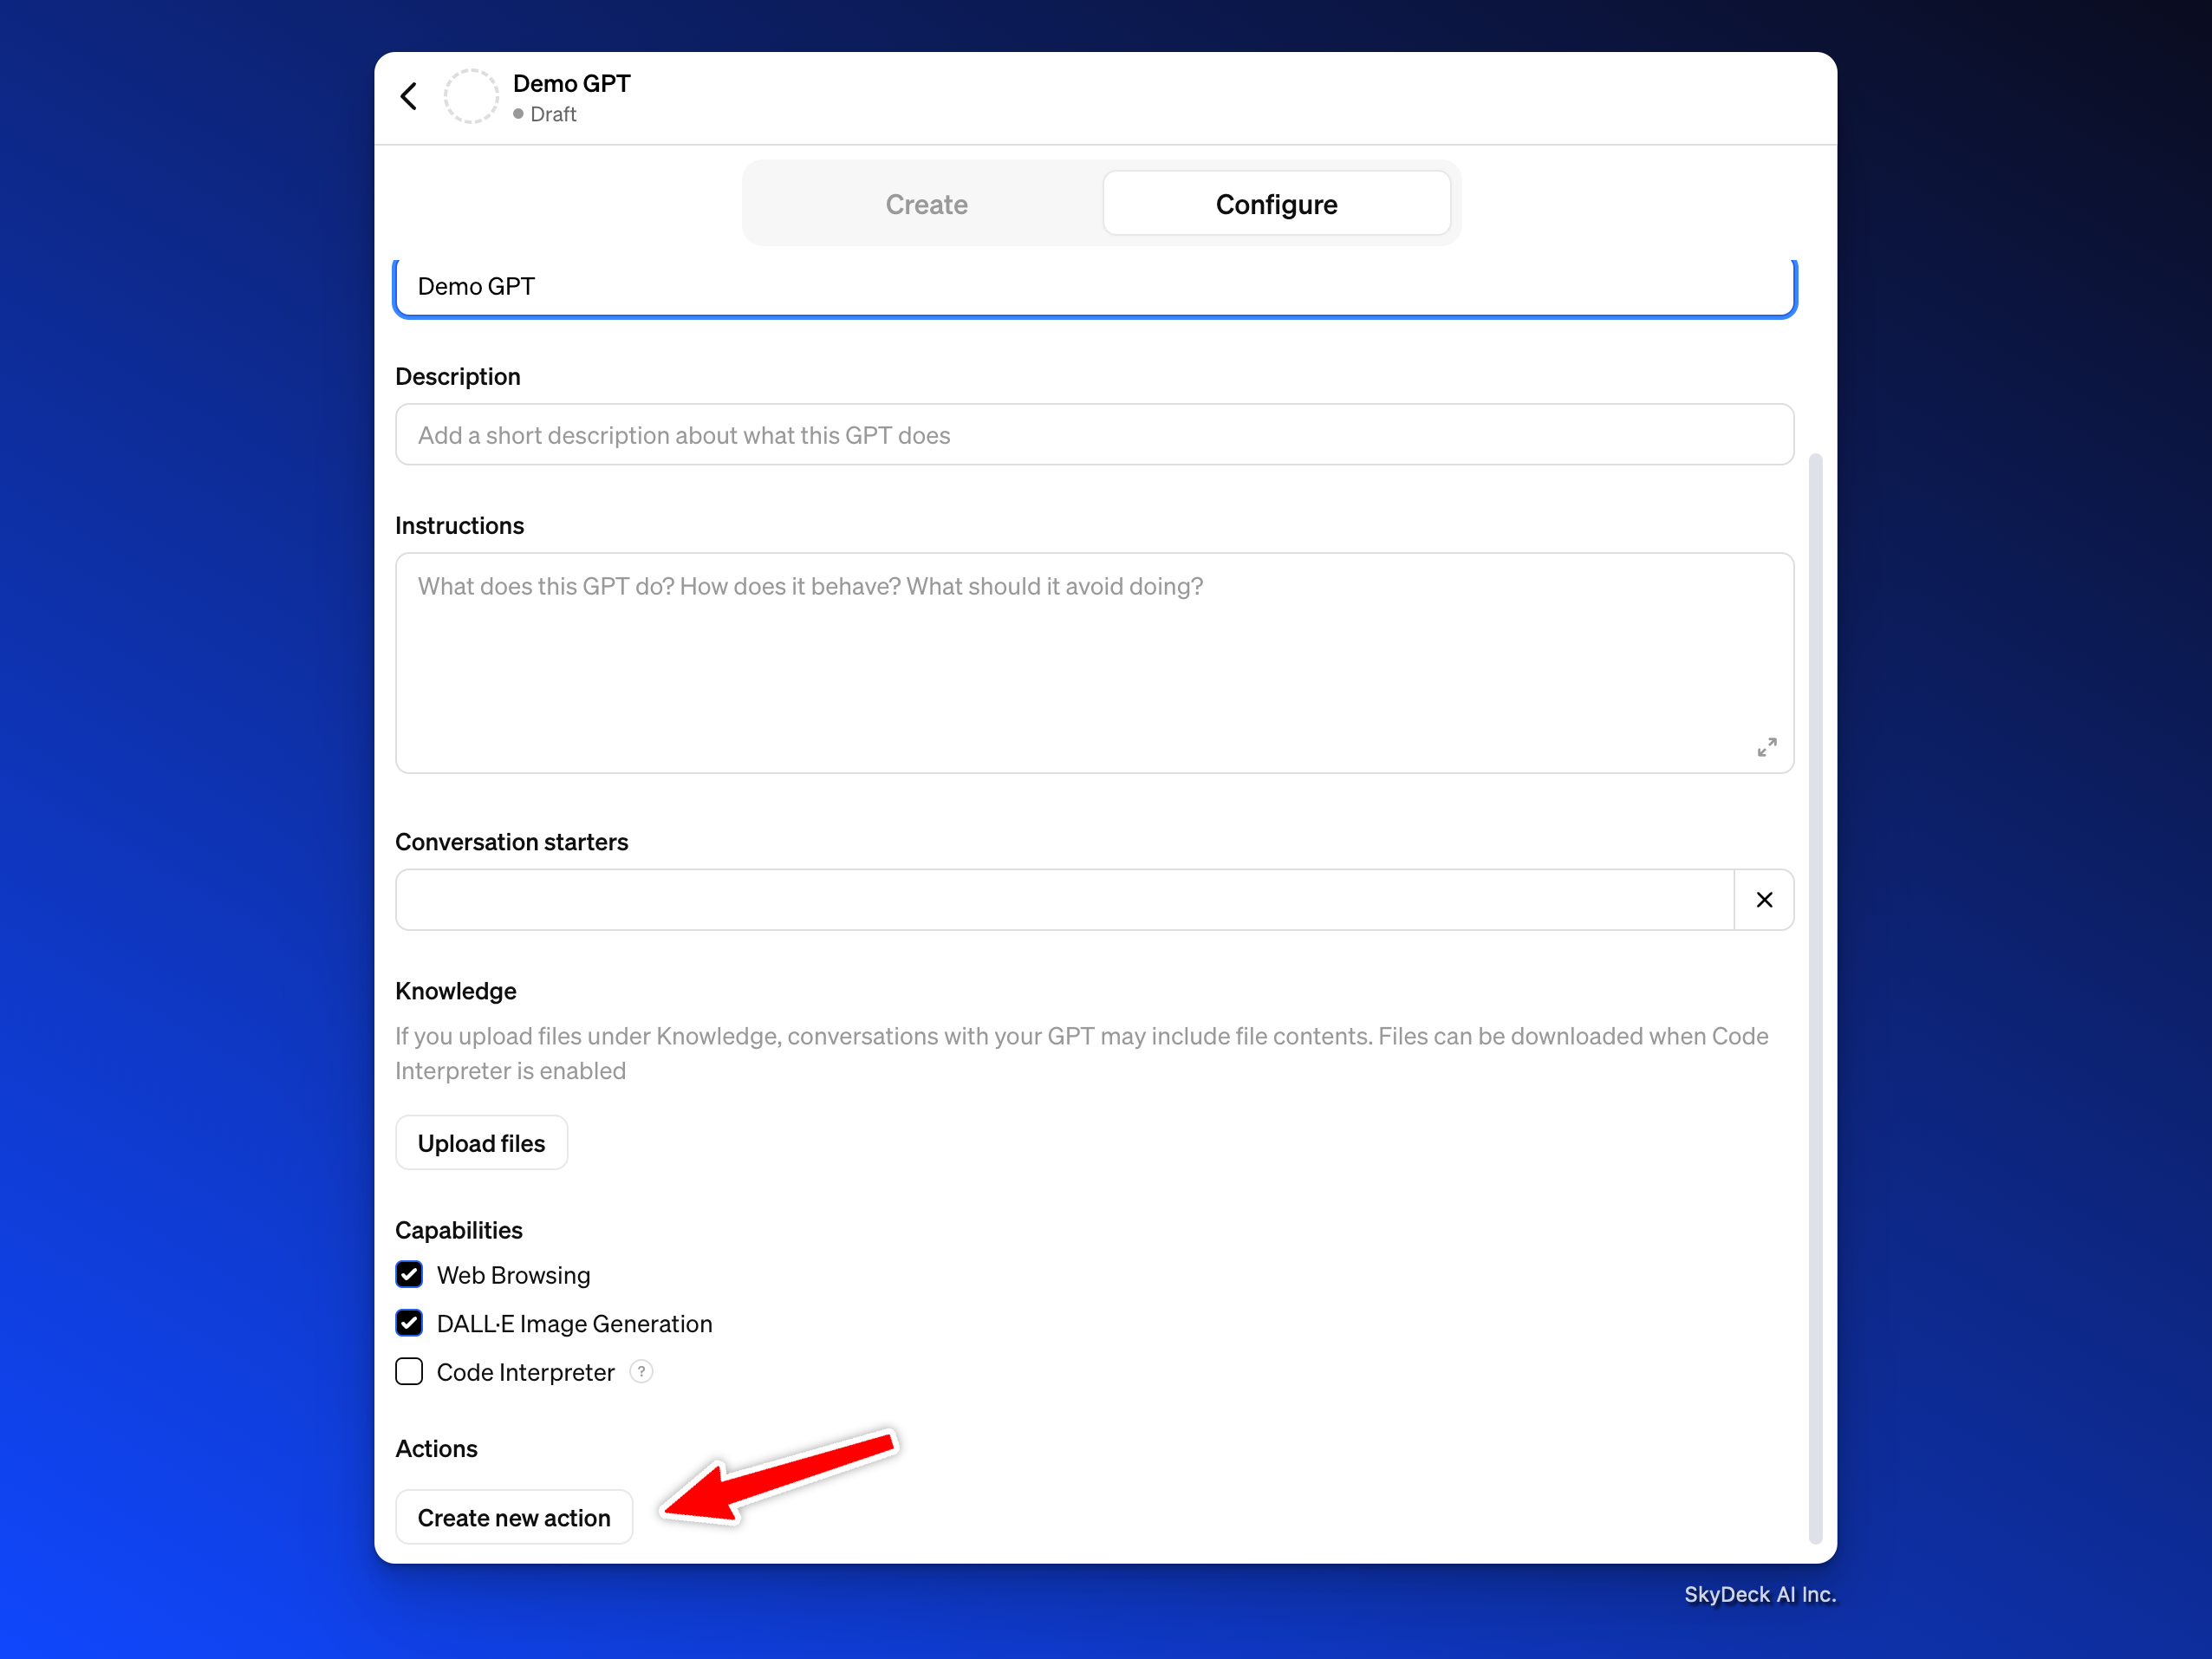
From the GPT editor:
Select "Configure" scroll down until you see "Create new action"
Click on the wheel next to Authentication and Set the Authentication Type to OAuth.
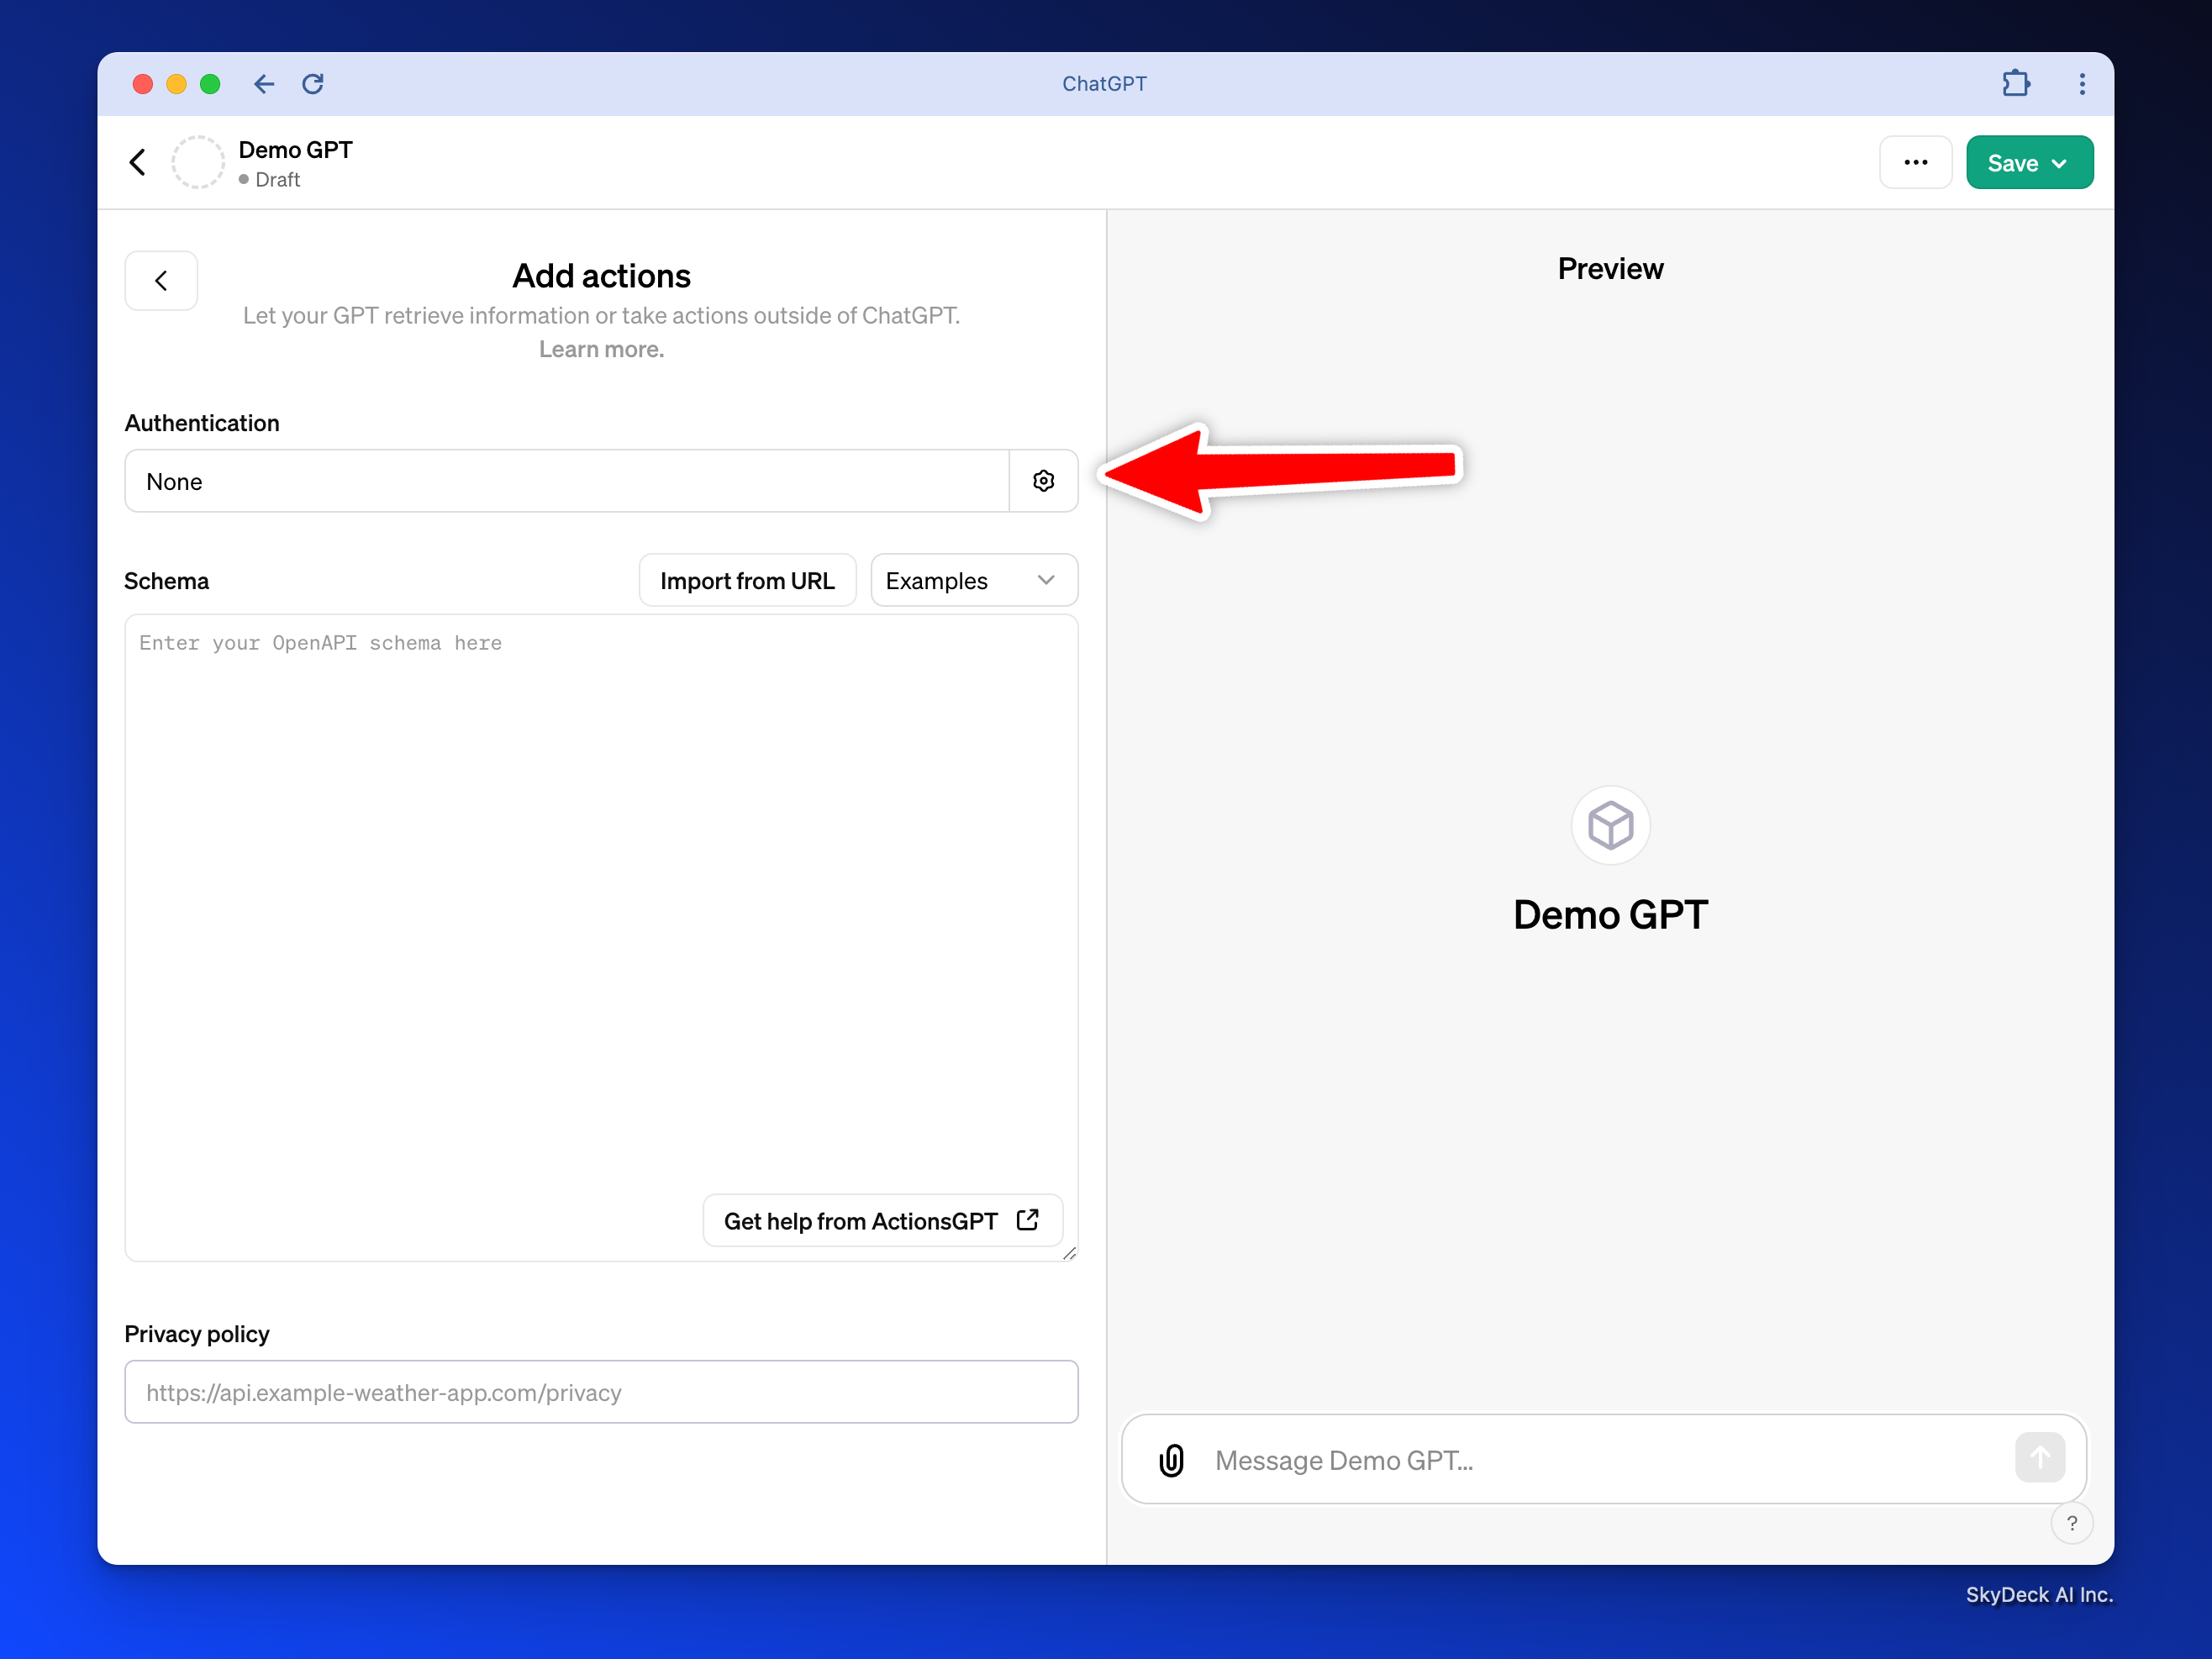
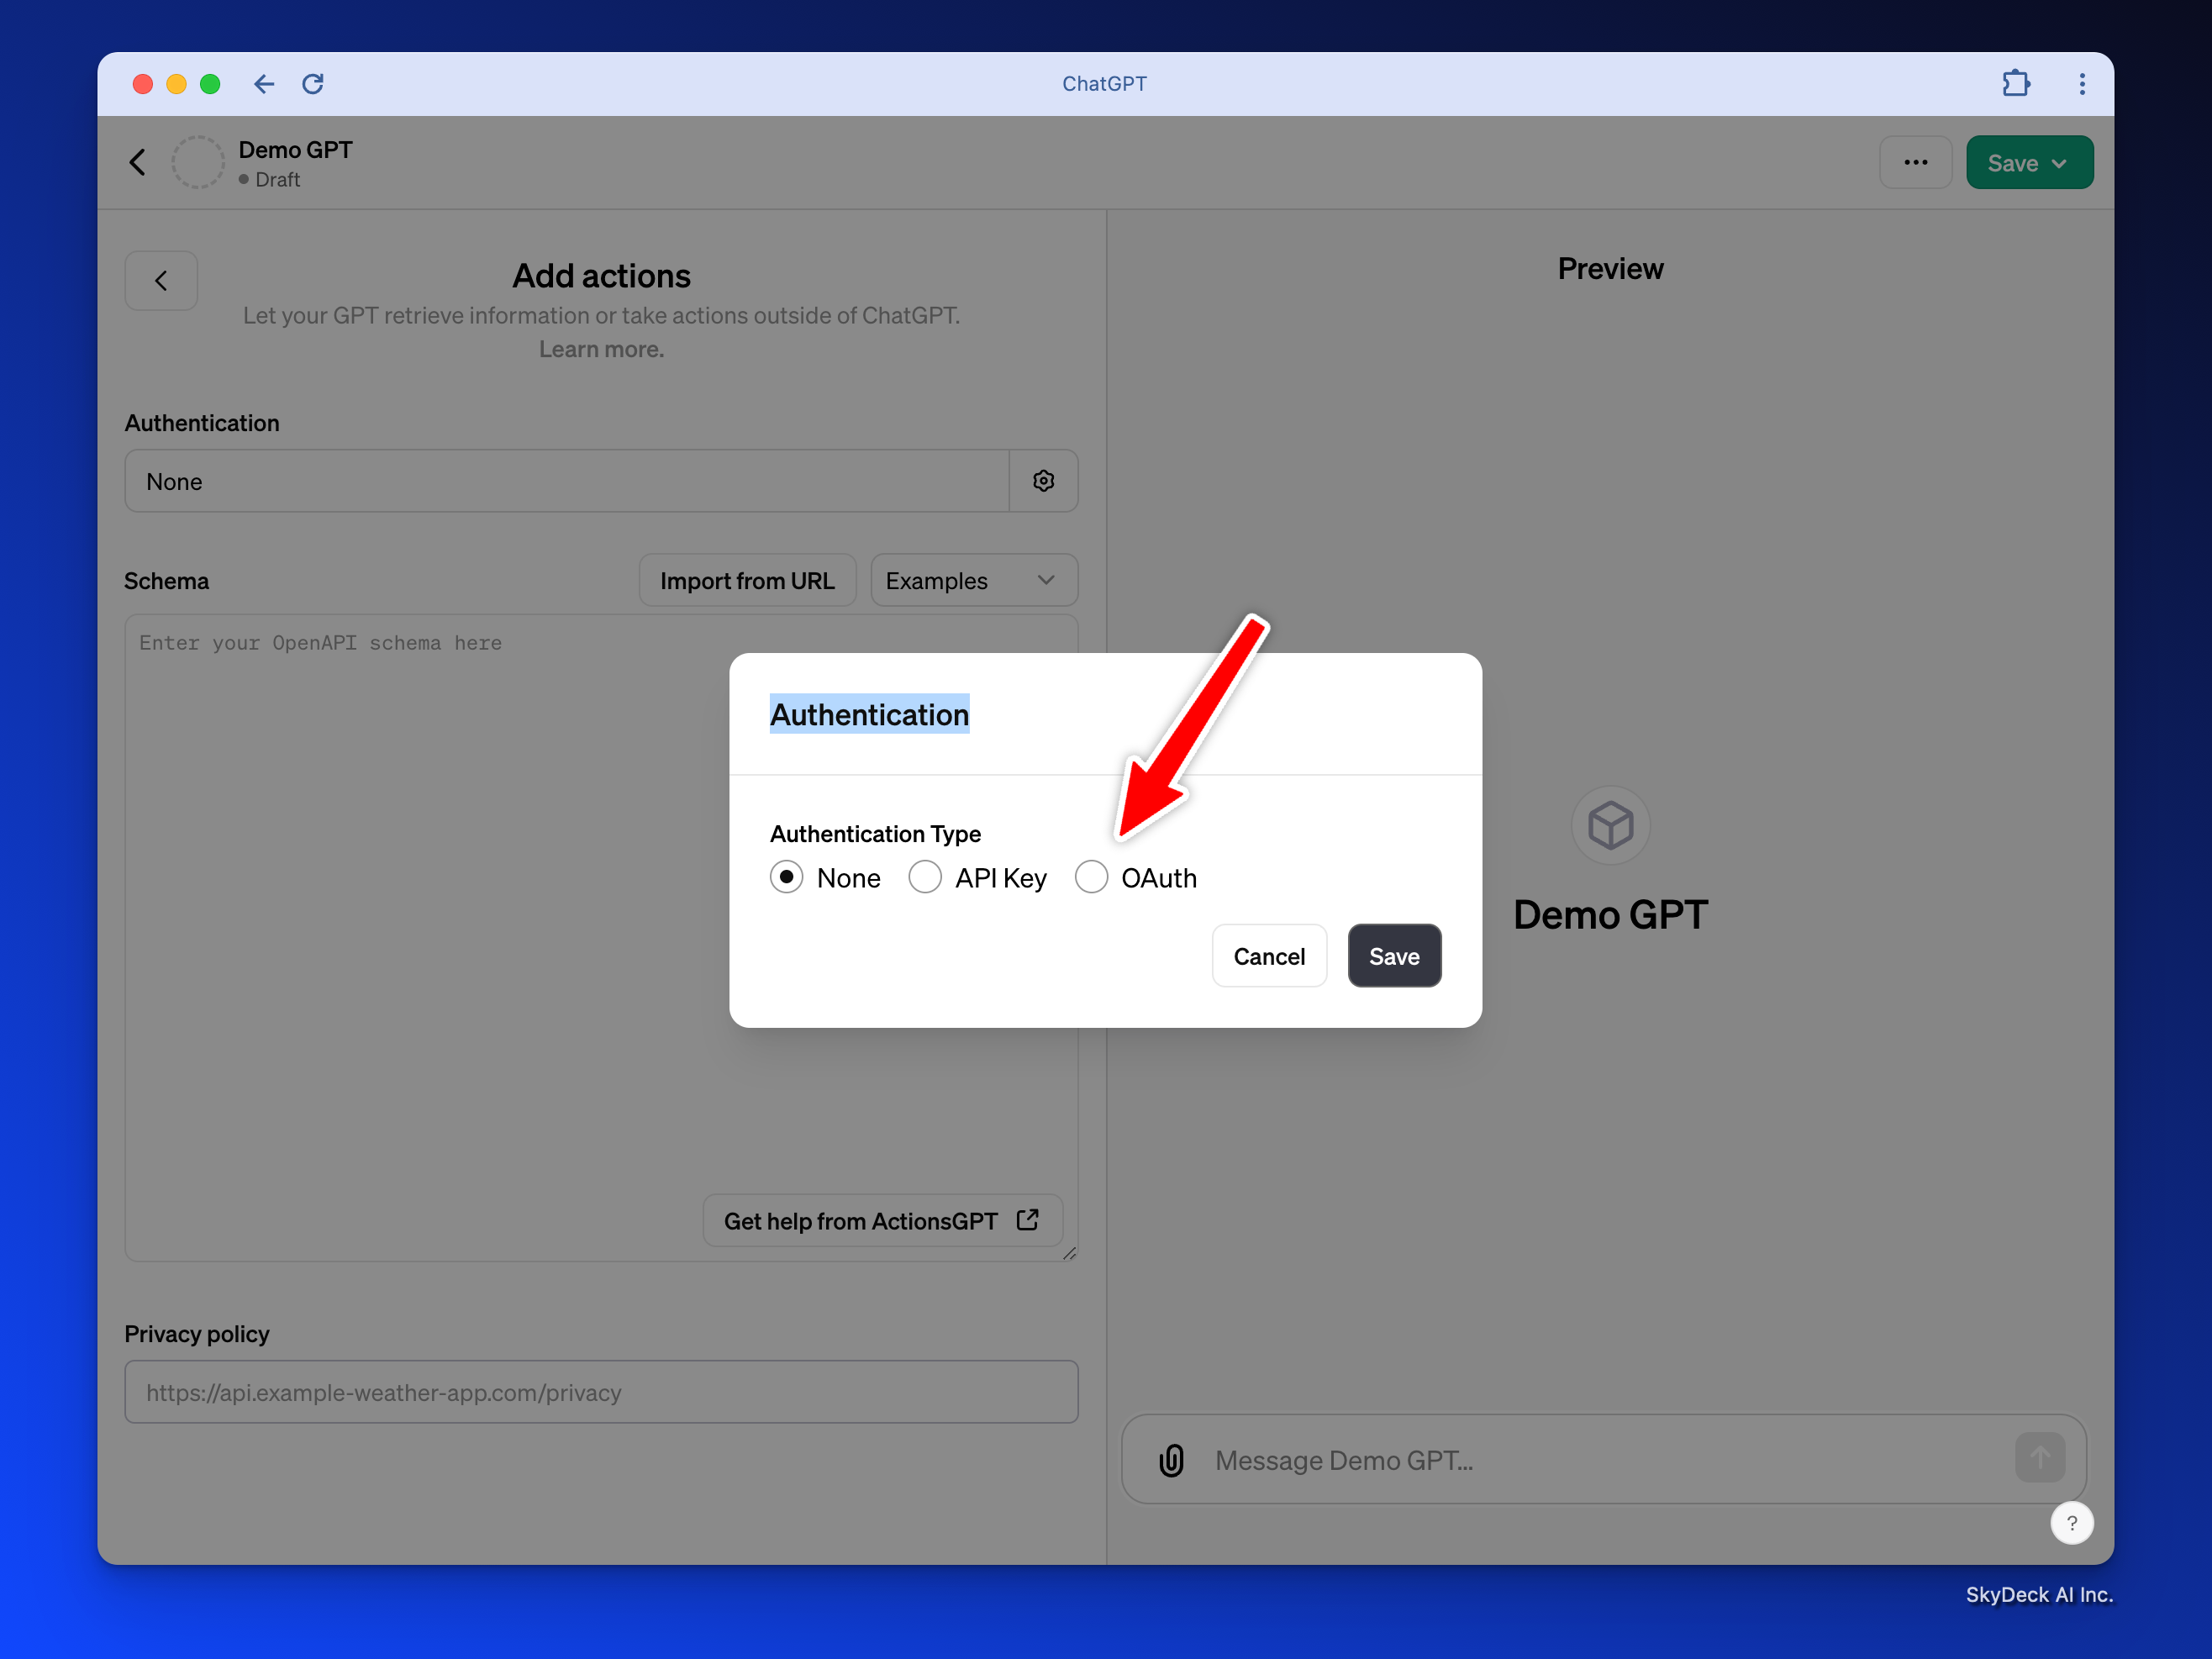
Paste in the Client ID and Client Secret from the Rememberizer Applications Credentials above:
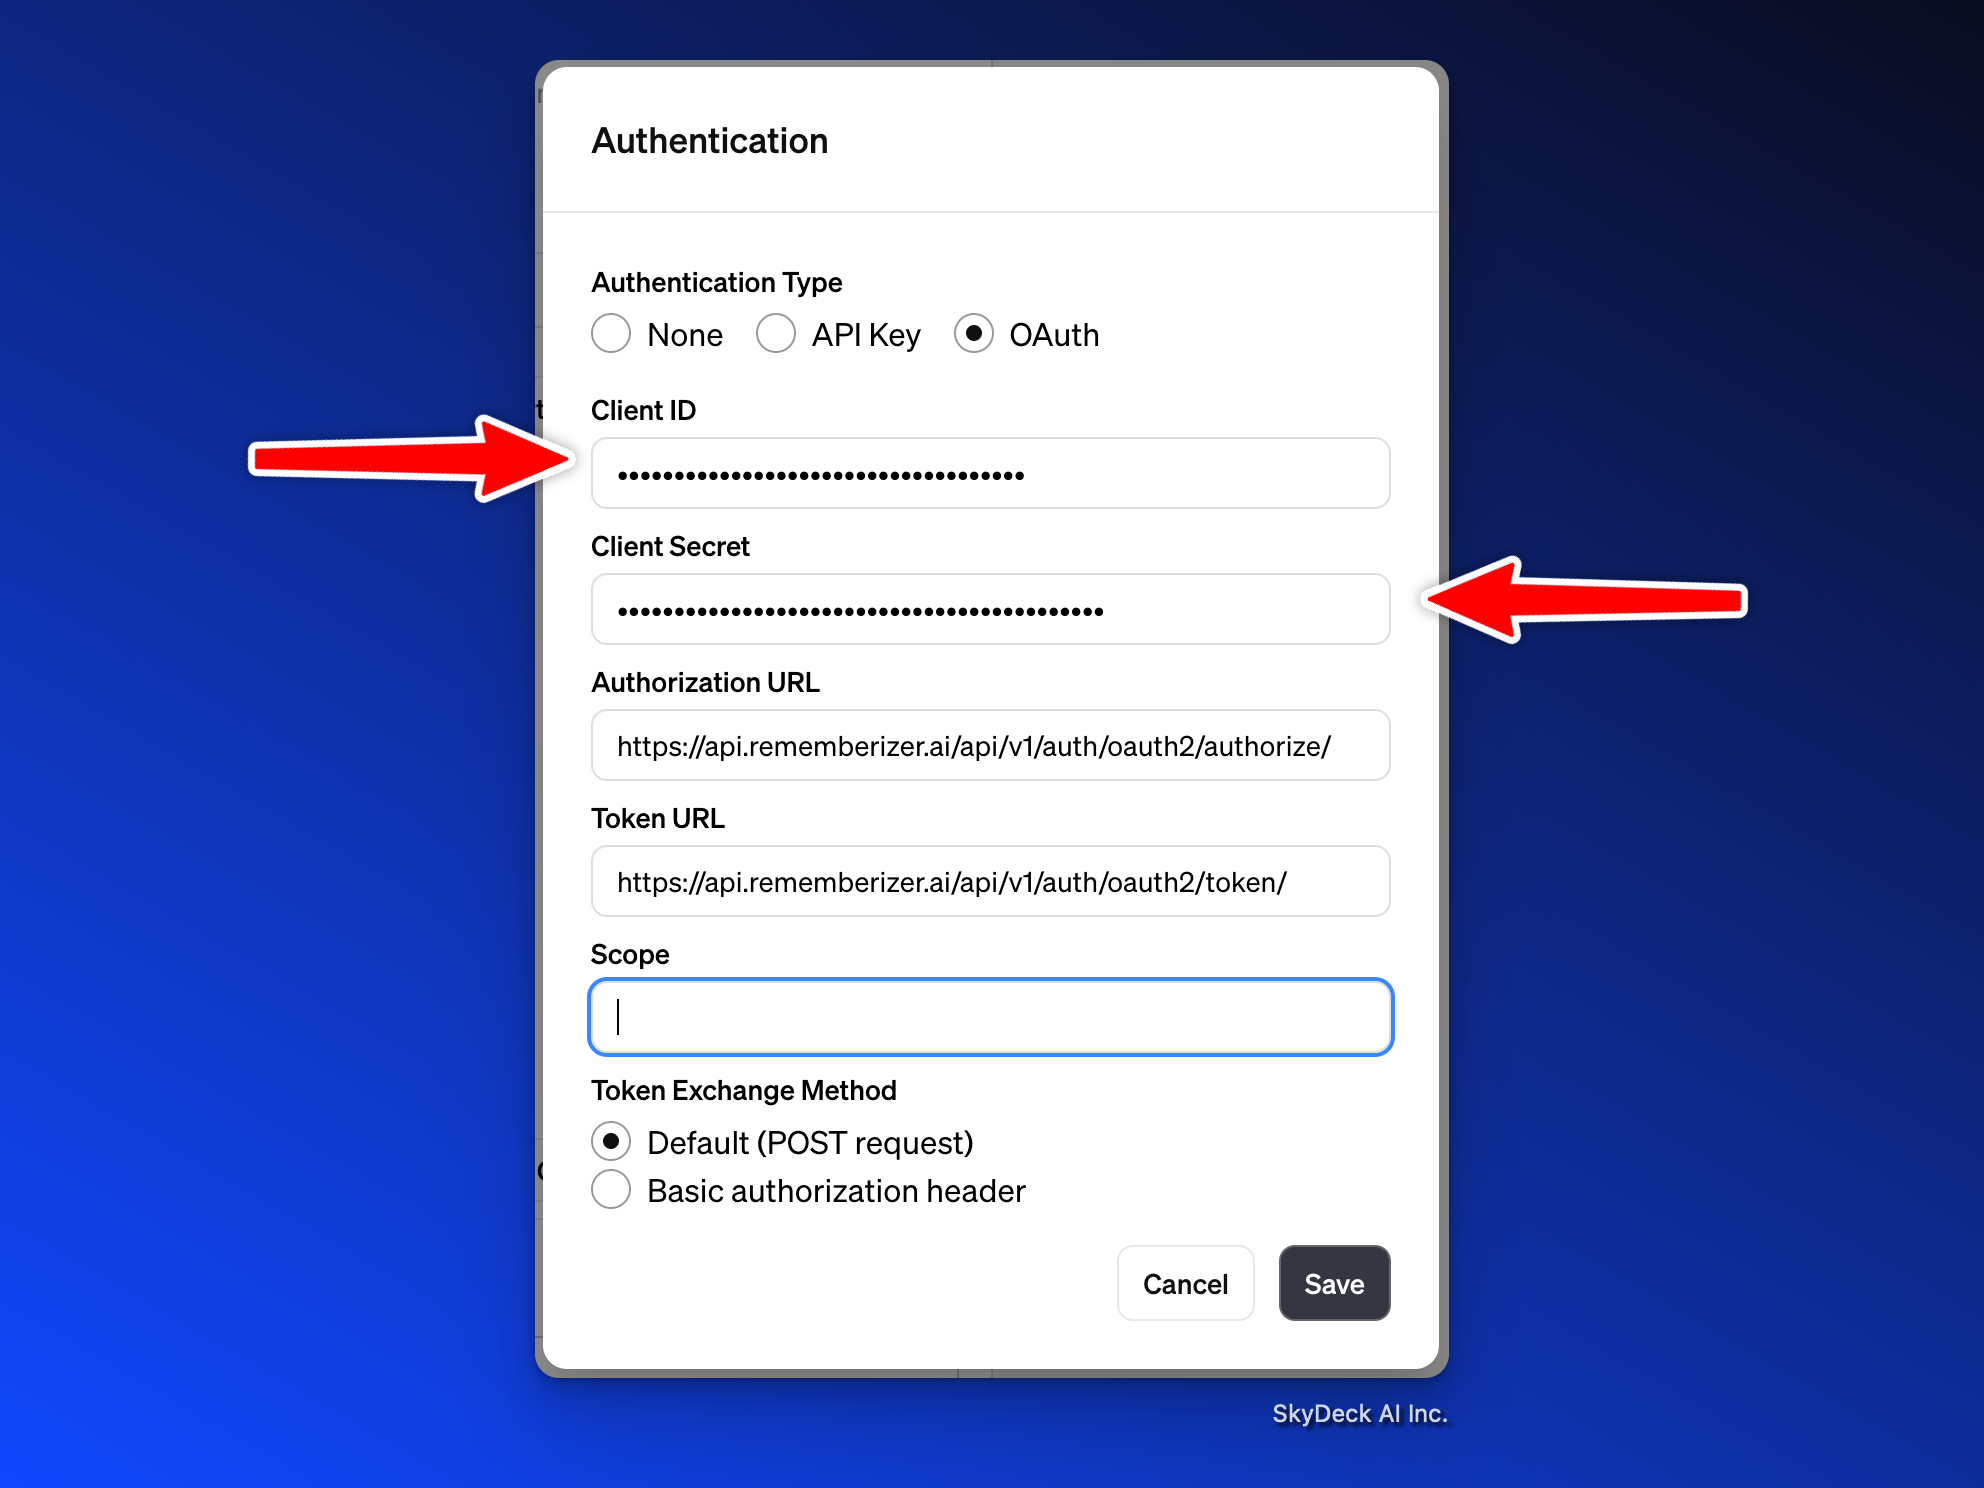
Authorization URL: https://api.rememberizer.ai/api/v1/auth/oauth2/authorize/
Token URL: https://api.rememberizer.ai/api/v1/auth/oauth2/token/
Leave Scope blank.
Click Save.
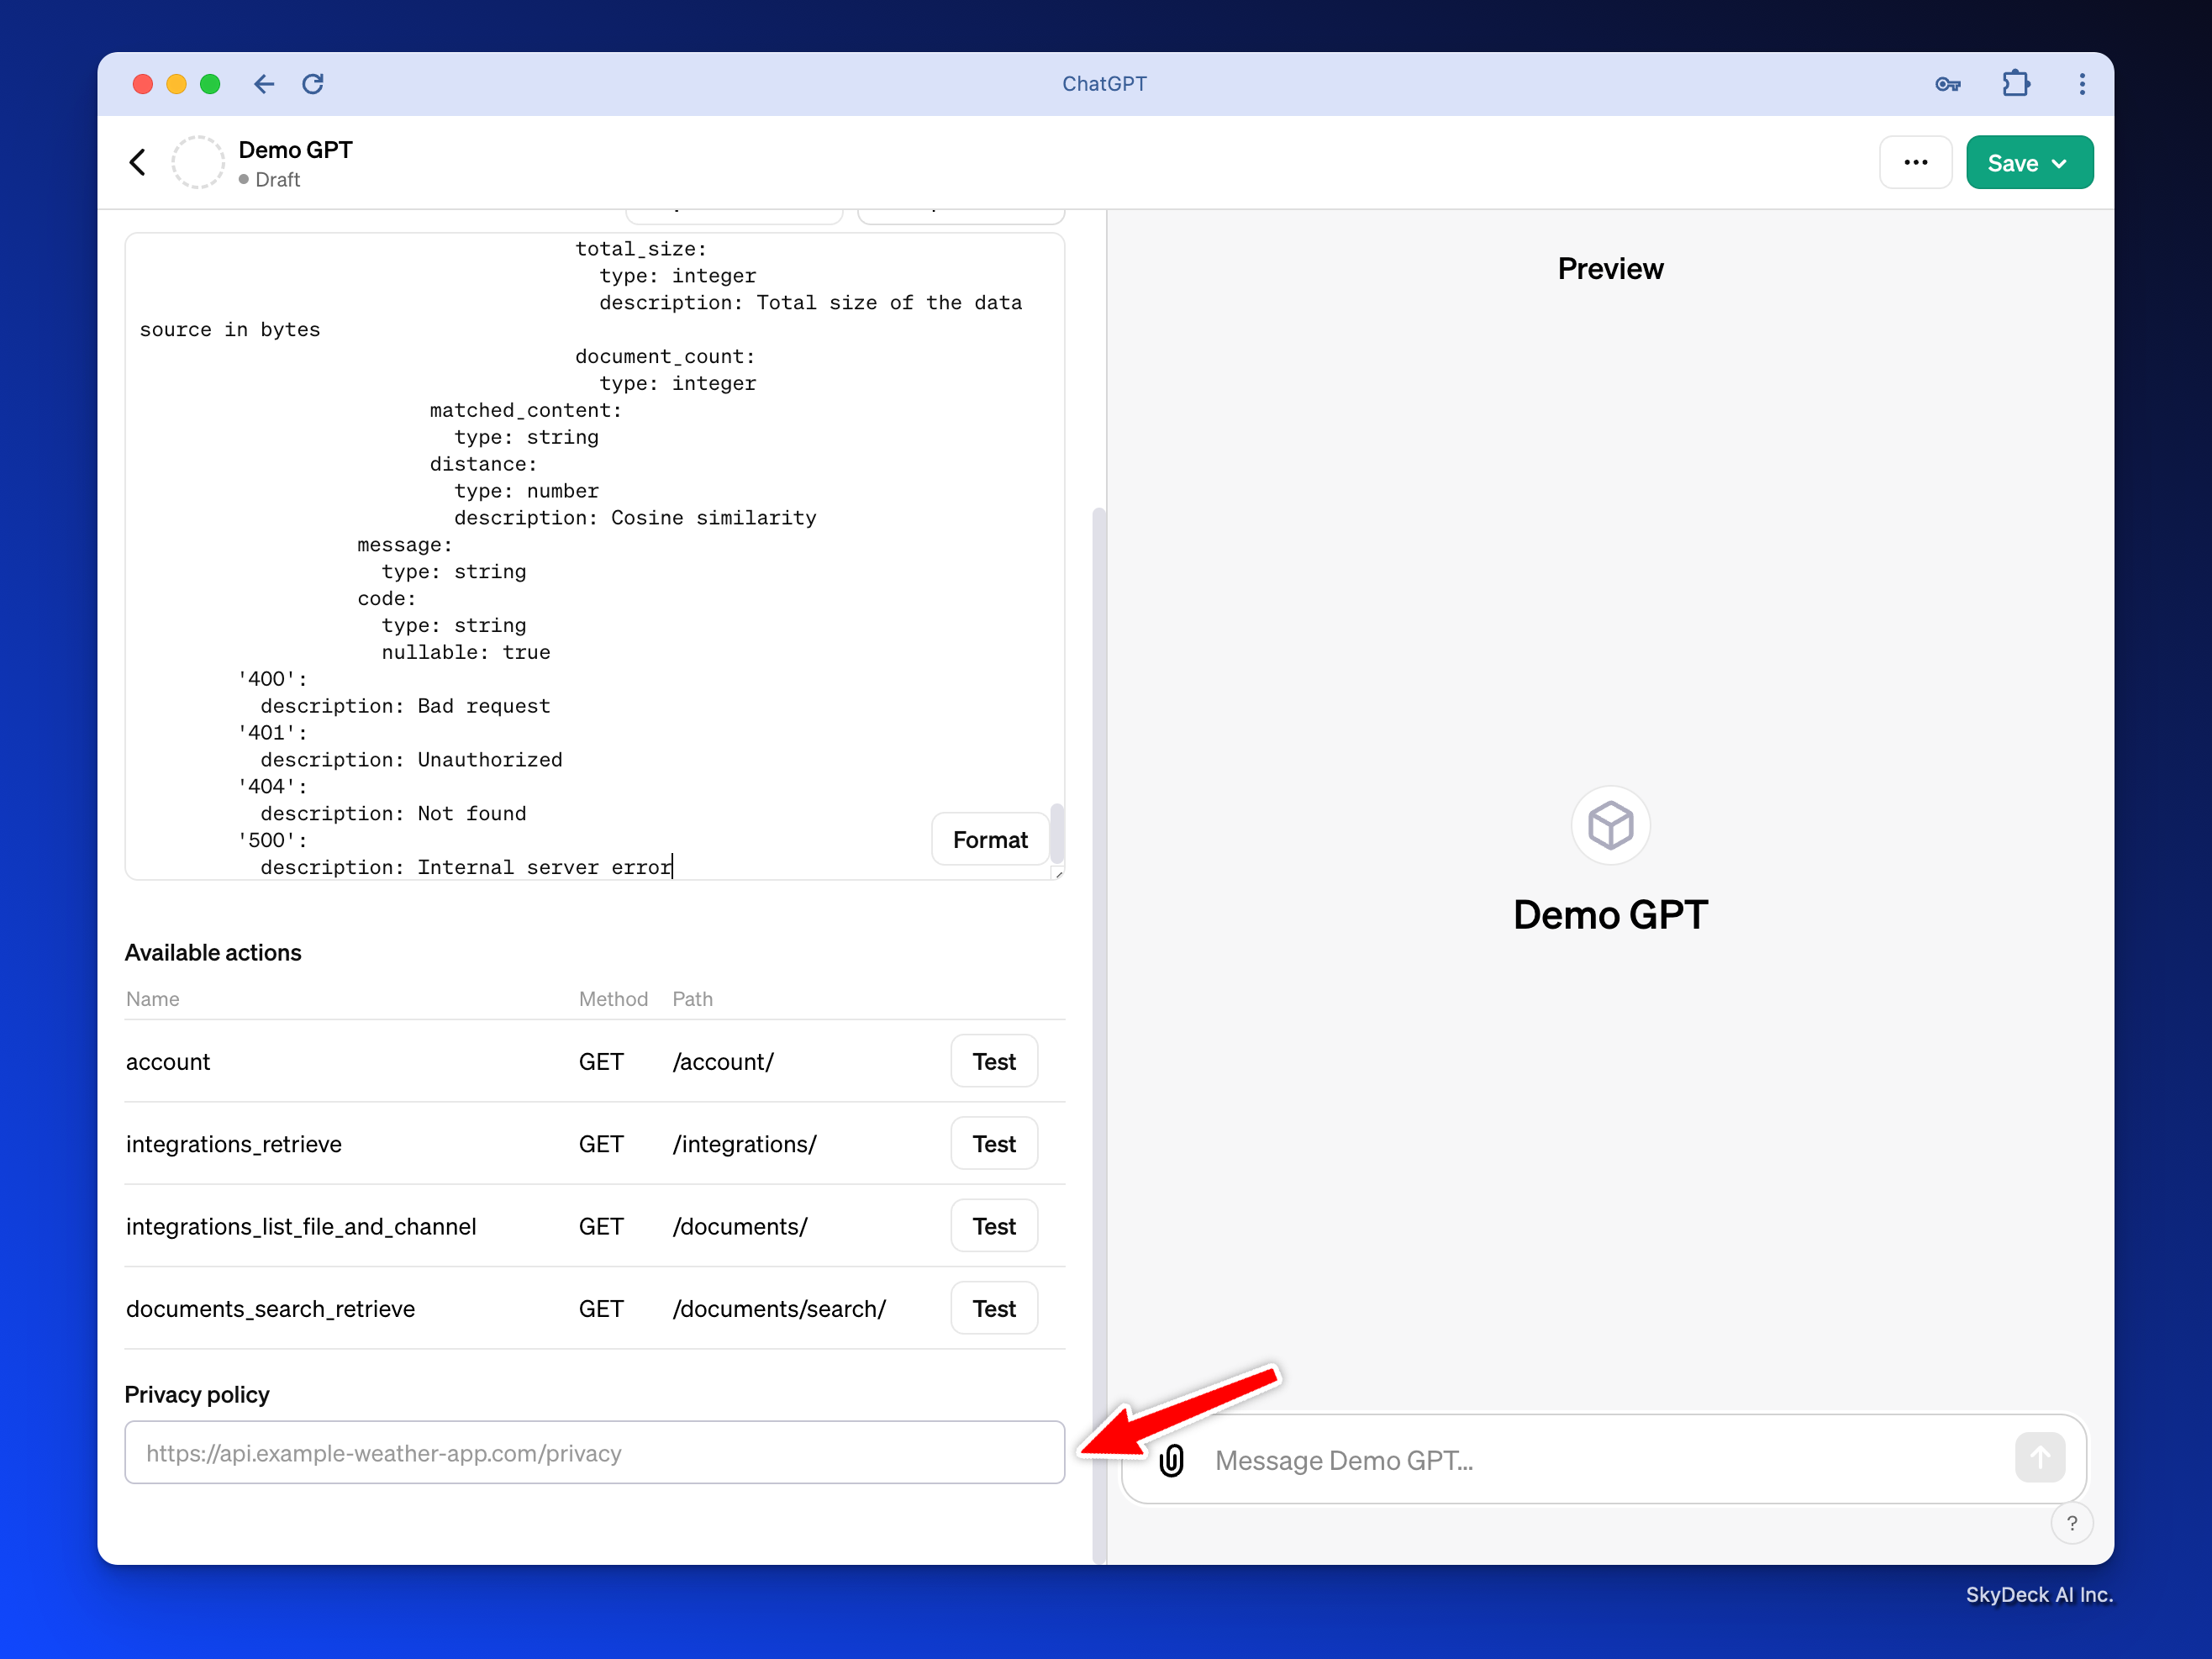
Fill in the GPT Schema with the Rememberizer API
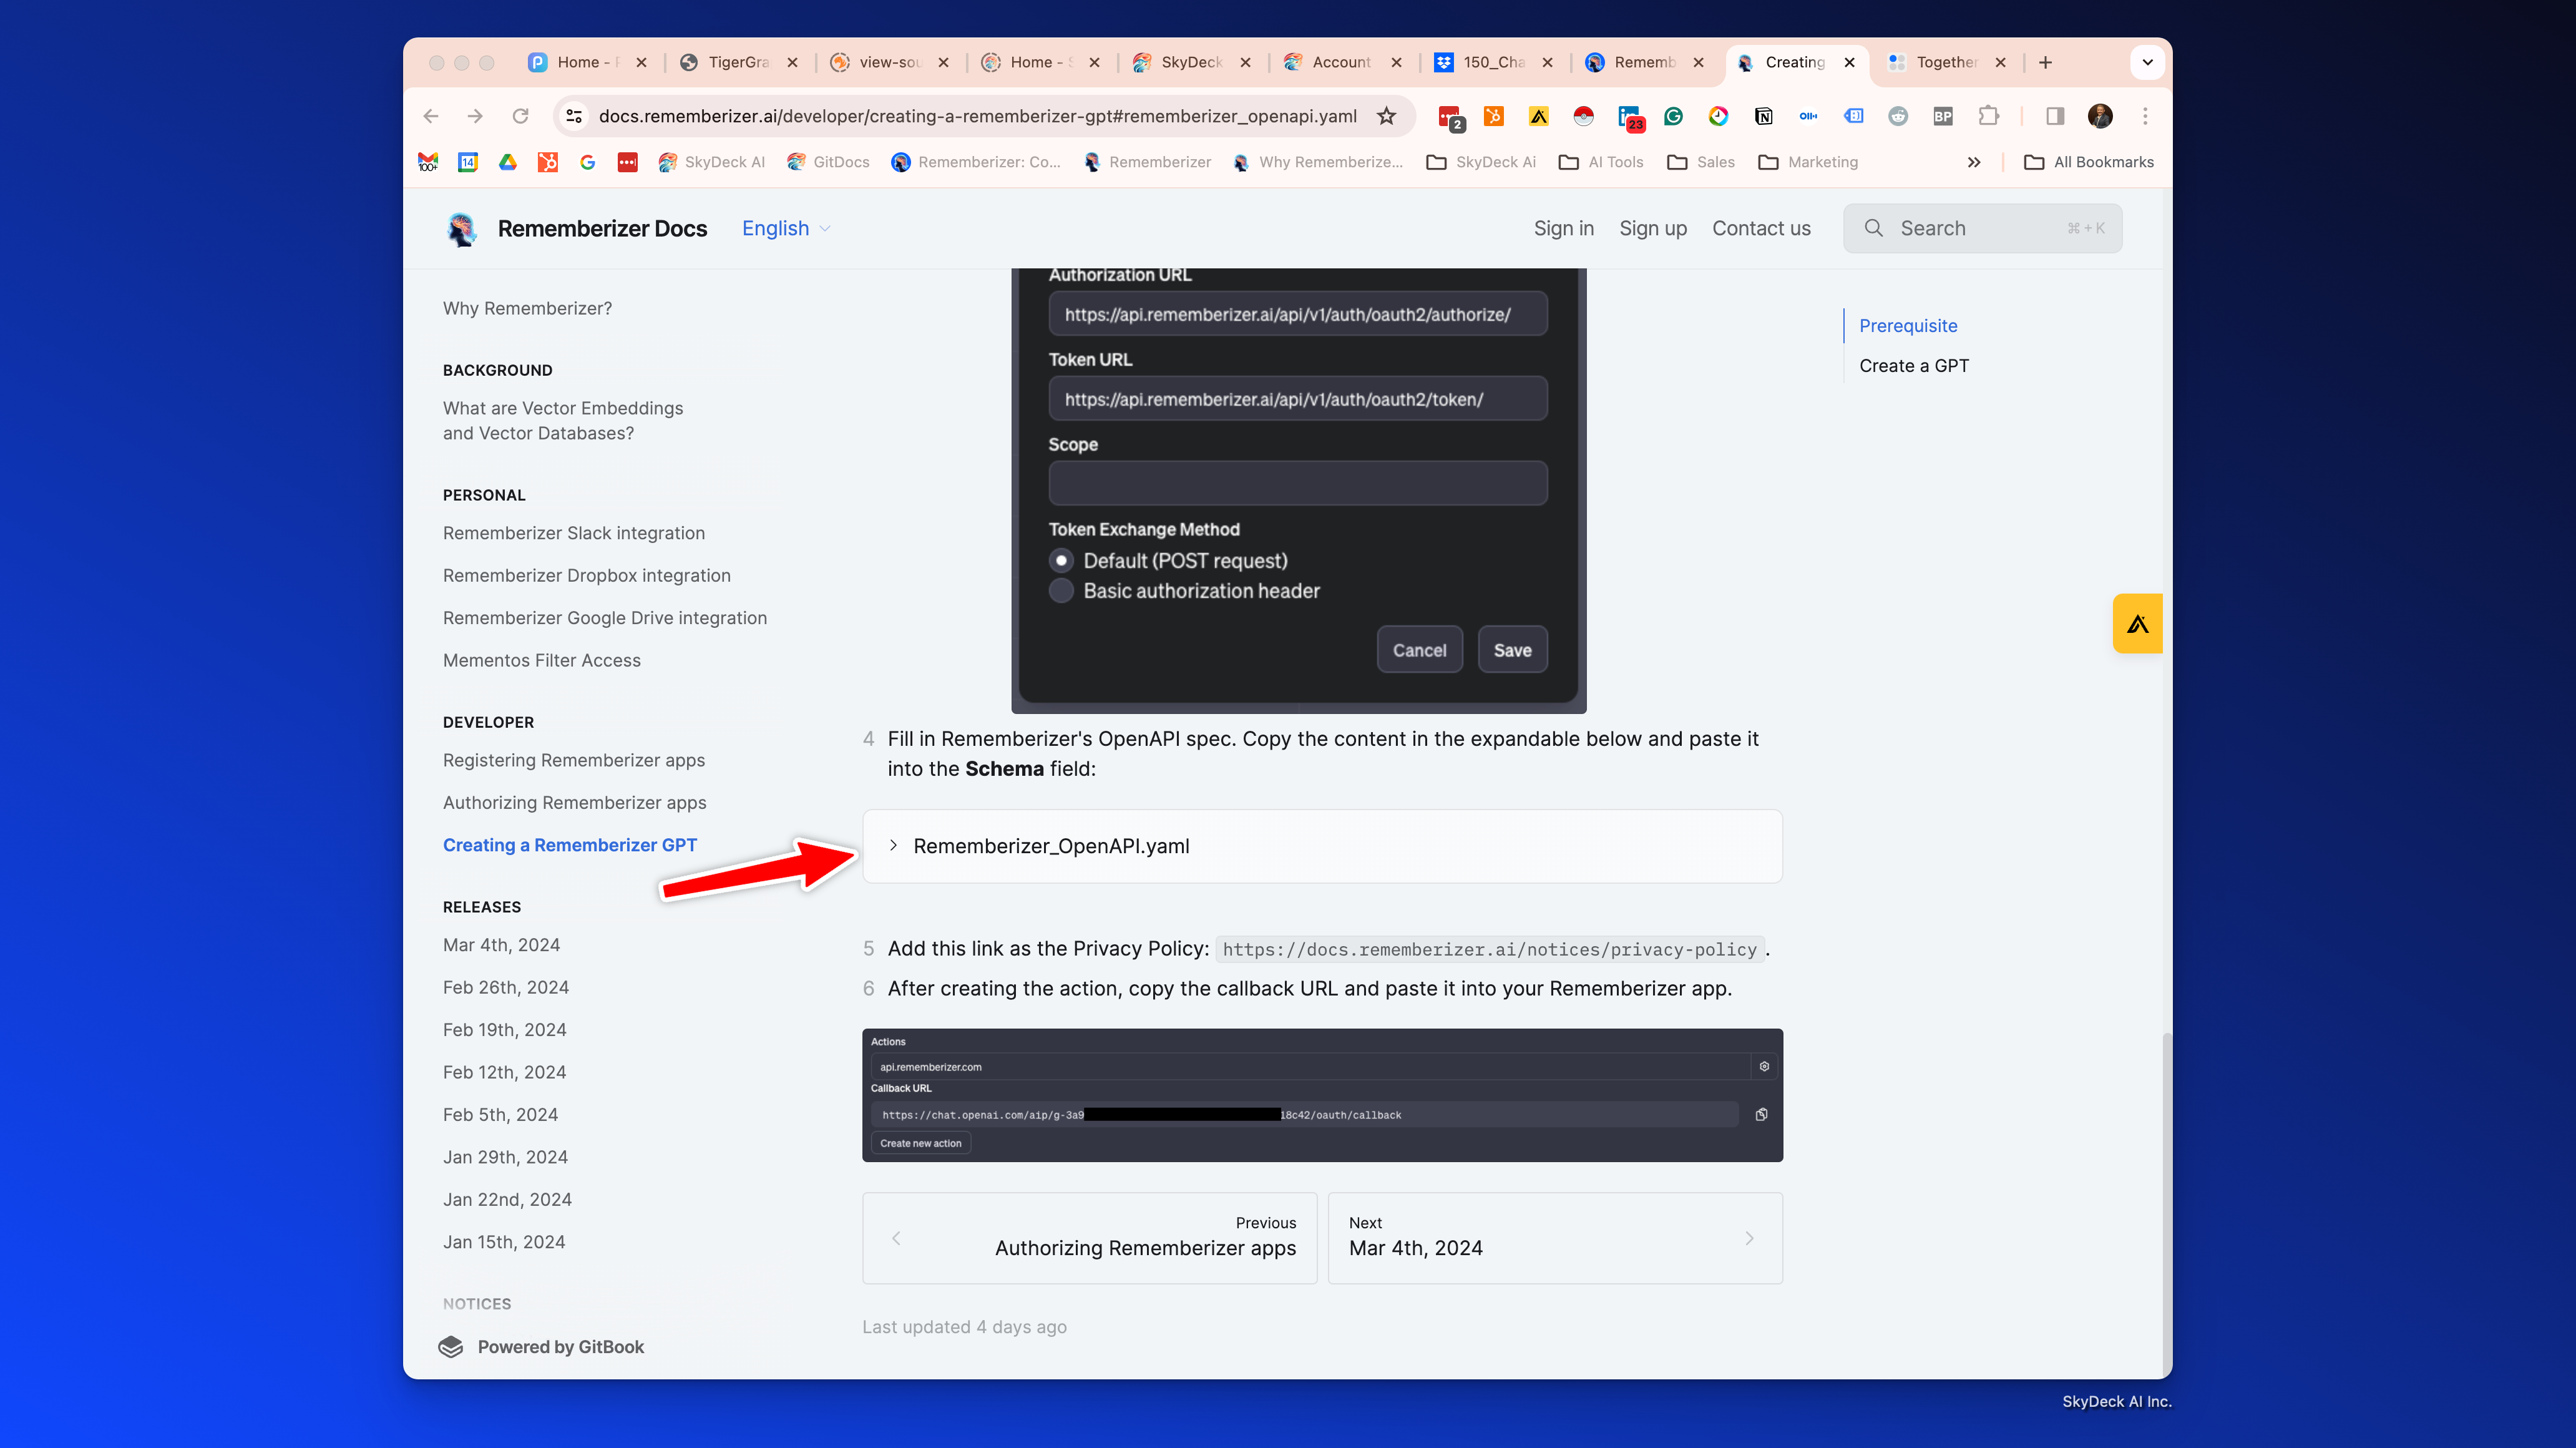
Fill in Rememberizer's OpenAPI spec. Copy the content in the expandable toddle No.4 in the link below and paste it into the Schema field:
https://docs.rememberizer.ai/developer/creating-a-rememberizer-gpt#rememberizer_openapi.yaml
Privacy Policy
Add this link as the Privacy Policy: https://docs.rememberizer.ai/notices/privacy-policy.
After creating the action, save the GPT, and then
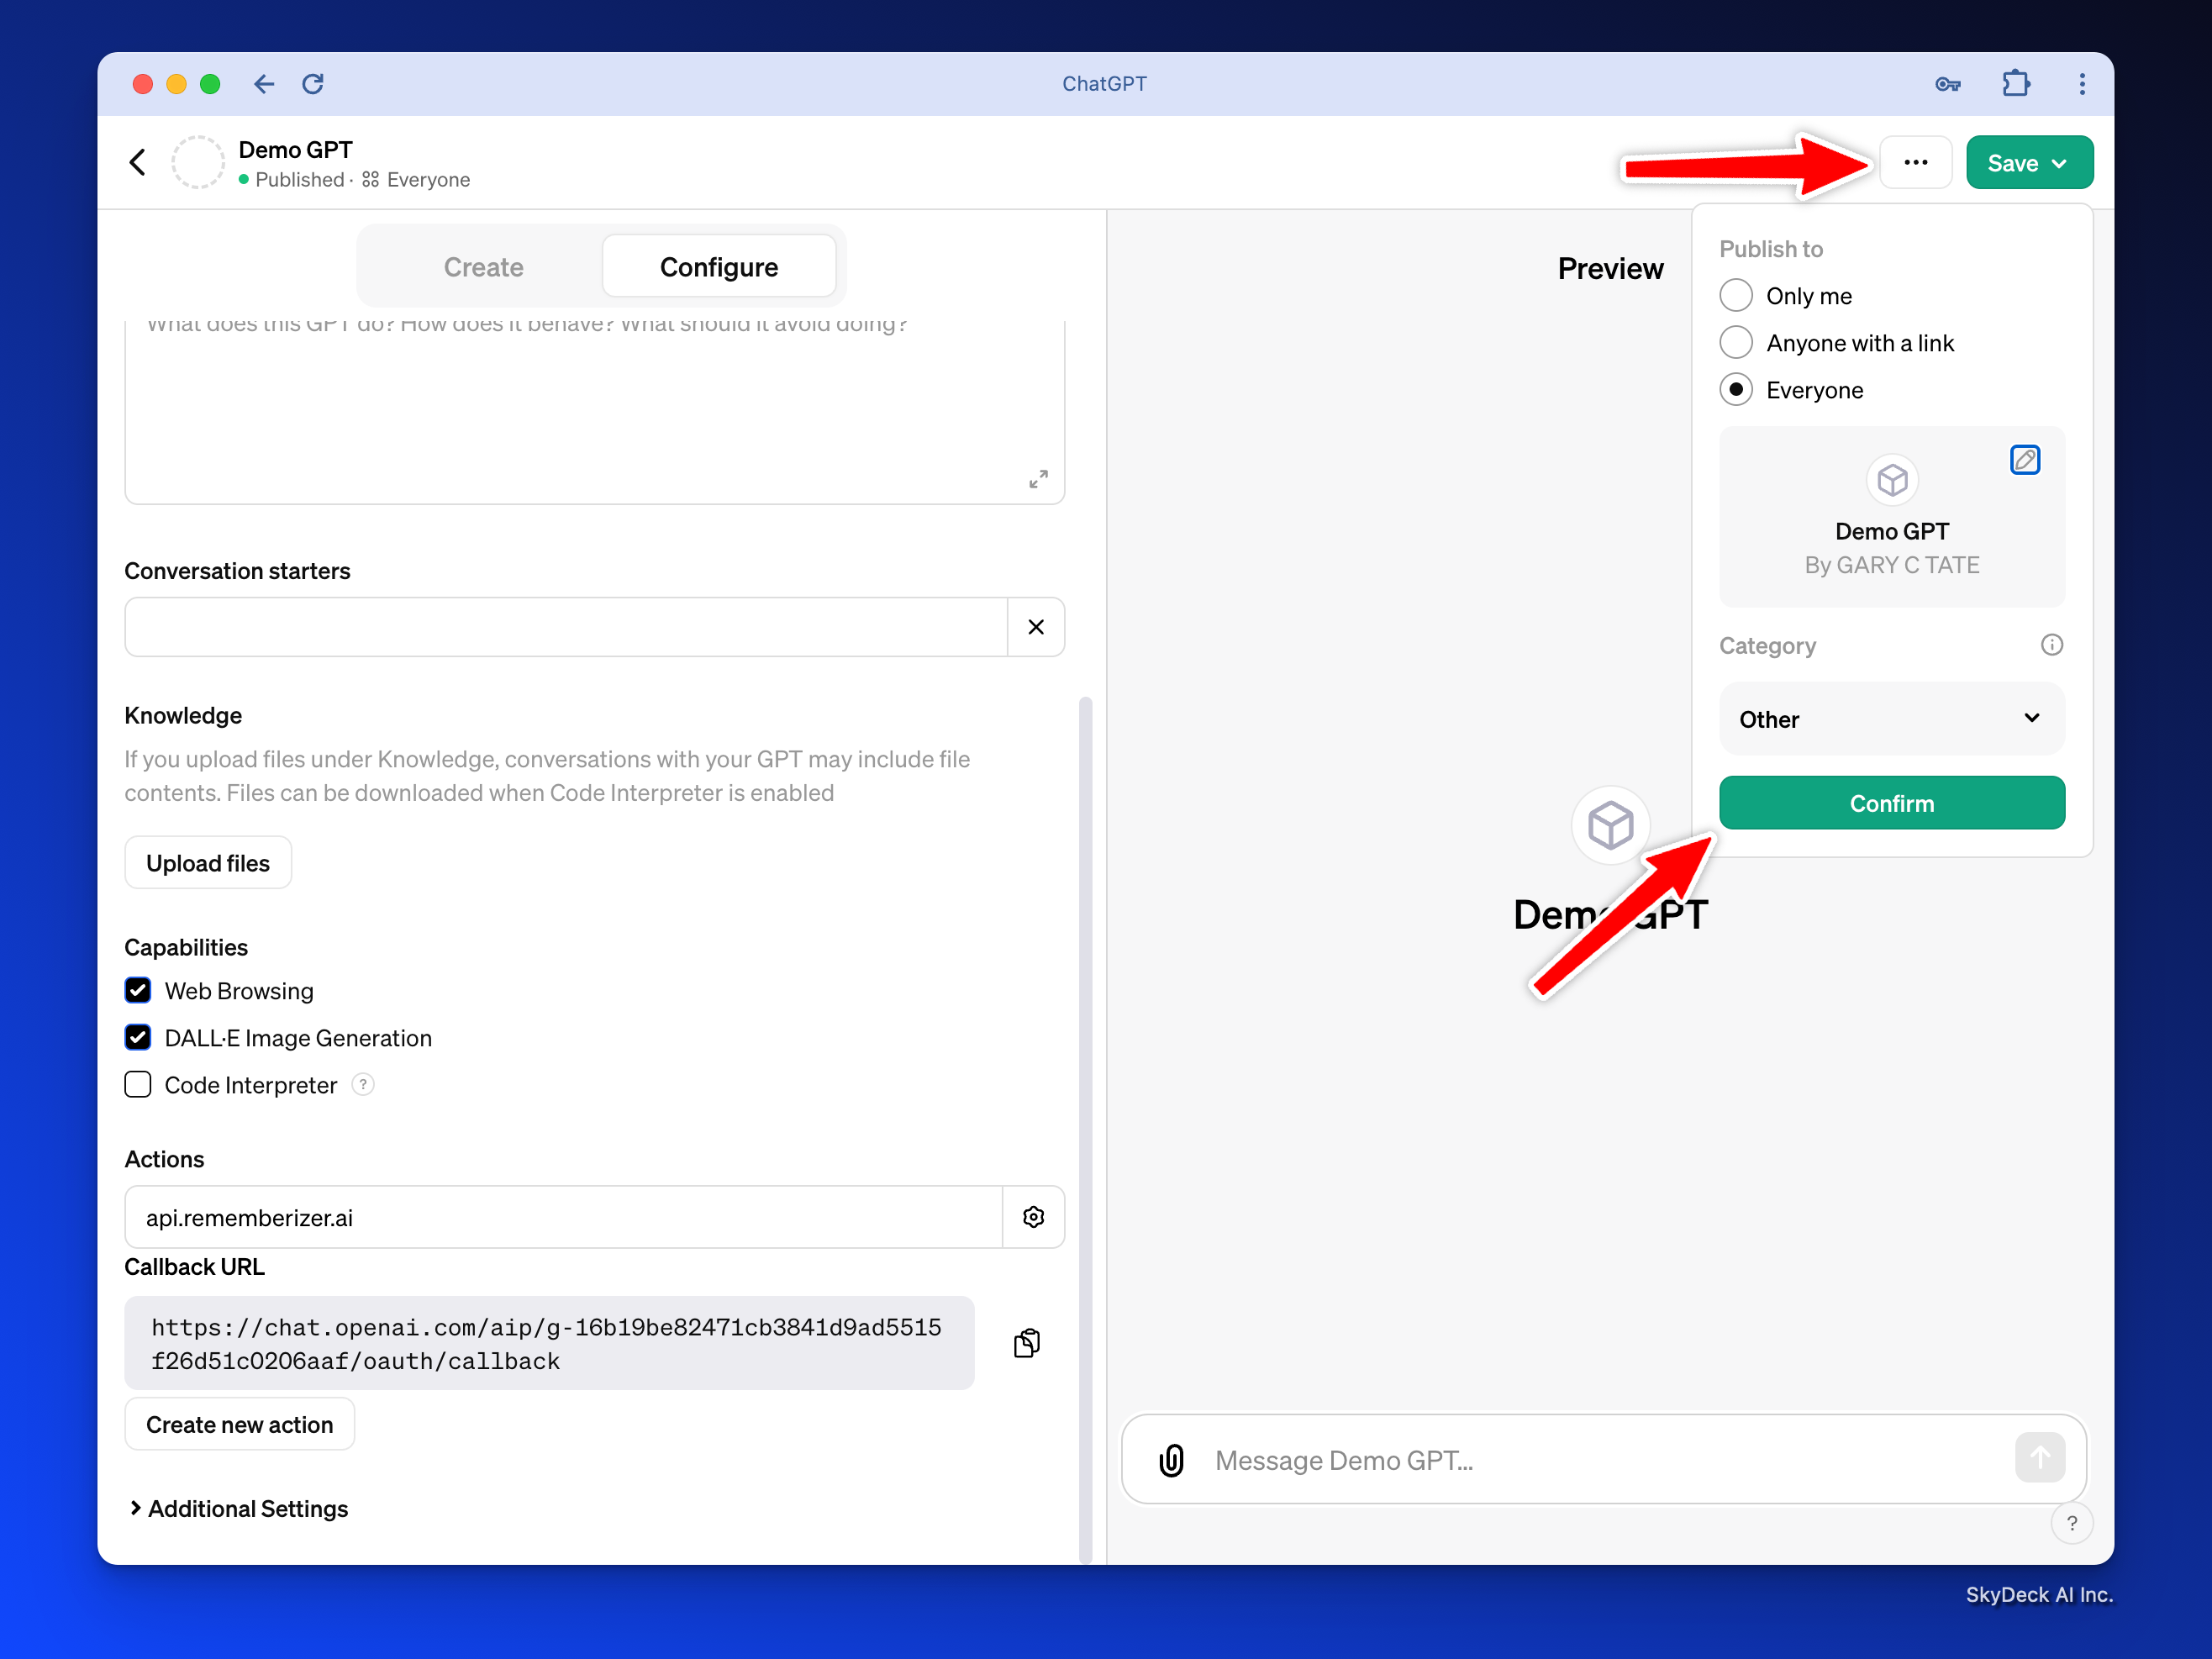
Copy the link for the GPT, which will look something like this:https://chat.openai.com/g/g-dSiQf1hmQ-demo-gpt
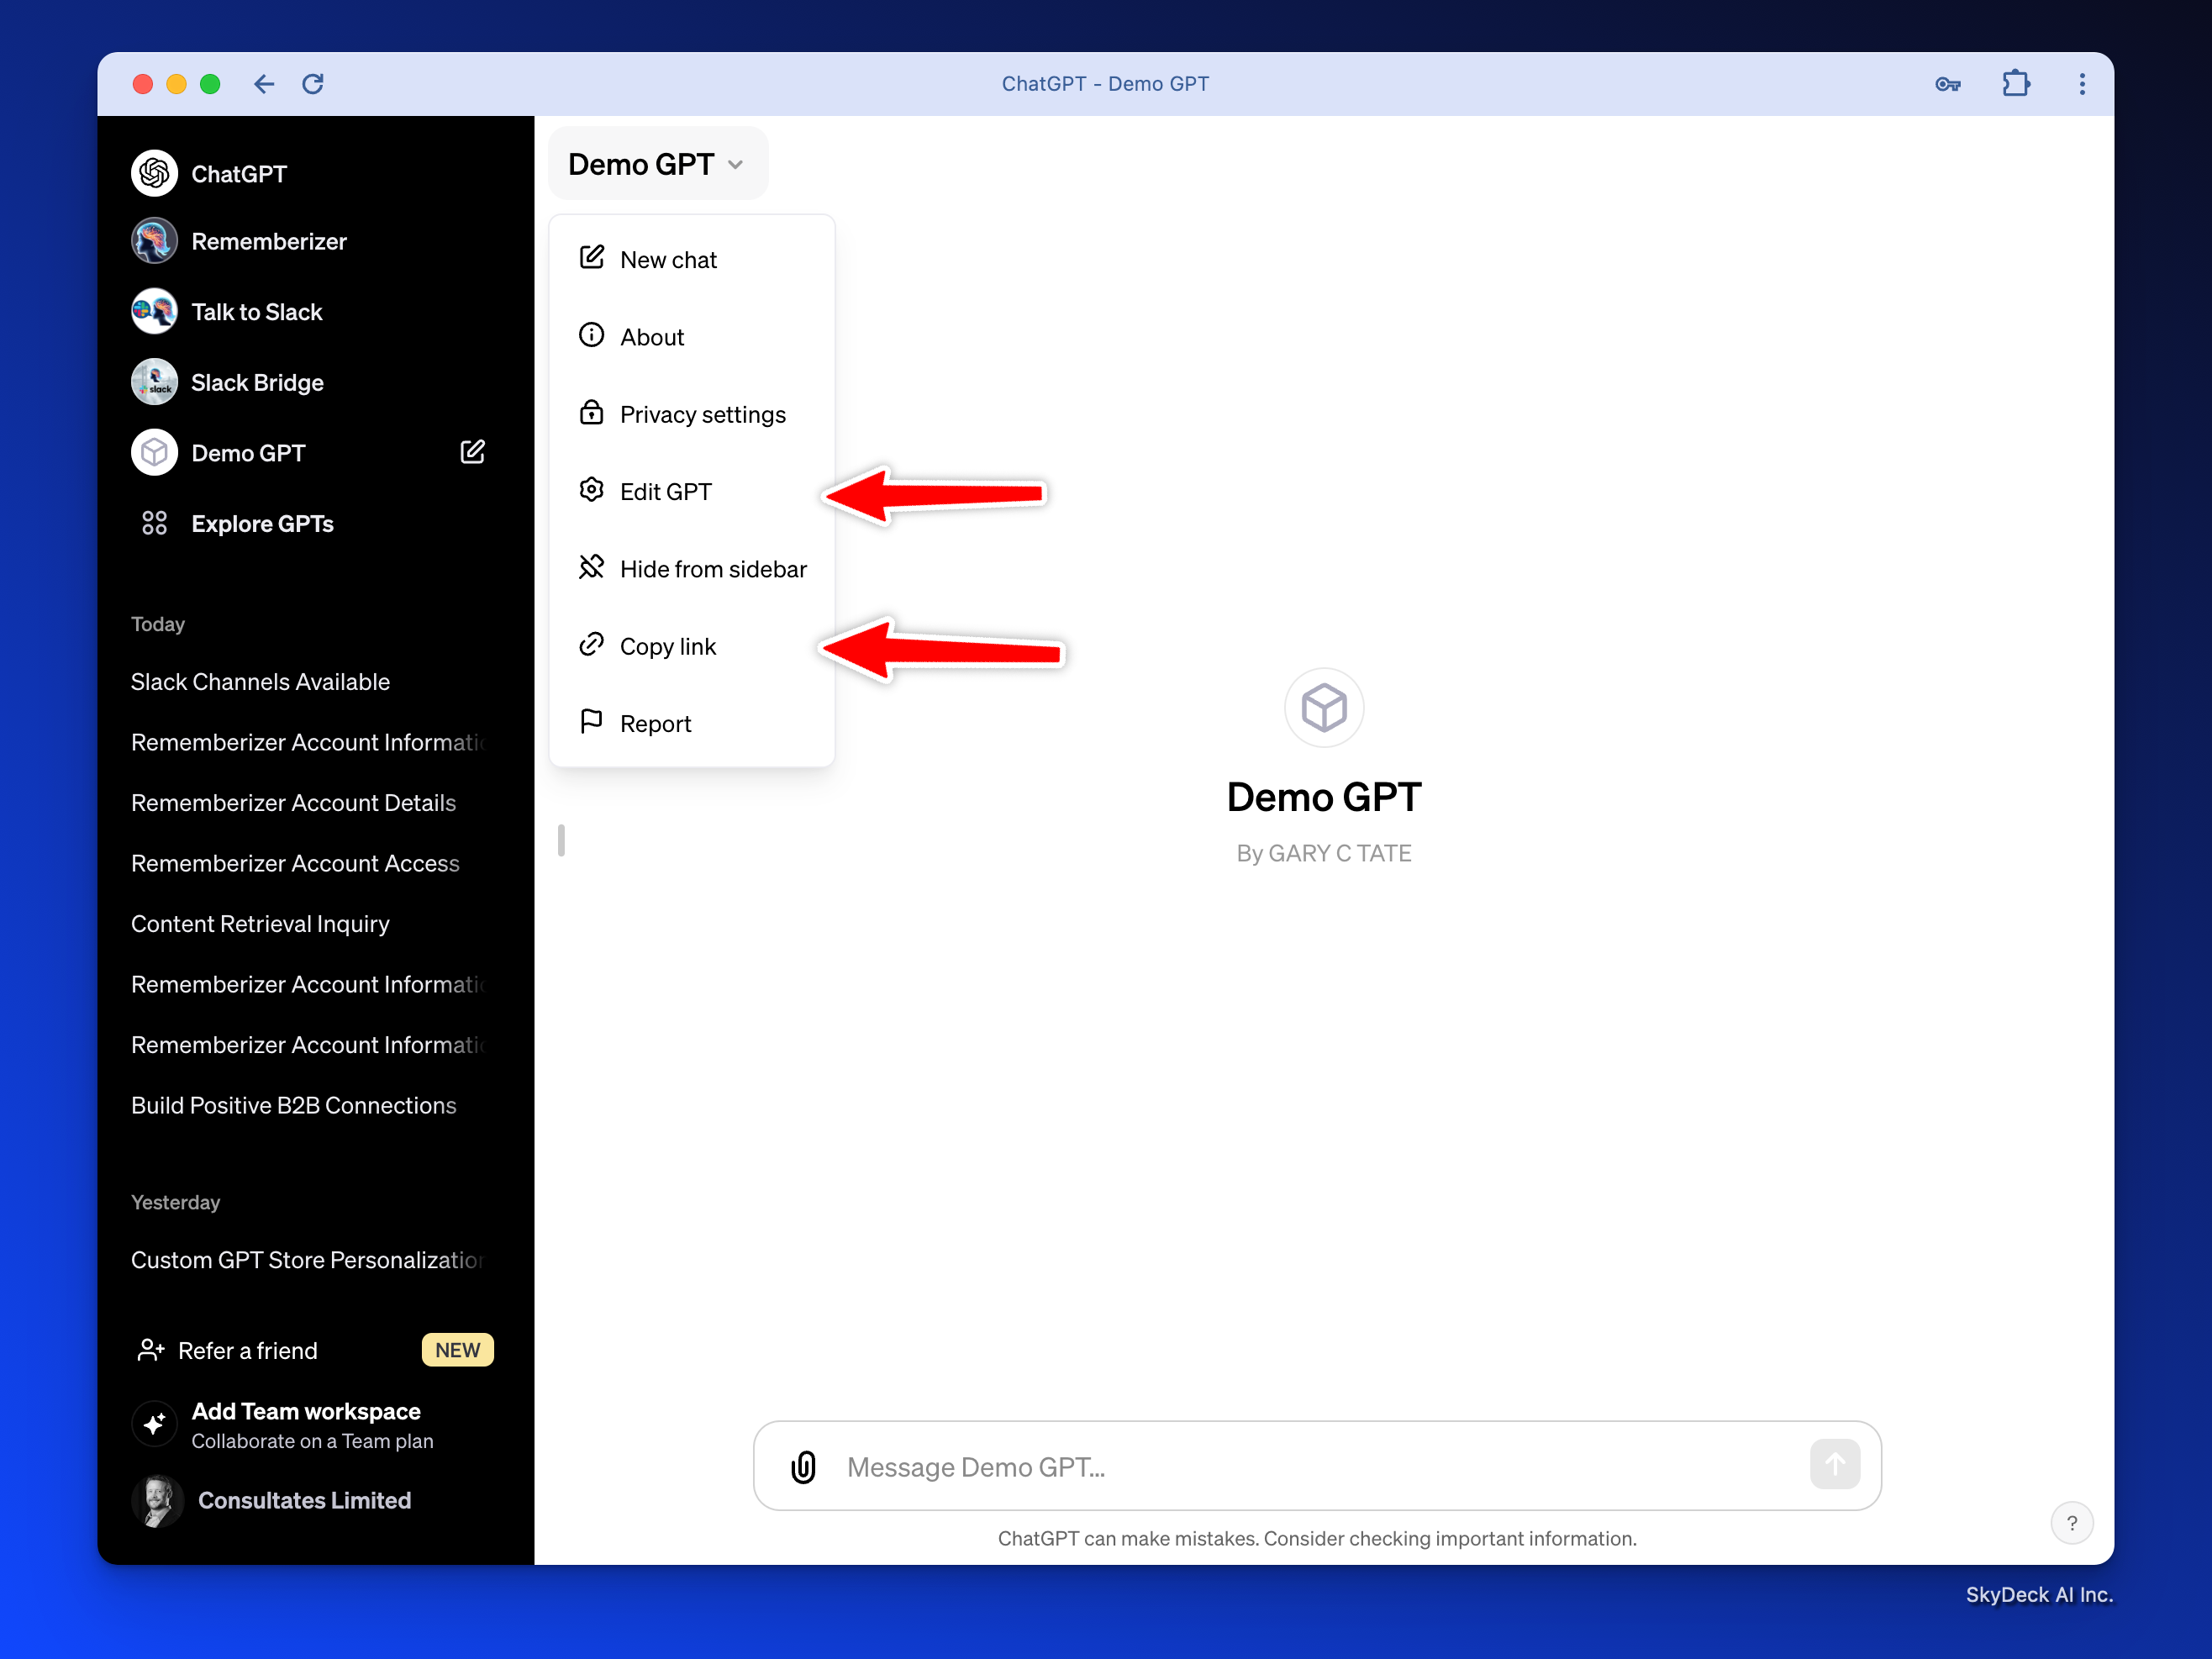
Now go back into Edit GPT
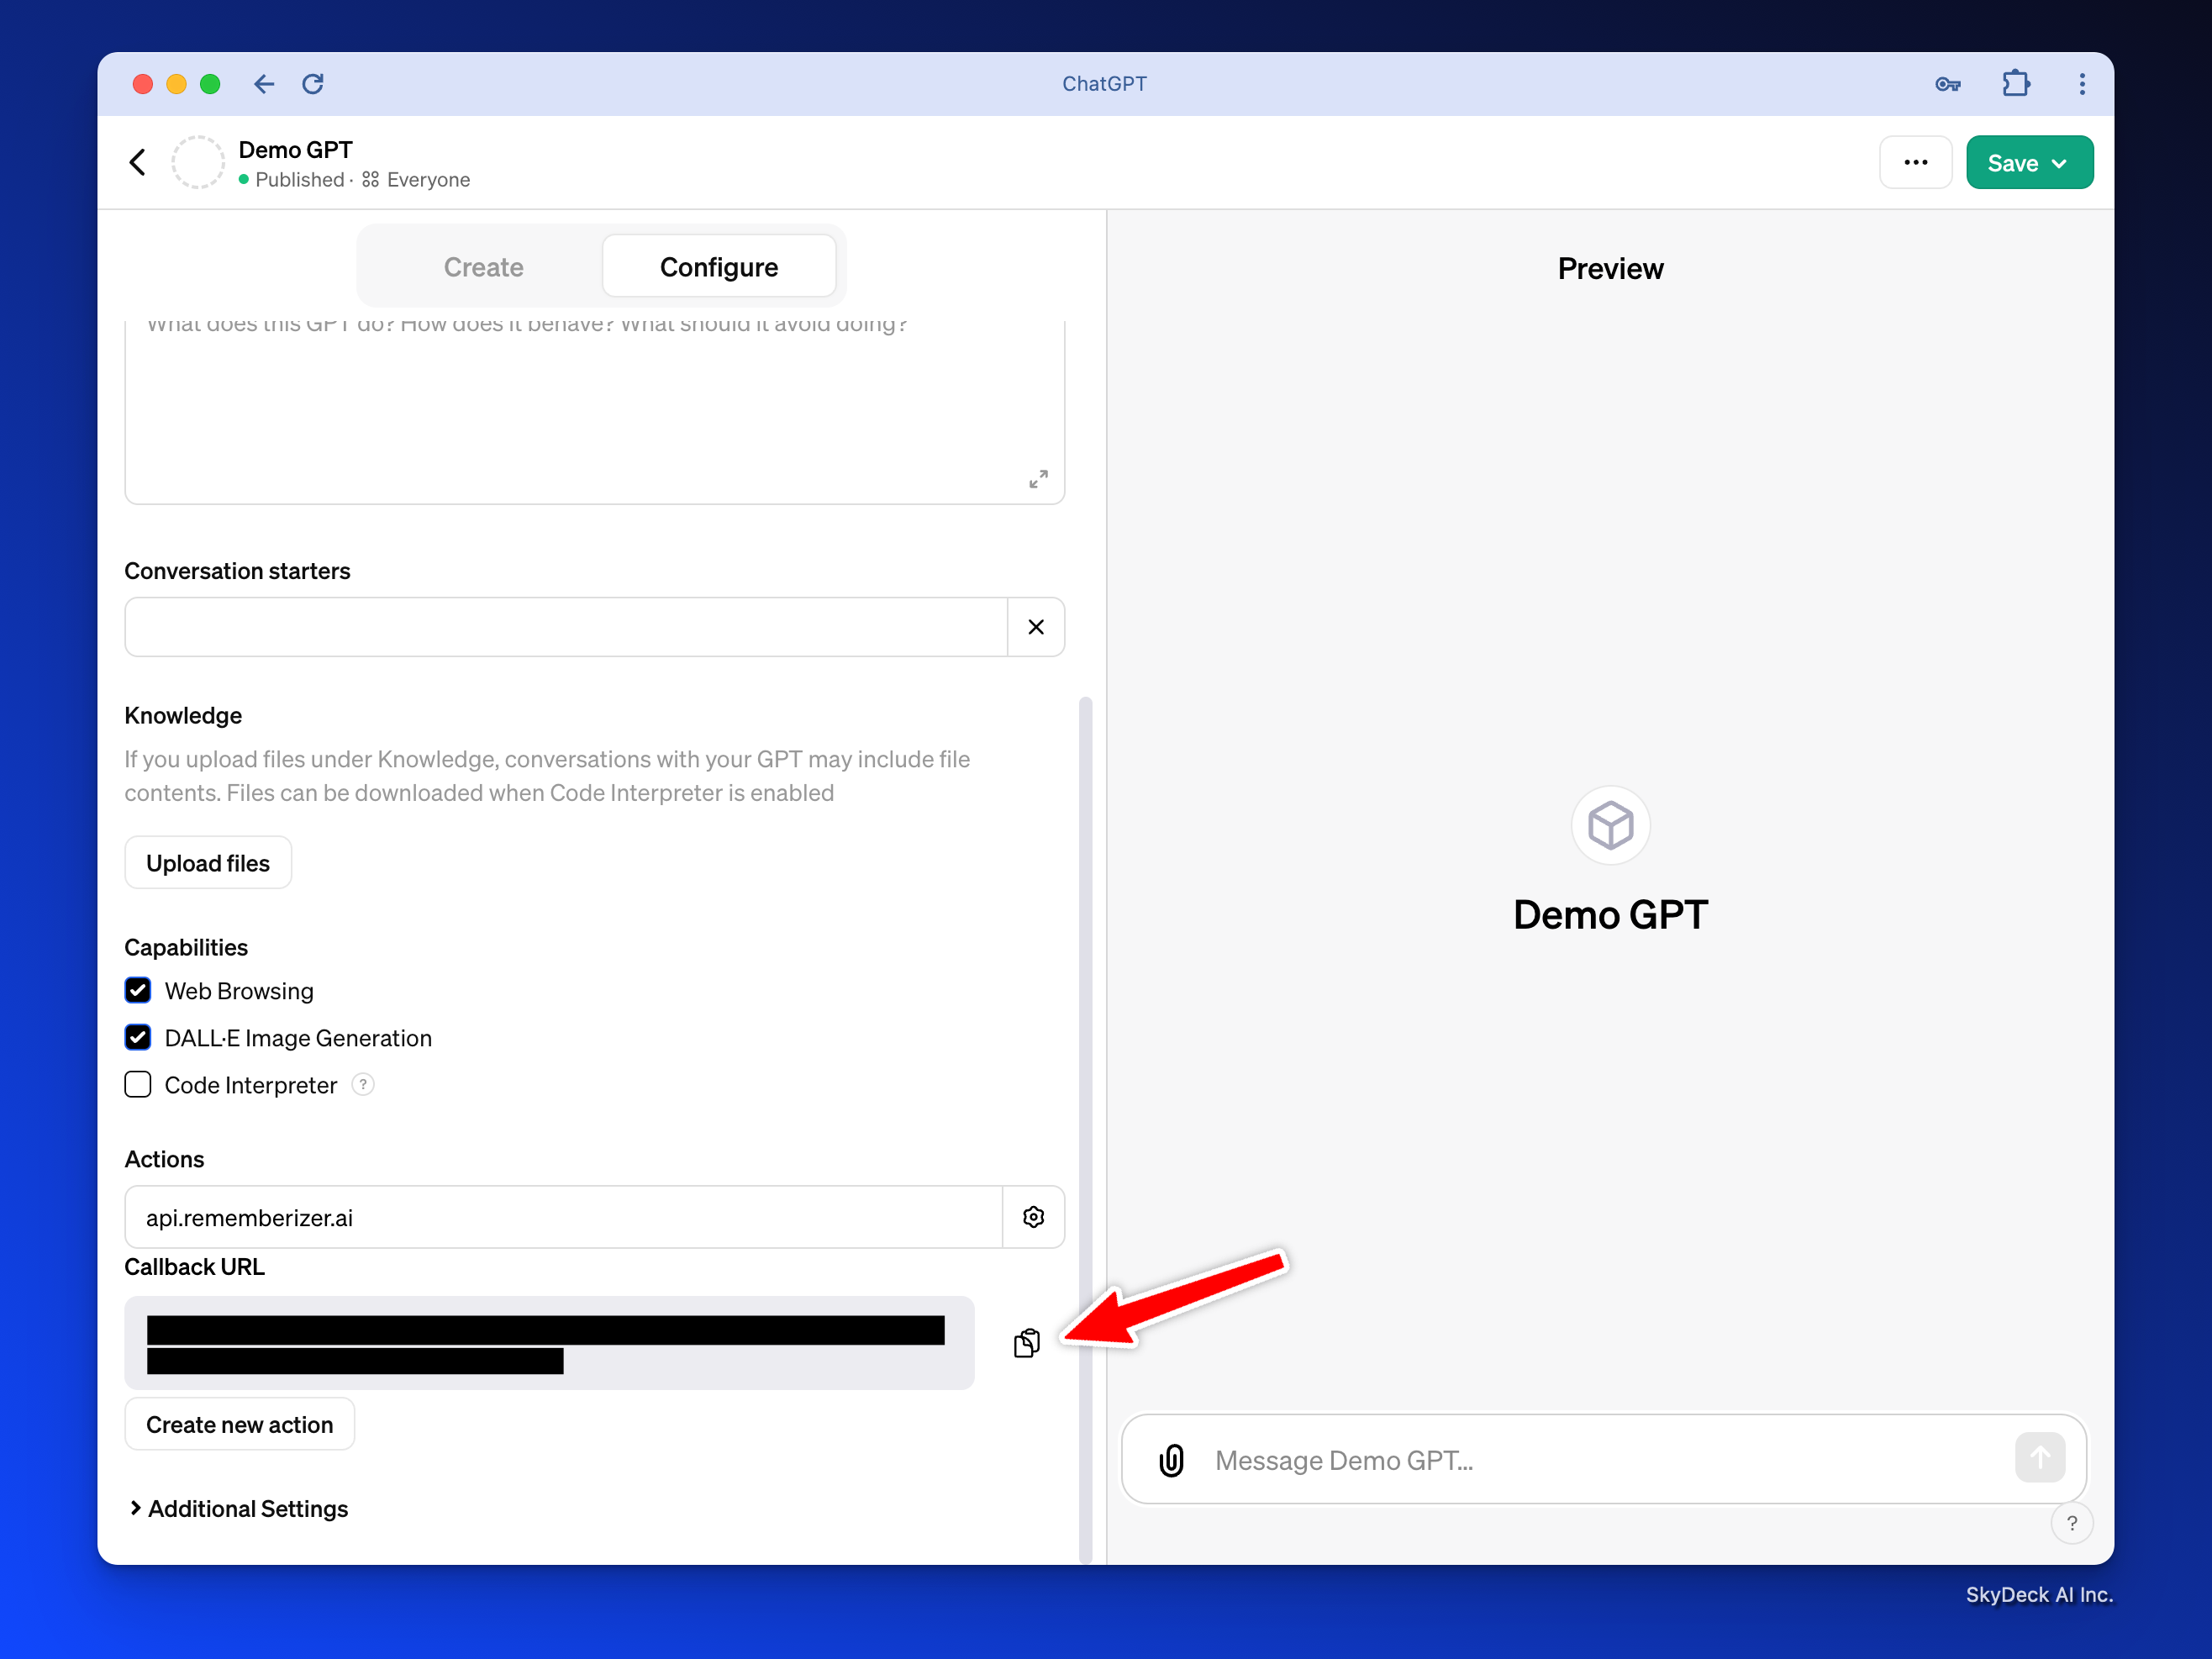
Copy the link for Callback URL which will looks something like this:https://chat.openai.com/aip/g-16b19be82471cb3841d9ad5515f26d51c0206aaf/oauth/callback
Update the Rememberizer App Information
GPT Link and Callback URL
Fill in the GPT Link and the Callback URL from the above step and save the Application
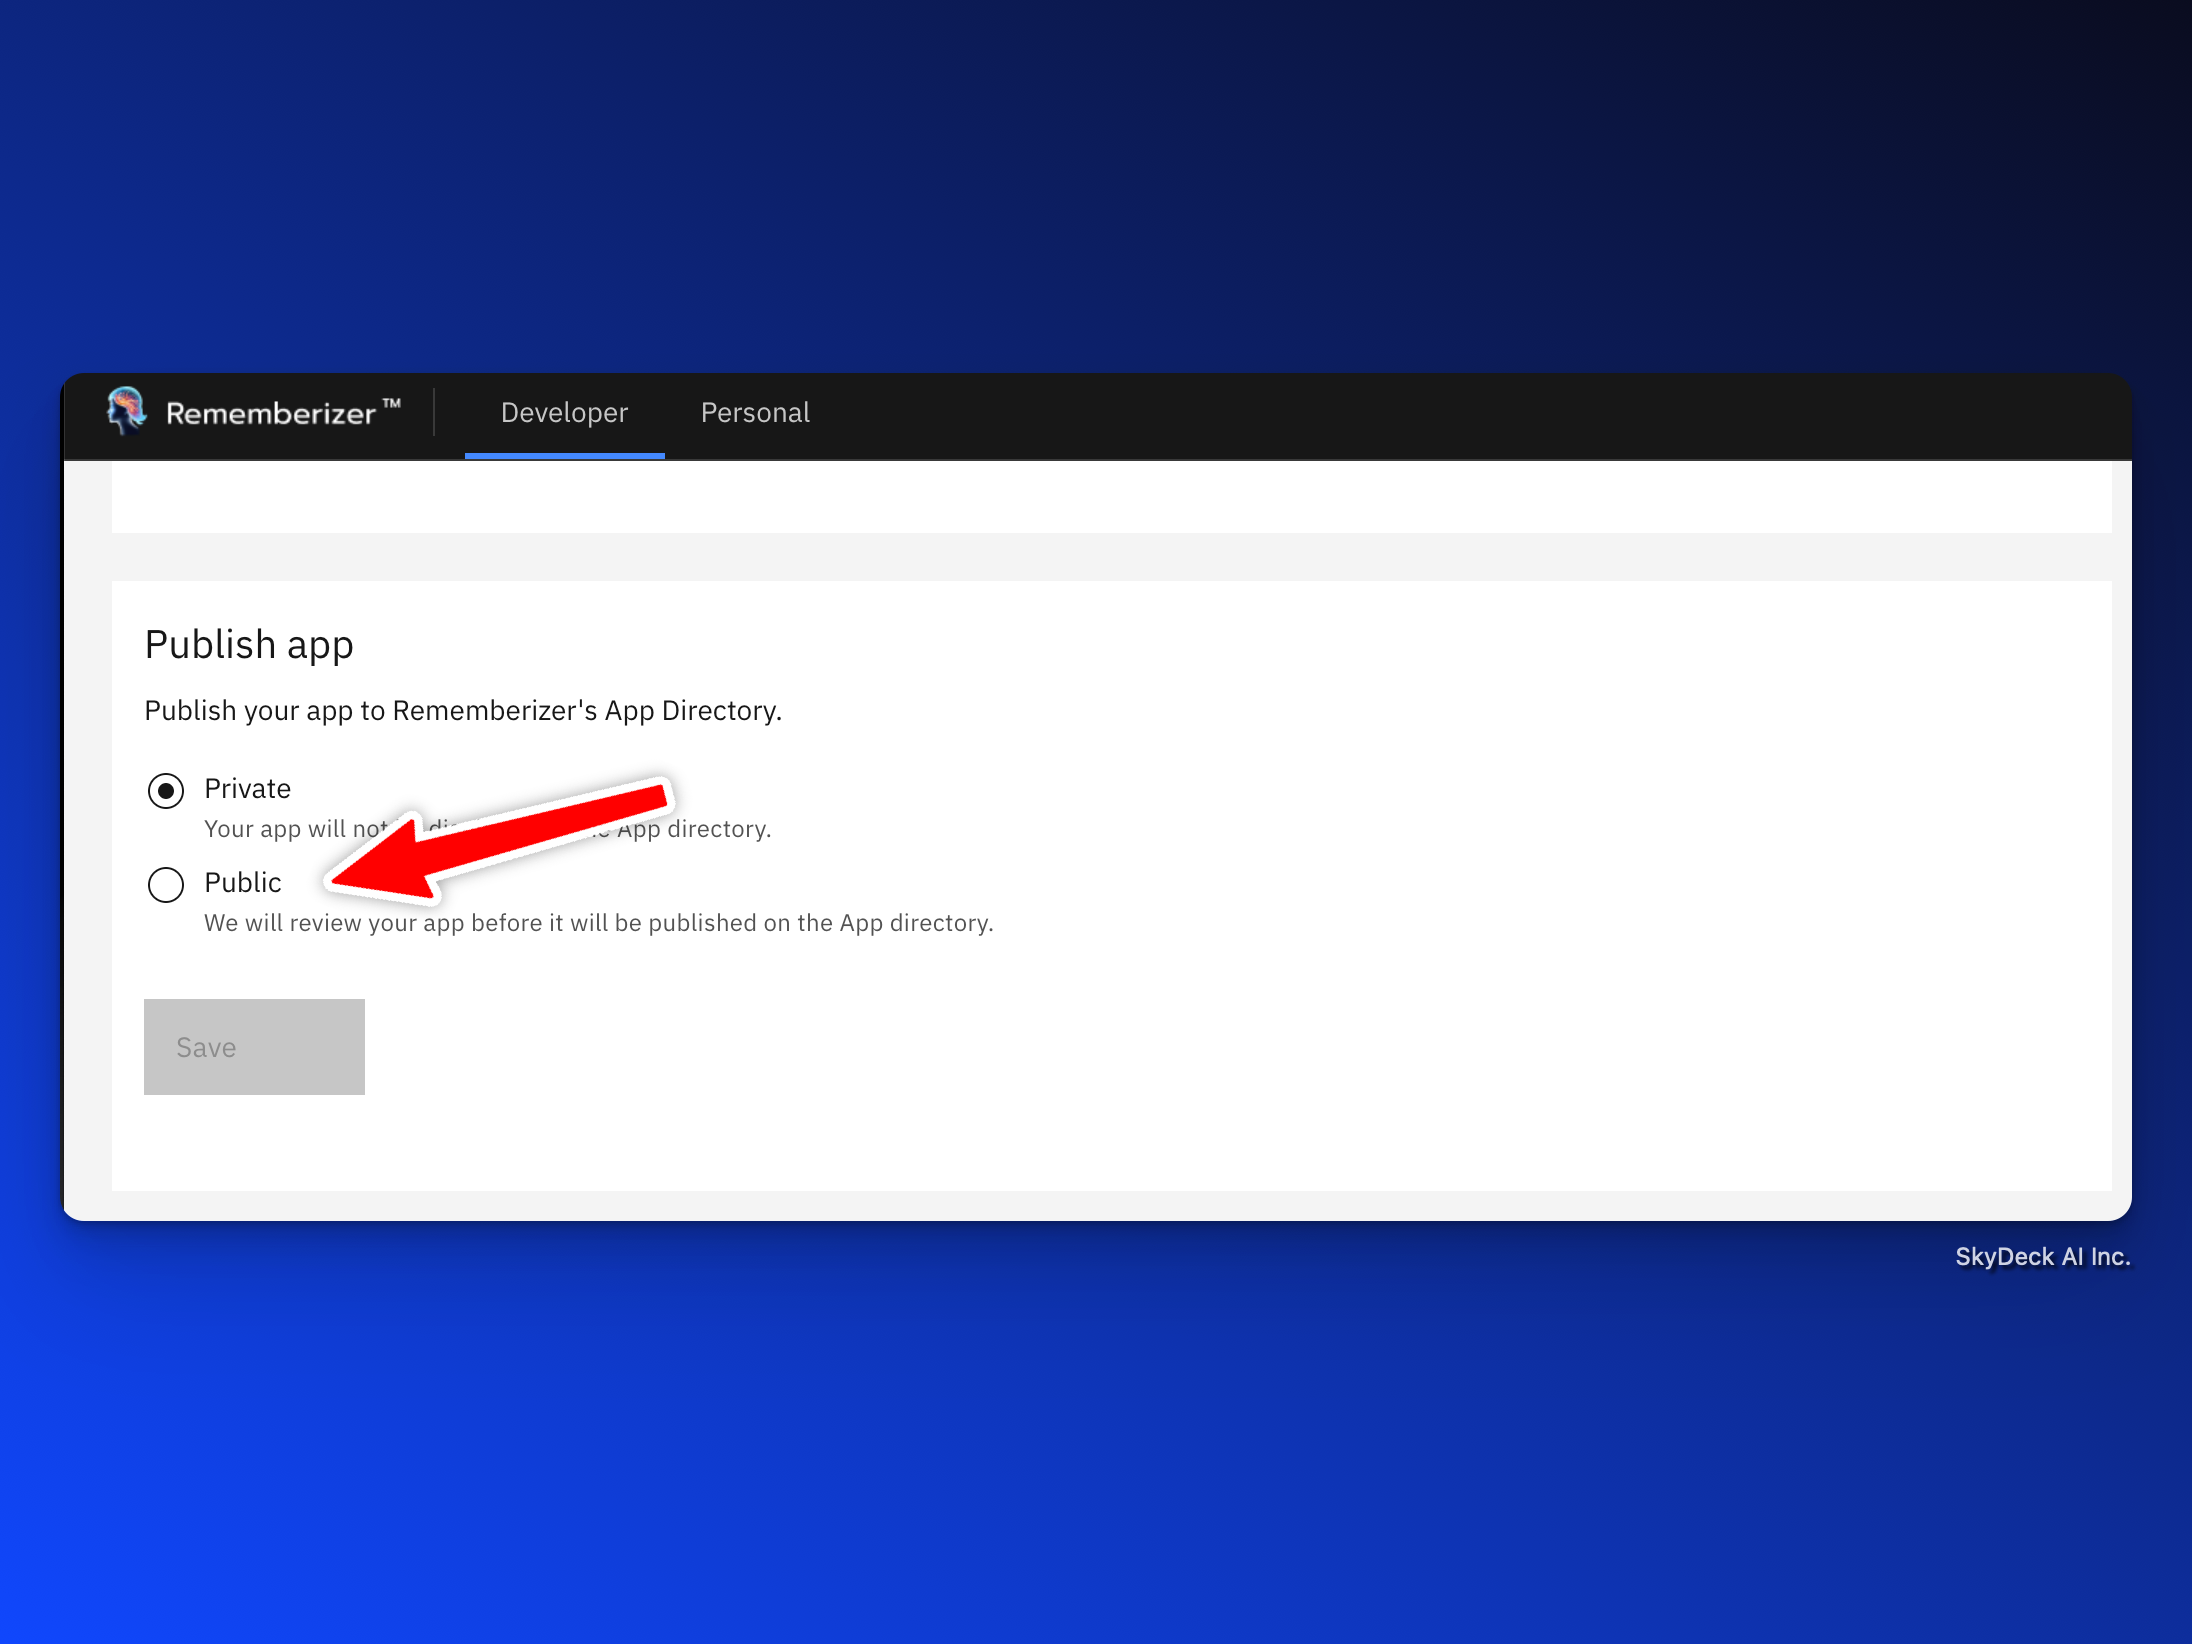
Publish as Public, if you want your app in the Featured App Directory
Once we review the app, if no problems, we will publish the ap and let you know. This will make your Custom GPT visible to our users and we will actively advertise your GPT to our user base.
And now we can test the app
To test you will have to create a user account and go through the process of testing your GPT as a user. We have created a guide for that here: https://try.rememberizer.ai/blog/rememberizer-gpt-a-first-time-user-guide
If you intend to develop your own AI application instead of using a custom GPT, please refer to the further reading section.
This repo includes:
https://github.com/skydeckai/rememberizer-integration-samples
- developer_guide.ipynb: This Jupyter Notebook serves as a comprehensive guide for developers looking to integrate with Rememberizer. It includes step-by-step instructions on registering your application, implementing OAuth2 for user authorization, and utilizing Rememberizer's APIs to access user data. The notebook combines explanatory text with executable code snippets, offering a hands-on approach to learning the integration process.
- callback_server.py: This Python script implements a simple Flask server designed to handle the OAuth2 callback for Rememberizer integrations. It listens for the redirect URI after a user authorizes your application, capturing the authorization code sent by Rememberizer. This code is then used to request access tokens for API interactions. The script is an essential component for developers without an existing server setup, facilitating quick and easy OAuth2 flow testing and implementation.
- rememberizer_openapi: OpenAPI schema to put in the GPT.
Here is a walkthrough video:

