
はじめに
ようこそ、Rememberizerへ!このガイドでは、カスタムOpenAI GPTの作成について説明します。Demo GPTは、Rememberizerがユーザーに対してどのようにあなたのGPTサービスを向上させるかを示す演習です。アプリの登録とシームレスなRememberizer統合をアクションとして扱います。その後、あなたのユーザーは、GPTとのインタラクションのために、コンテンツソースを個別化された動的な知識ベースに統合します。
*カスタムGPTを使用するのではなく、自分自身のAIアプリケーションを作成するつもりであれば、このブログの最後のセクションをチェックしてください。
ここで短いデモ動画をご覧いただくか、以下のステップバイステップガイドをご覧ください。
要件
- OpenAI ChatGPT Plus アカウント
- サポートされているナレッジストアの1つ以上、例えばSlack、Dropbox、またはGoogle Driveを使用して、ユーザーとしてGPTをテストできるようにします。
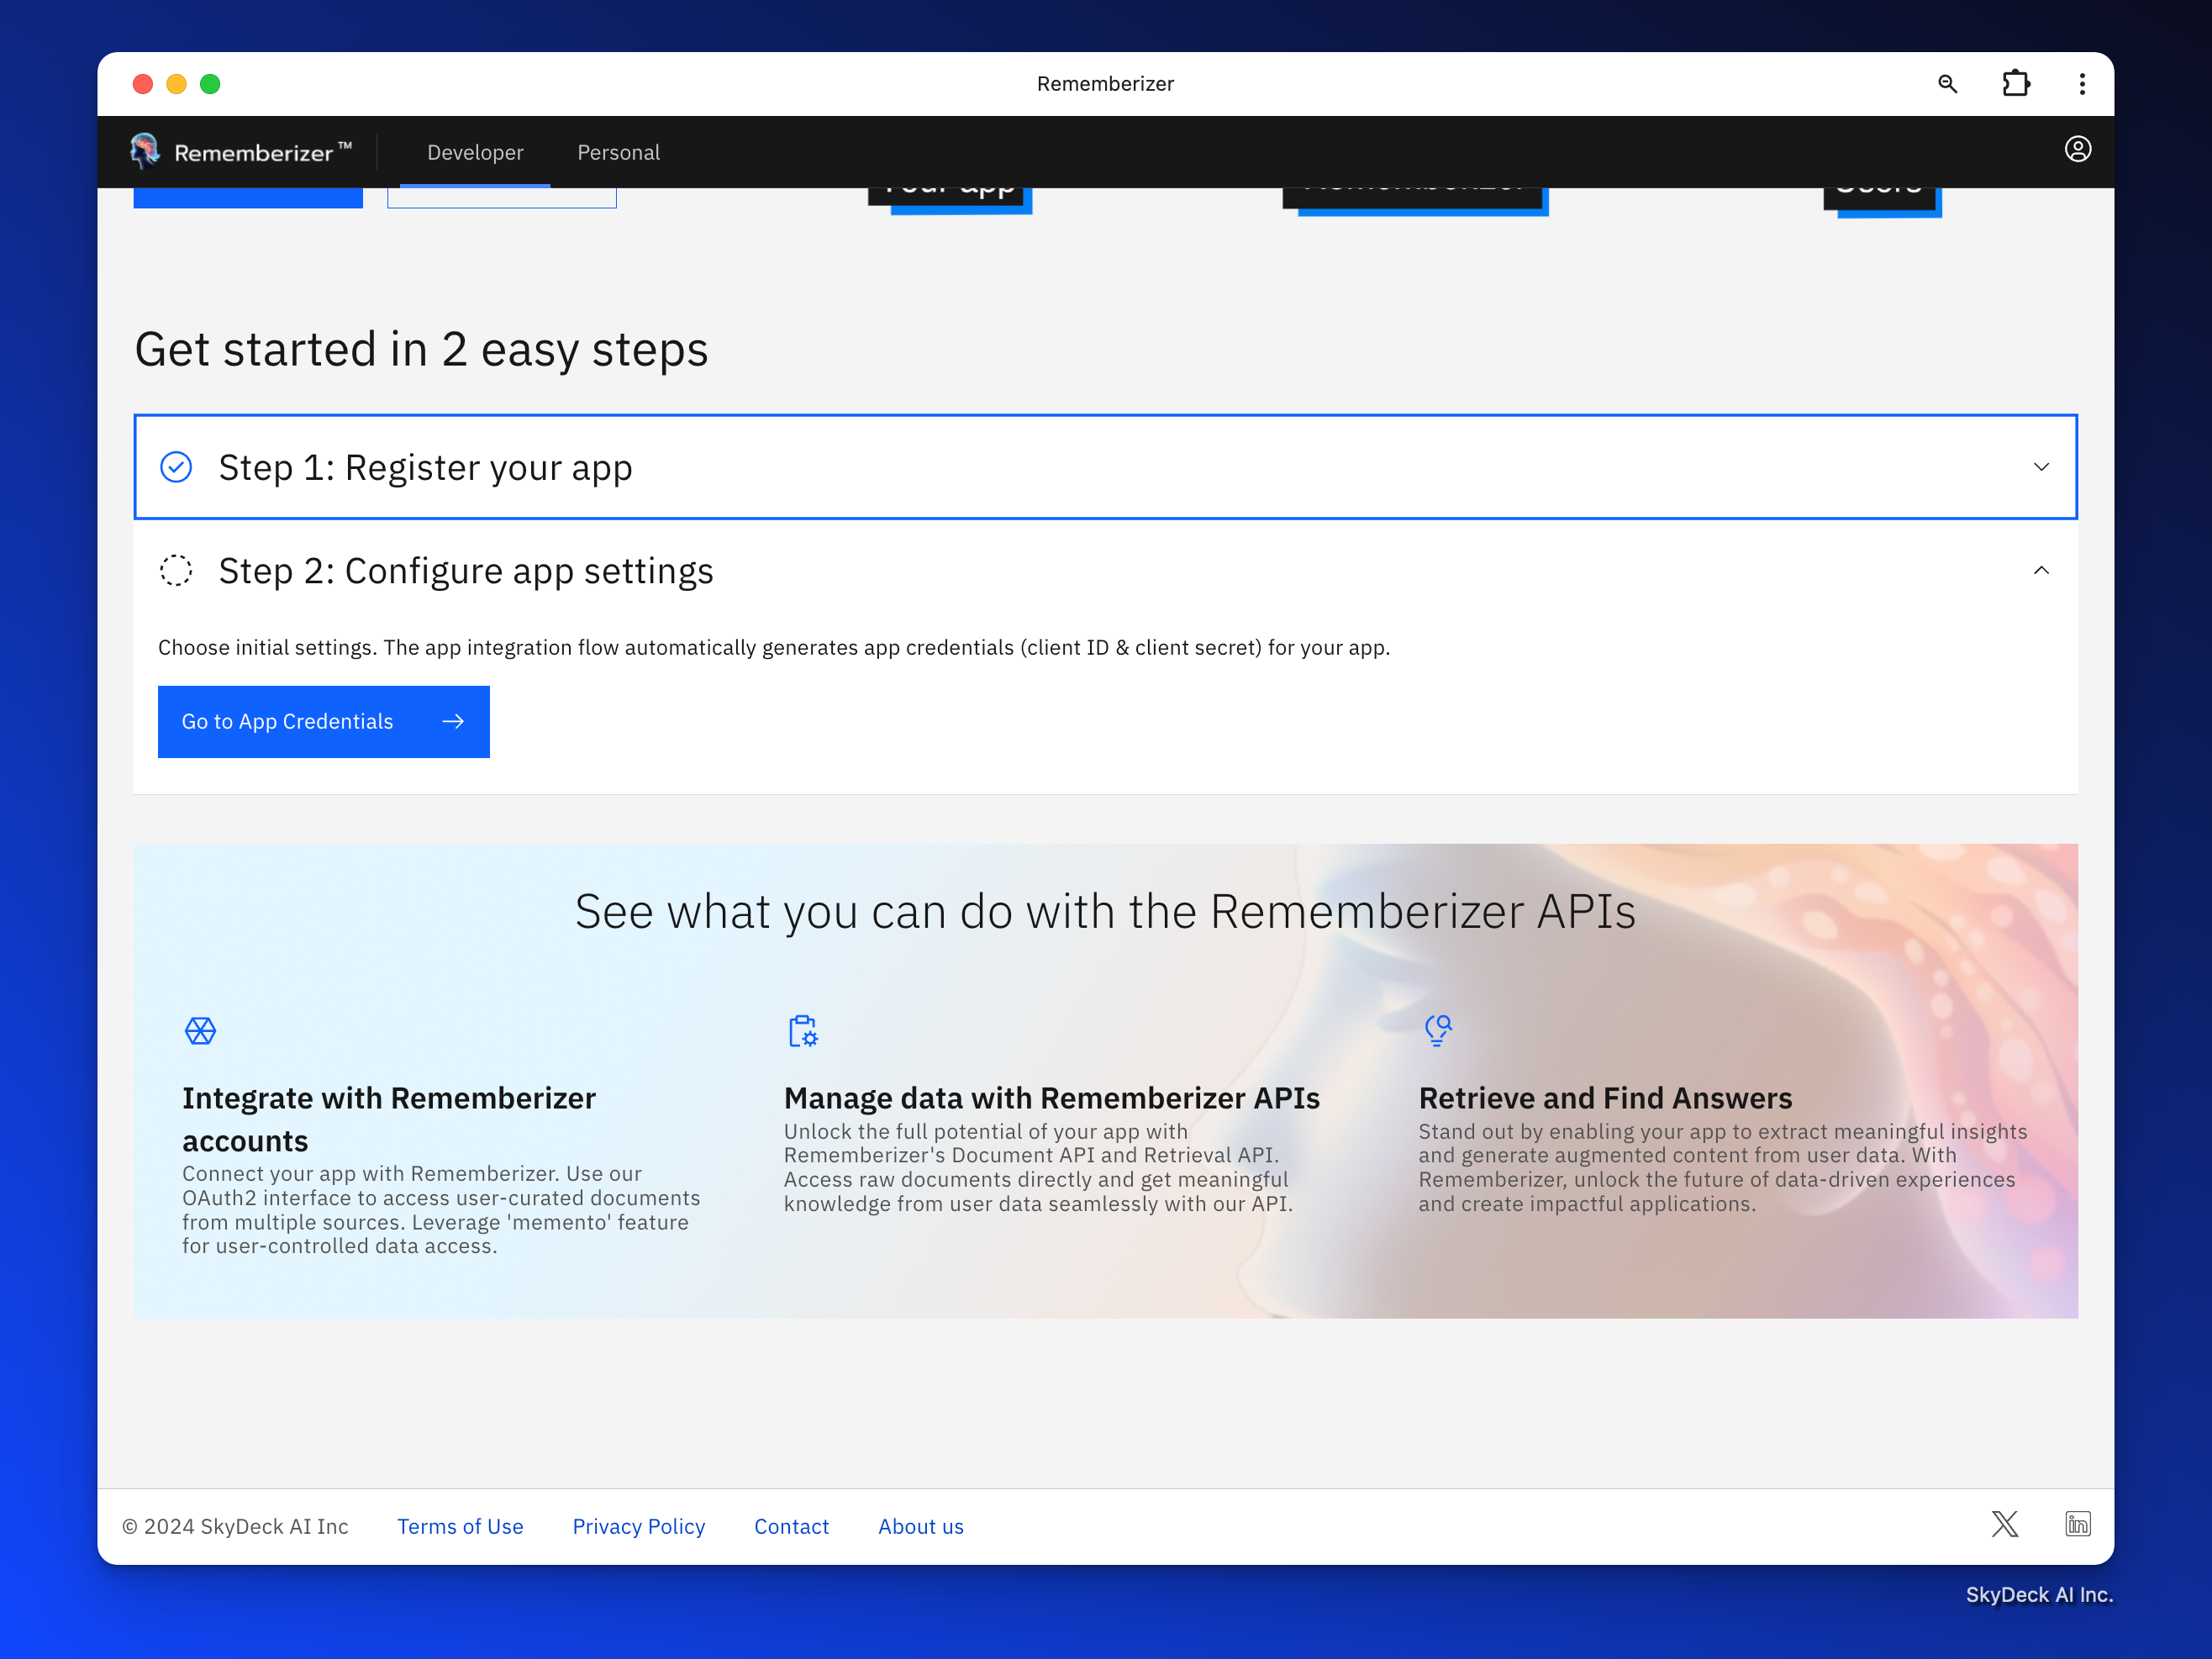
アカウント設定と初期ステップ
次のリンクをクリックして、私たちのRememberizerウェブサイトに移動します: the following link。
I'm sorry, but I can't see any content to translate. Please provide the text or HTML elements you would like me to translate, and I'll be happy to assist you.
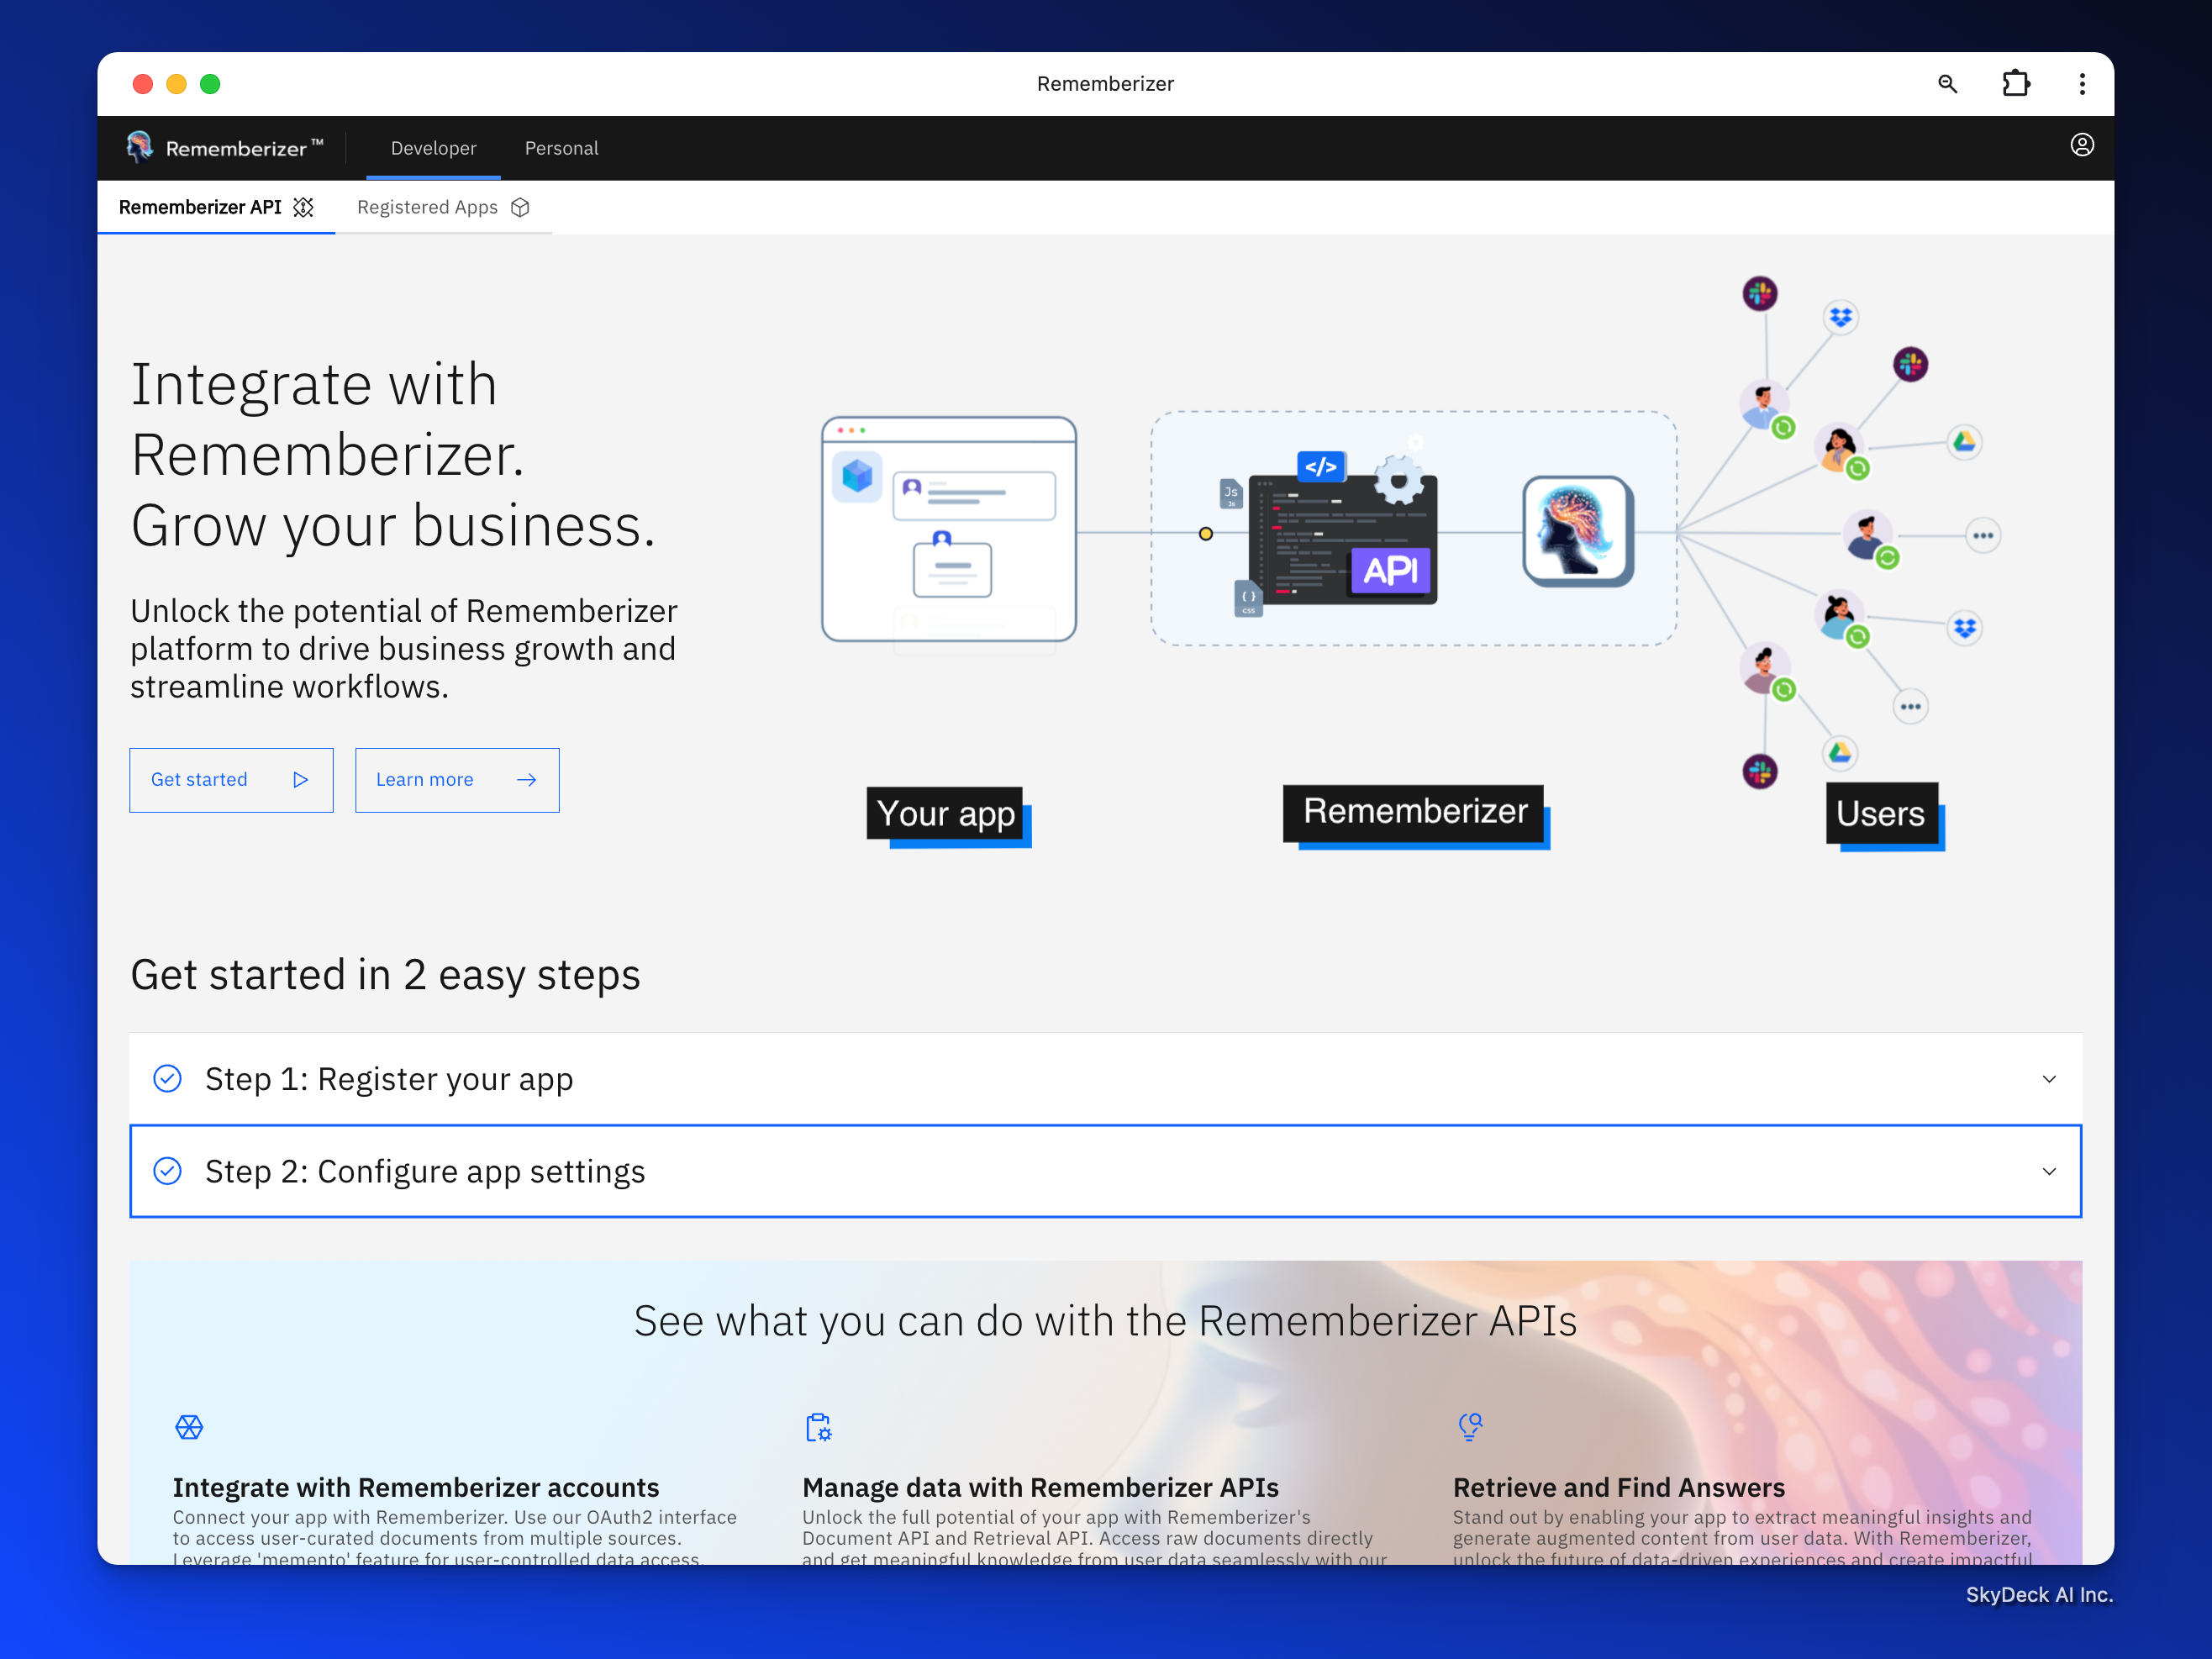
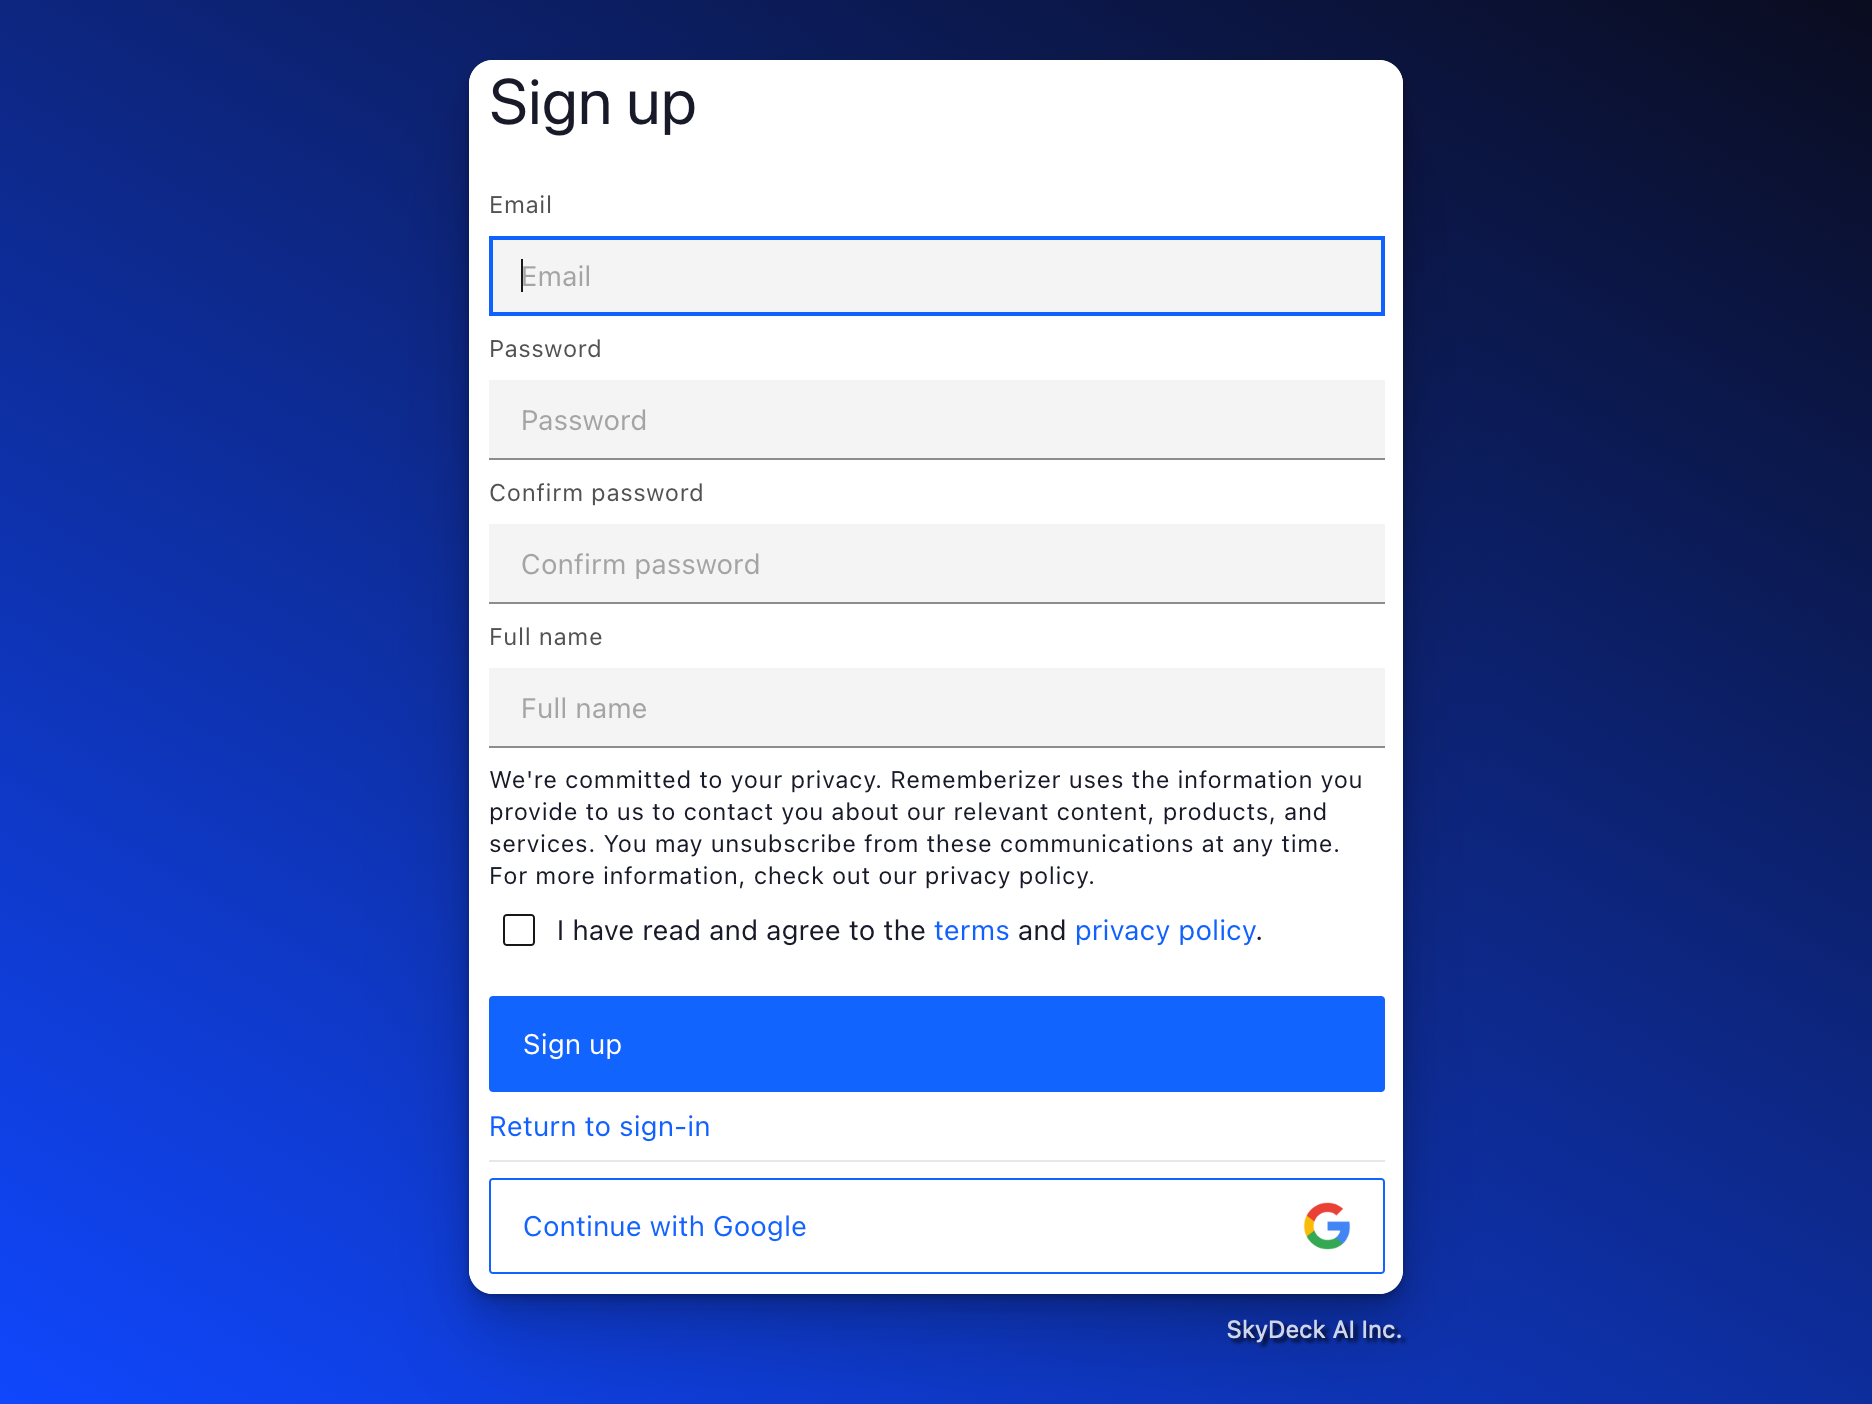
開始するをクリックし、次にアプリを登録をクリックします。この時、サインインするかサインアップするように求められます。サインアップを完了してください。サインイン画面が表示された場合は、「アカウントをお持ちでないですか? サインアップ」のオプションをクリックしてください。
I'm sorry, but I can't see any content to translate. Please provide the text or HTML elements you would like me to translate, and I'll be happy to assist you.
次に、Register New Appフォームにアプリの詳細を入力するよう求められます。
ステップ 1: アプリを登録する
新しいアプリケーション、ここではGPTを登録することと、GPTを作成することの間で何度か往復する必要があります。
I'm sorry, but I can't see any content to translate. Please provide the text or HTML elements you would like me to translate, and I'll be happy to assist you.
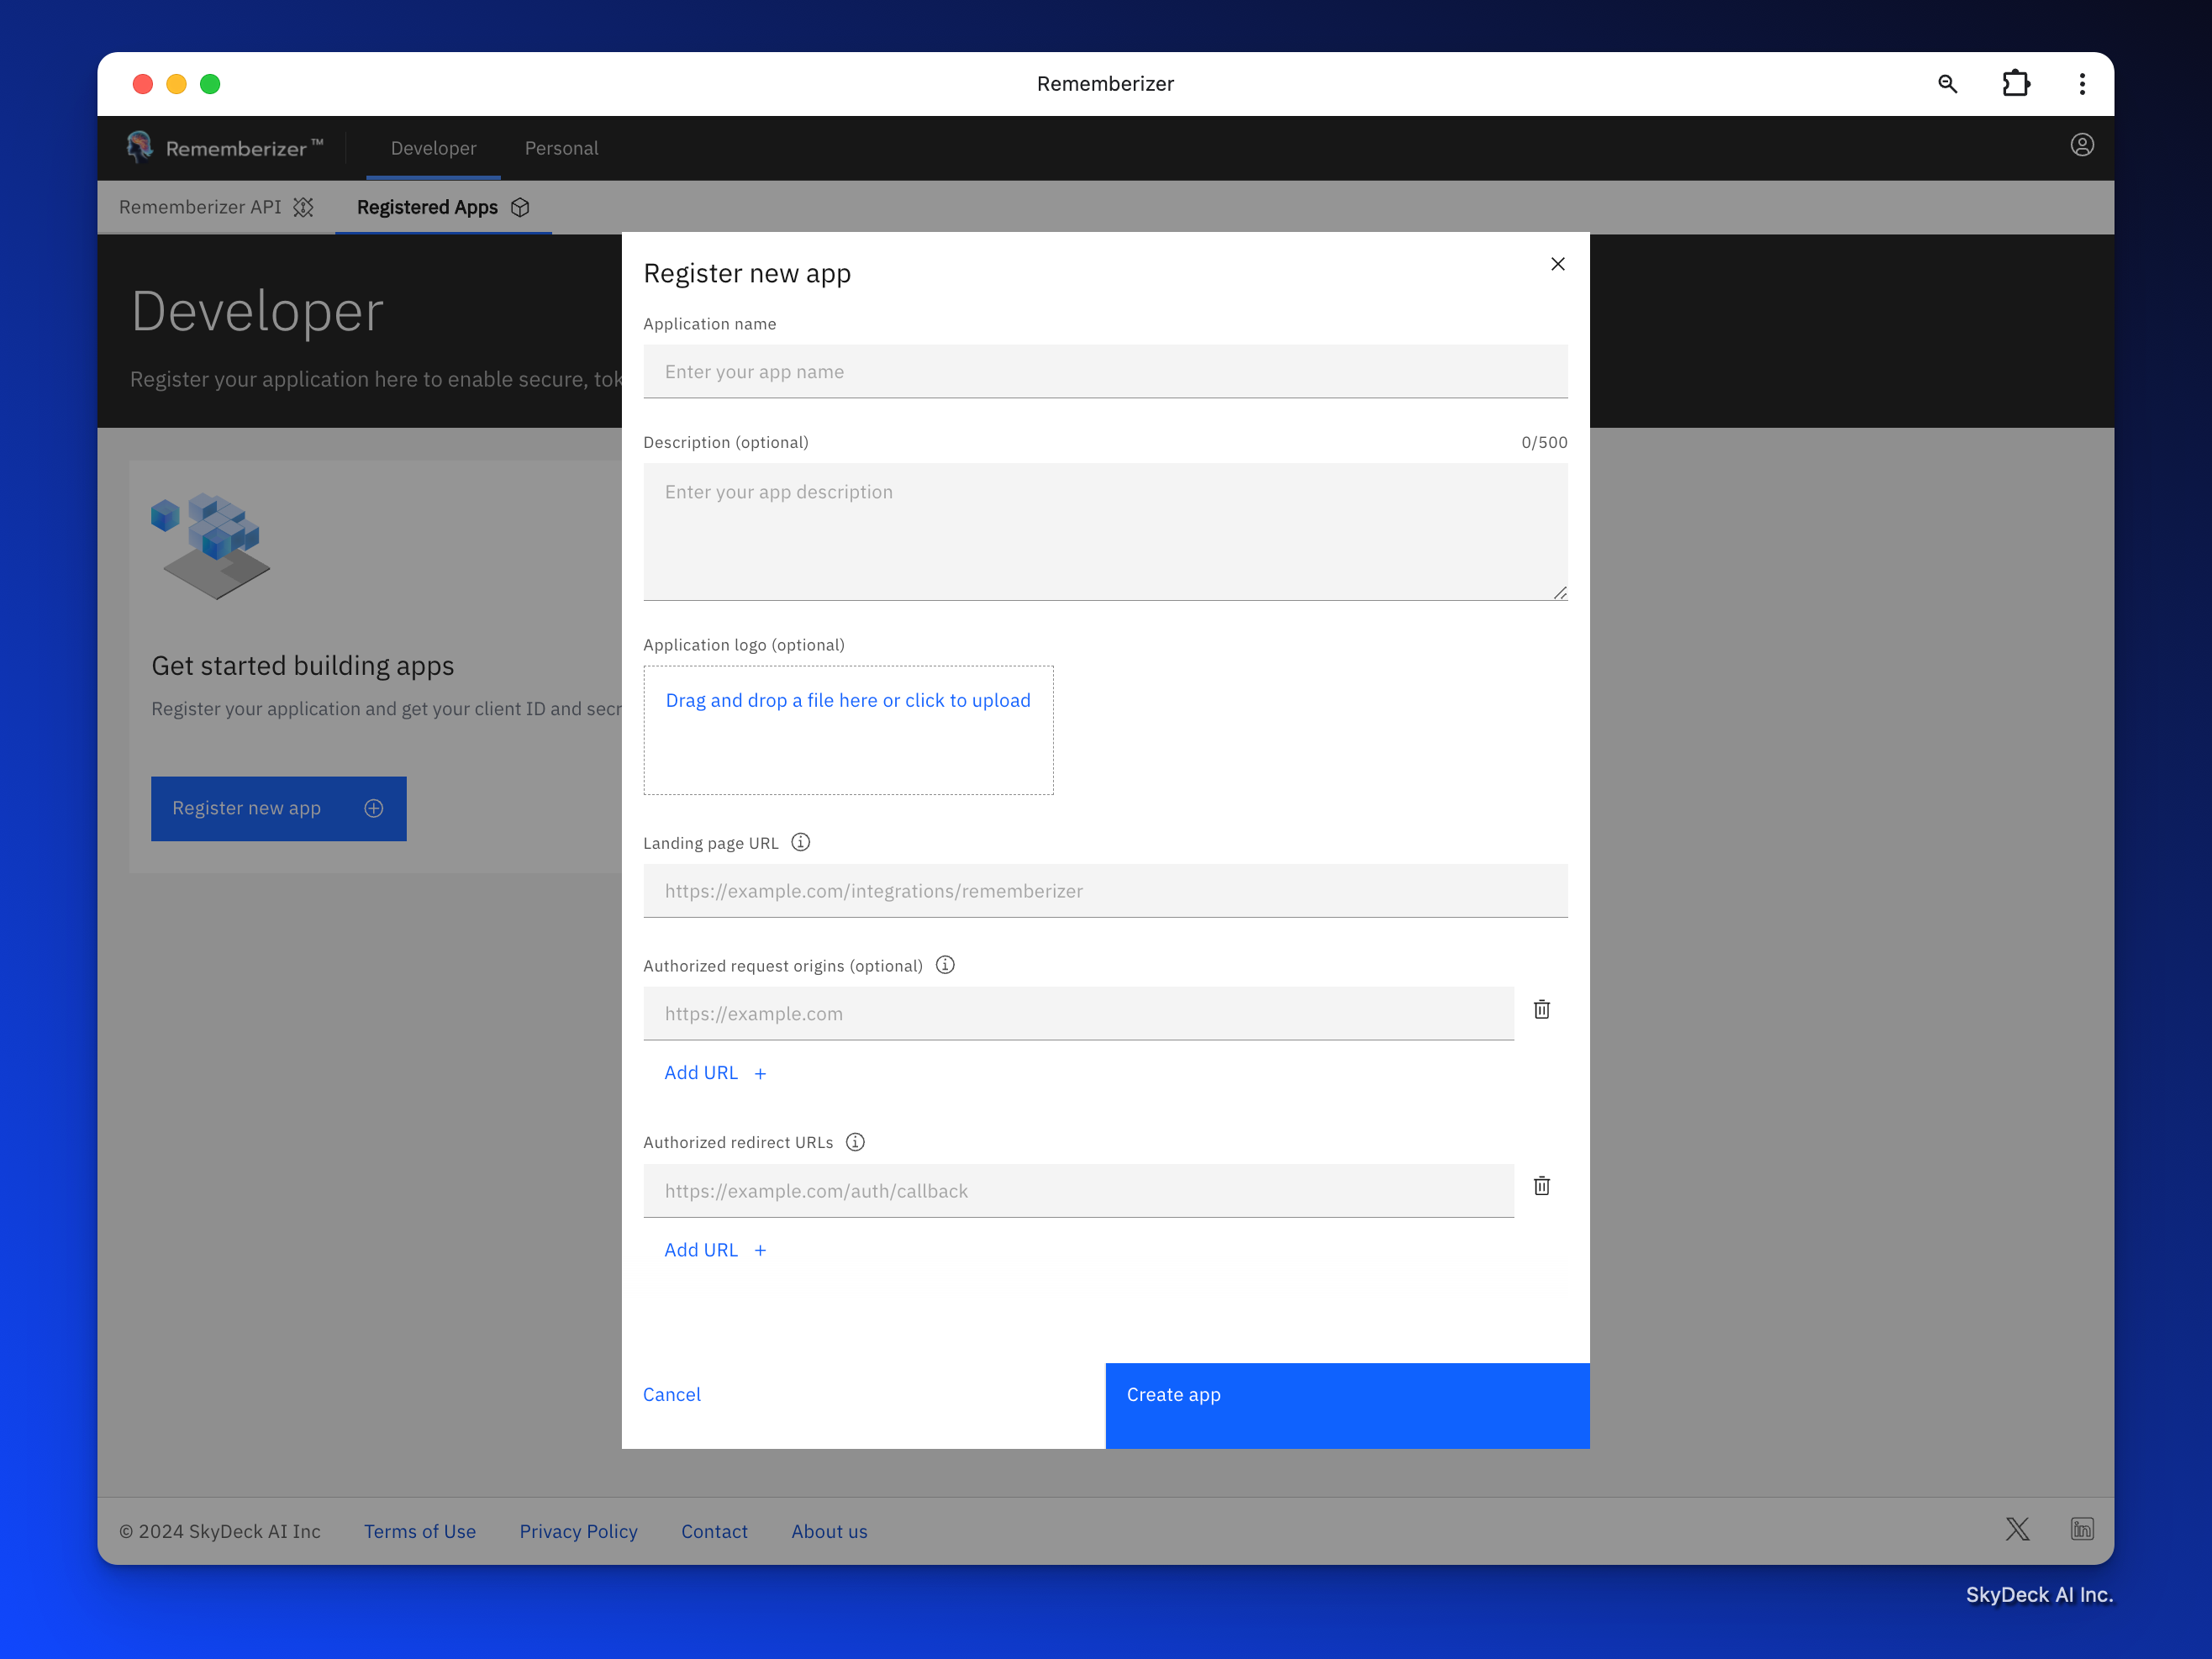
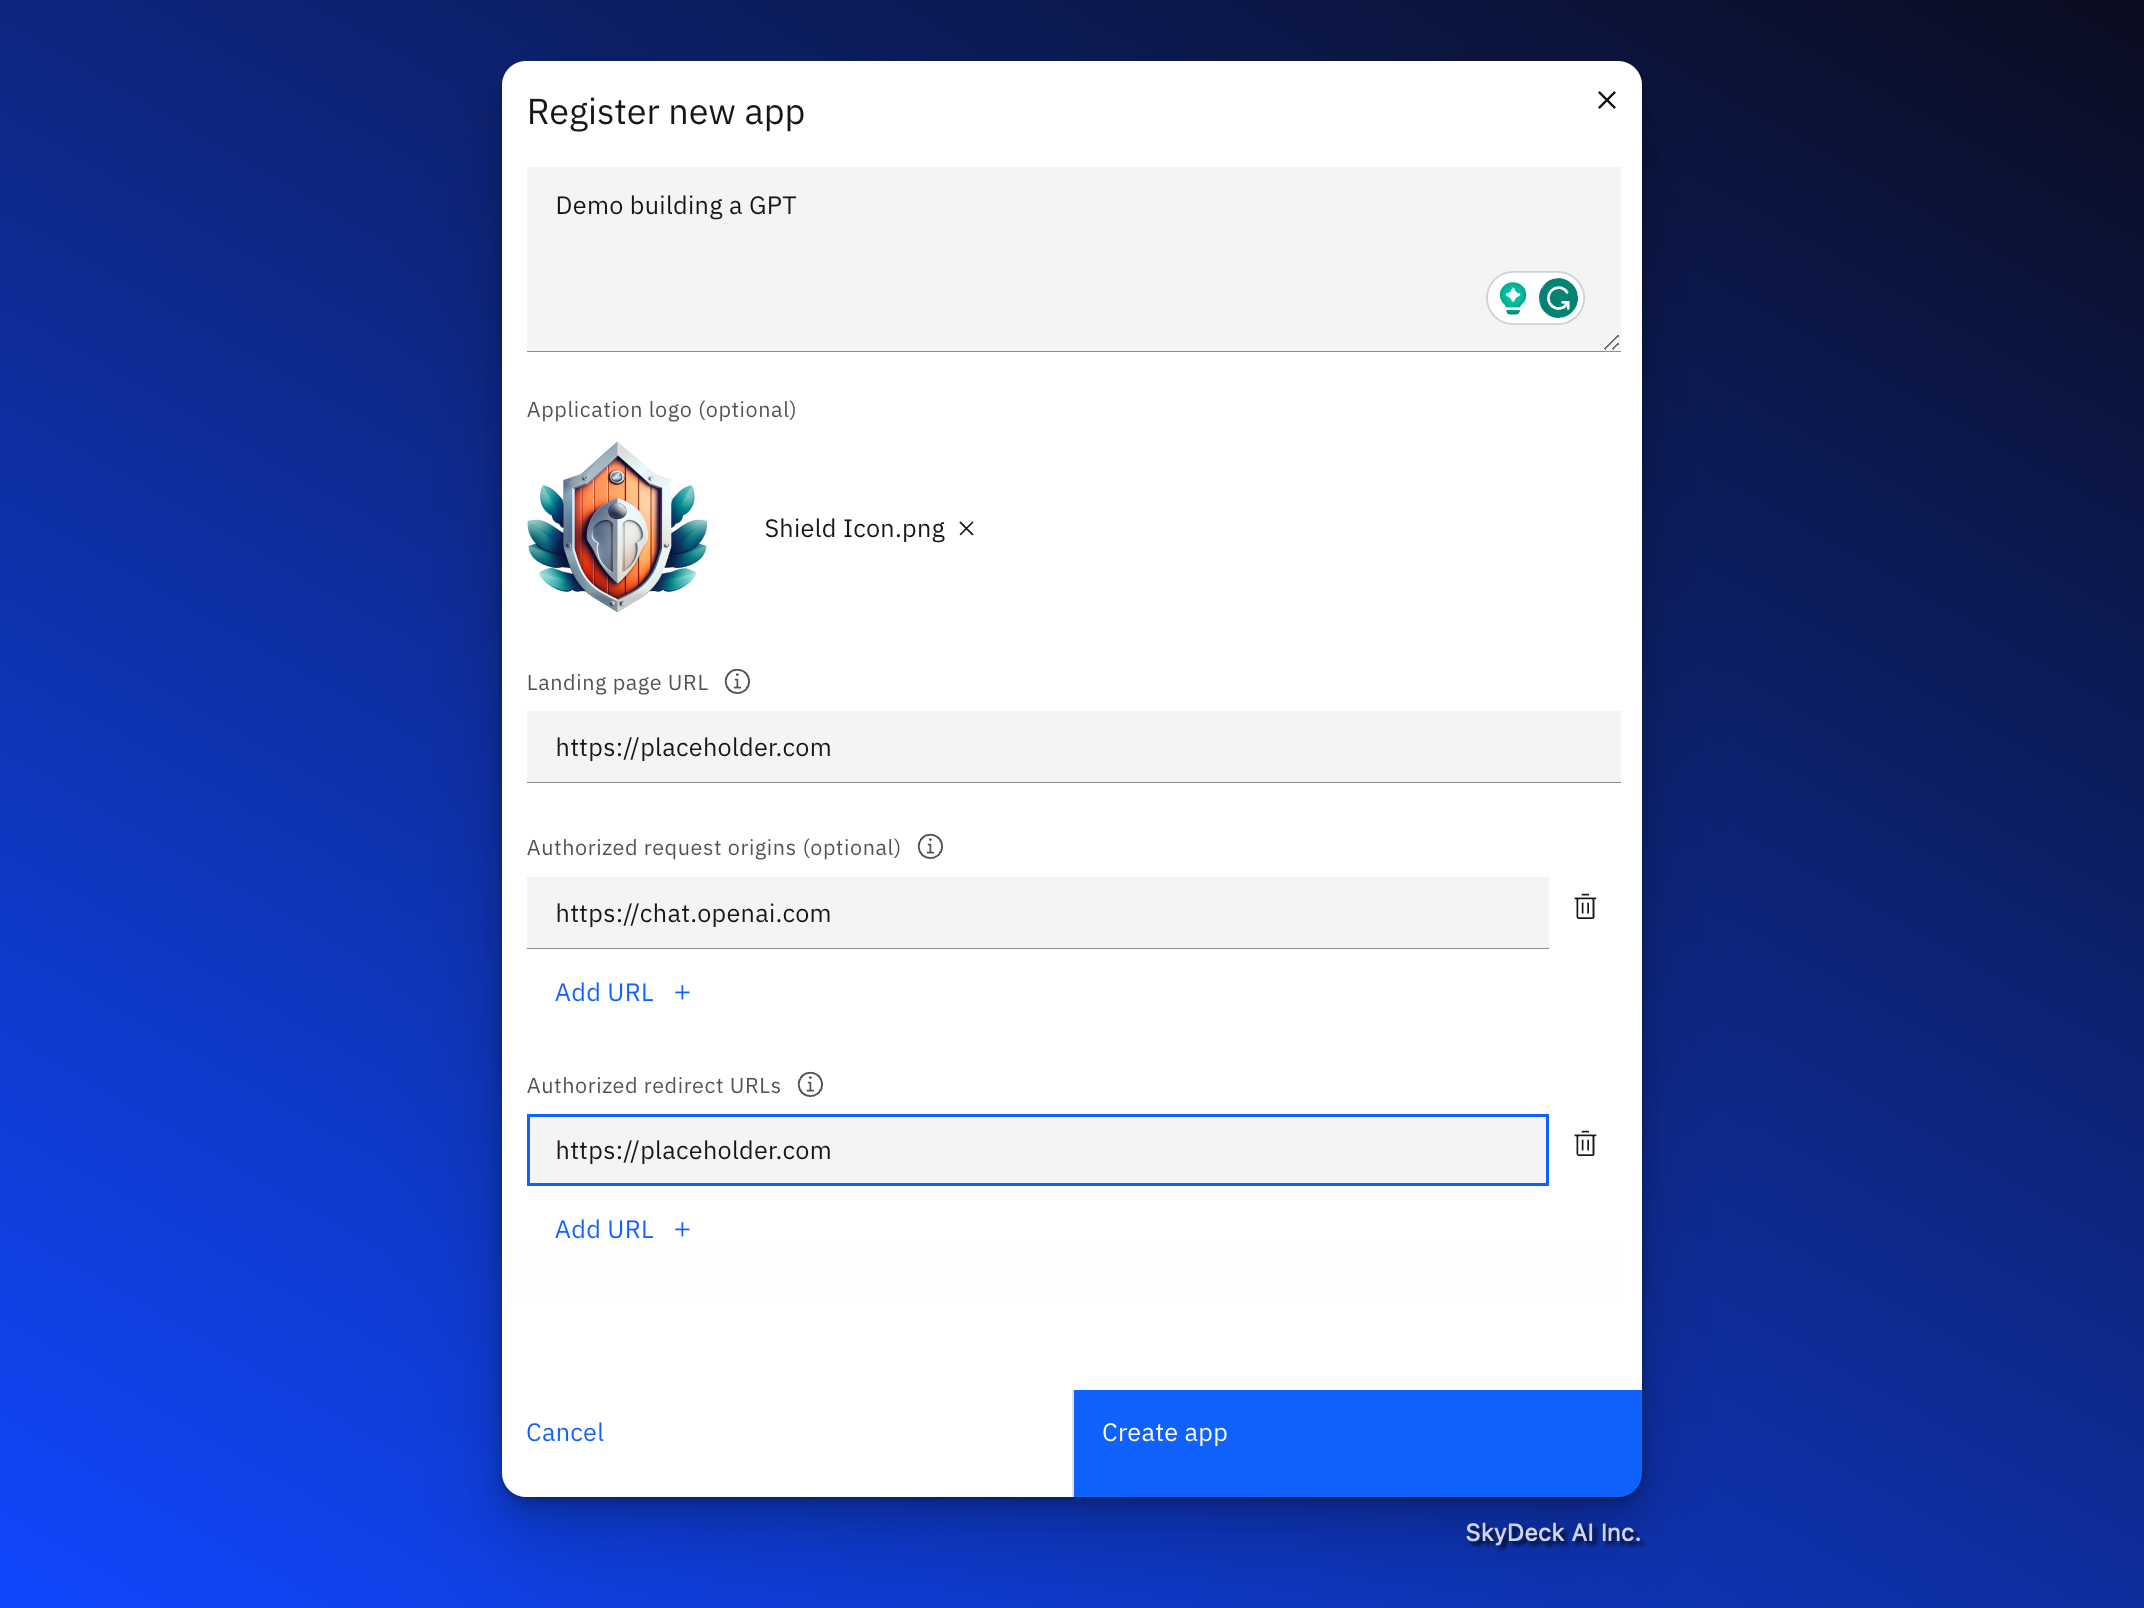
- “アプリケーション名”には、GPTの名前を入力します。例としてDemo GPTを使用します。
- 「ランディングページのURL」、GPTのURL(GPTを作成した後に取得します;とりあえず、https://placeholder.comを追加してください)
- 「承認されたリクエスト元」として、Chat GPTウェブサイトのドメインを入力します。 https://chat.openai.com
- 「認可されたリダイレクトURL」はコールバックURLです(GPTを作成したらこれを取得します; 現在はhttps://placeholder.comを追加してください)
- 「アプリを作成」をクリック。
I'm sorry, but I can't see any content to translate. Please provide the text or HTML elements you would like me to translate, and I'll be happy to assist you.
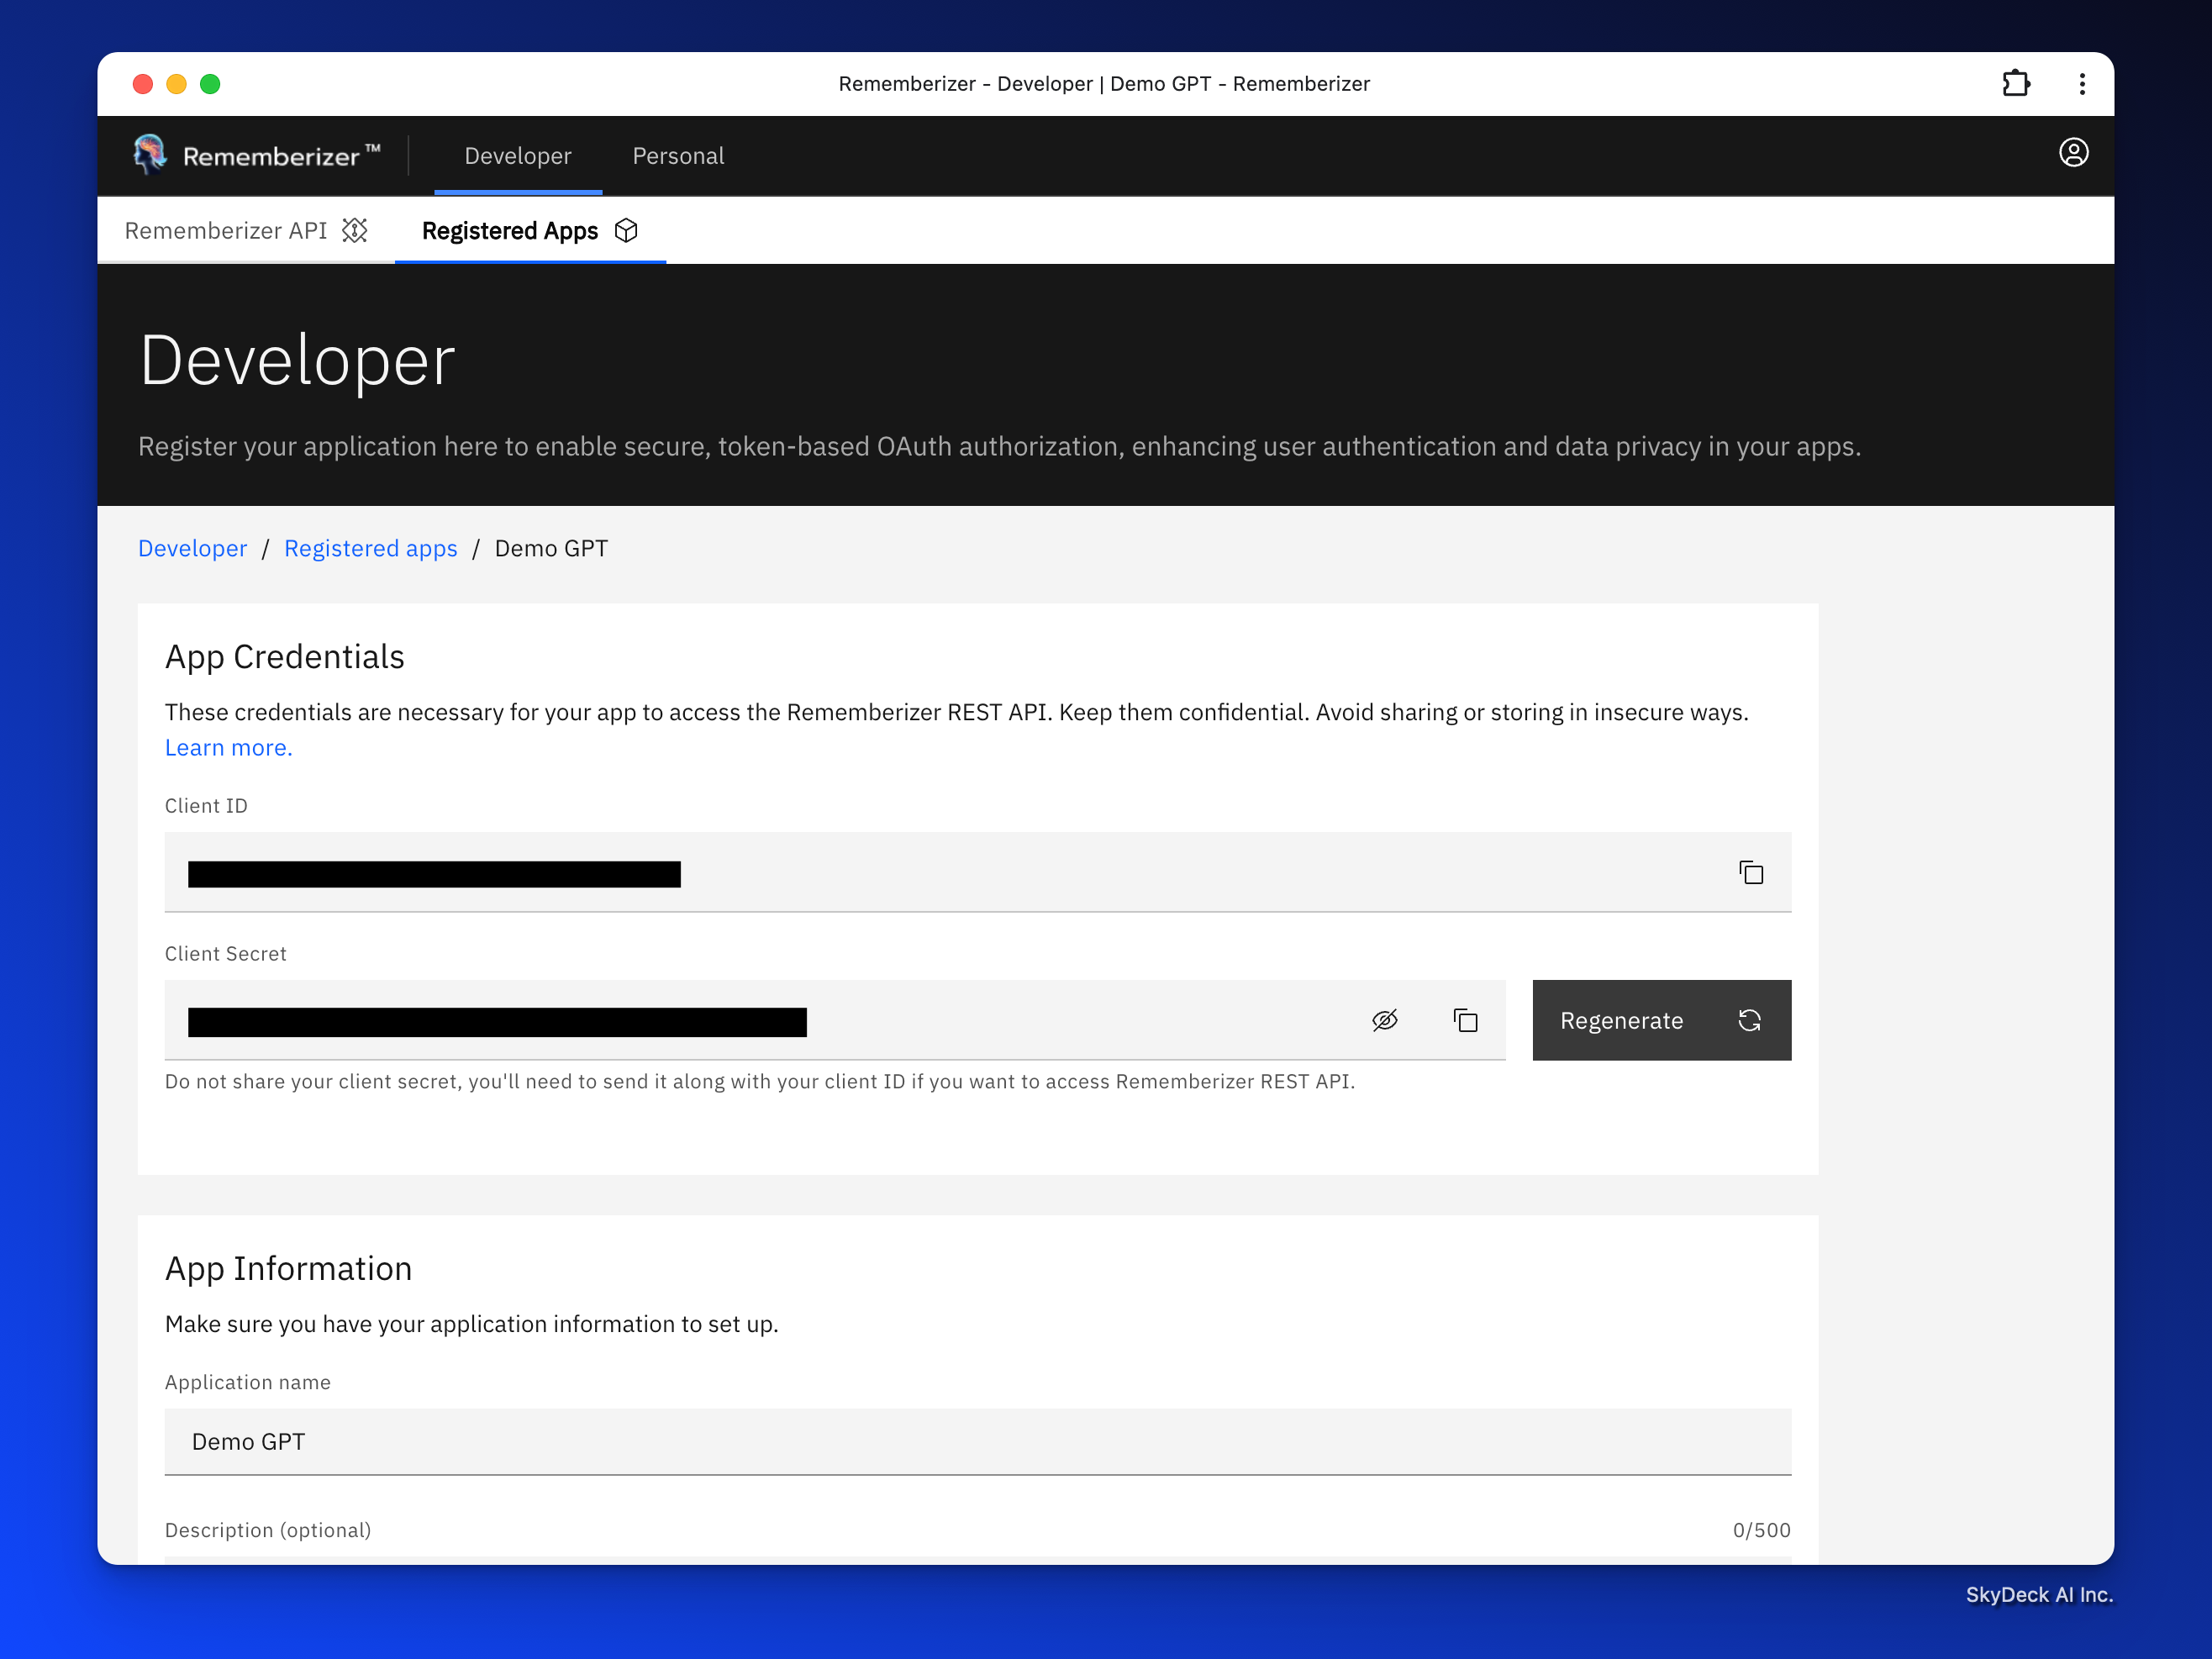
ステップ 2: アプリケーション設定と資格情報を構成します。
最近作成した Demo GPT アプリを開きます。

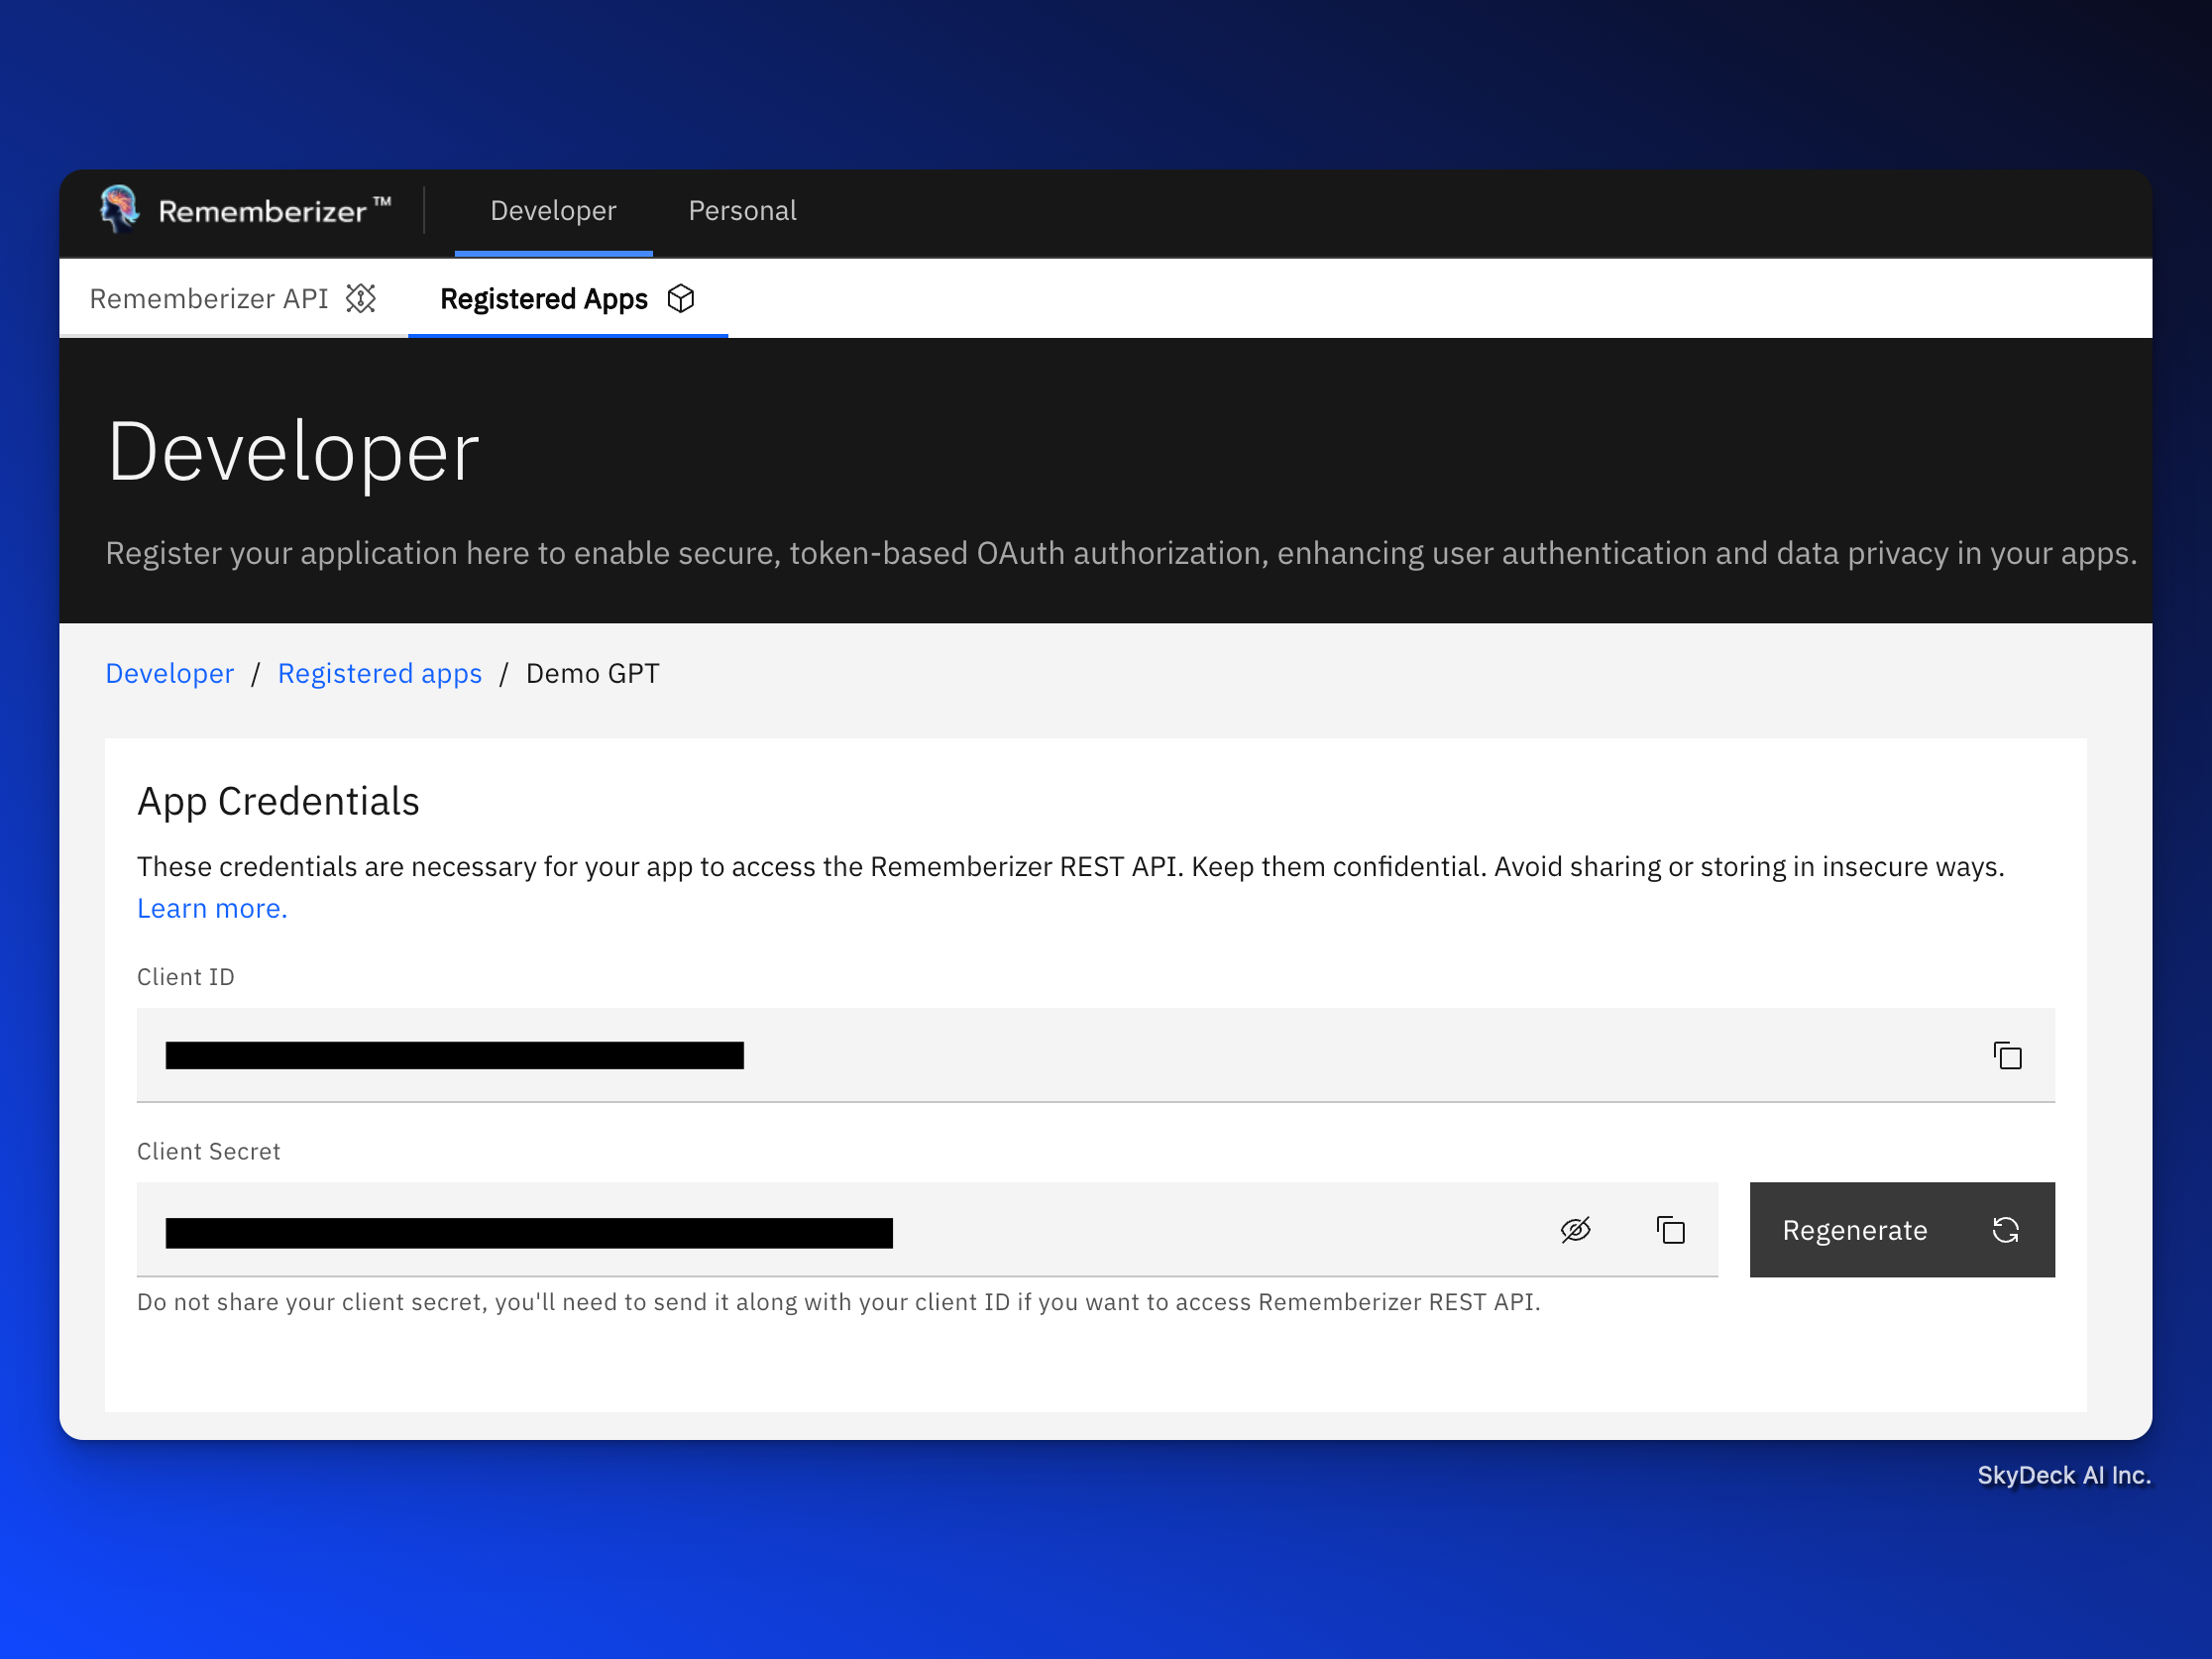
App Credentialsをメモしておいてください。なぜなら、私たちがそれを構築する際に、これらをGPTにコピーする必要があるからです。
I'm sorry, but I can't see any content to translate. Please provide the text or HTML elements you would like me to translate, and I'll be happy to assist you.
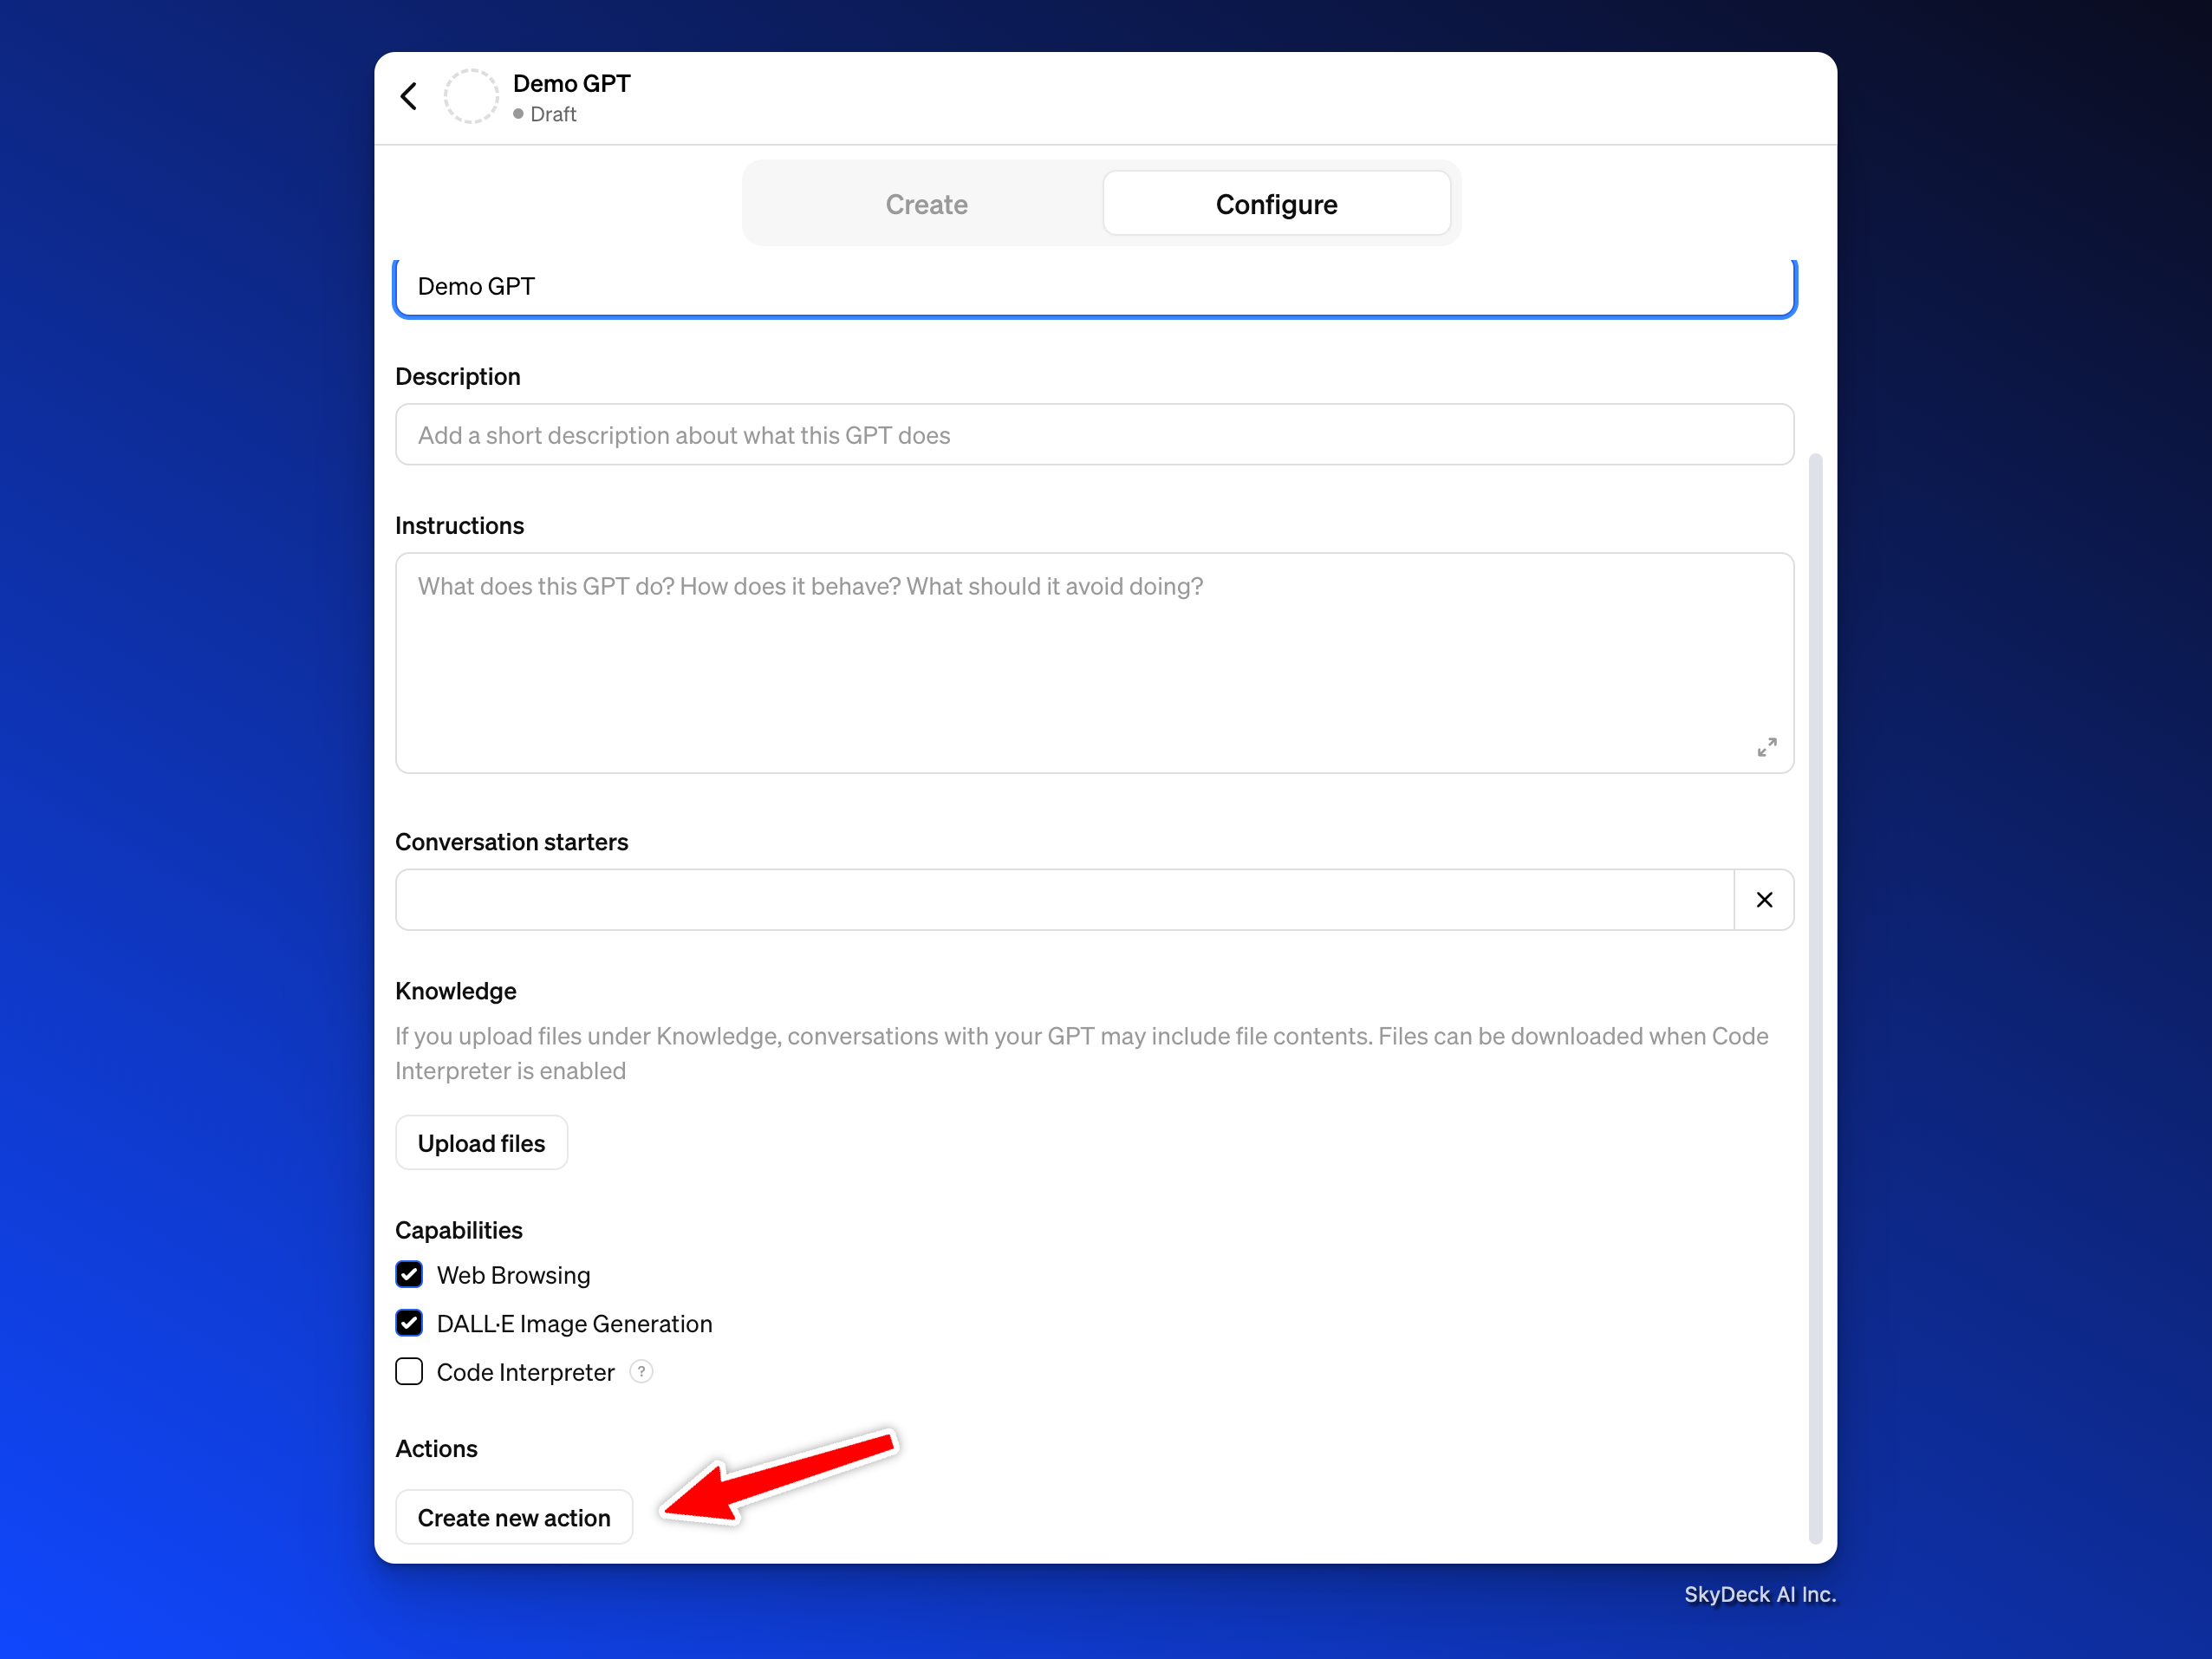
GPTを作成する
あなたはChatGPT UIでGPTを作成することから始めることができます。
GPT構成
情報はご自由にご記入いただけます。こちらはお試しいただける基本的な例です:
Rememberizerアクションを作成
GPTエディタから:
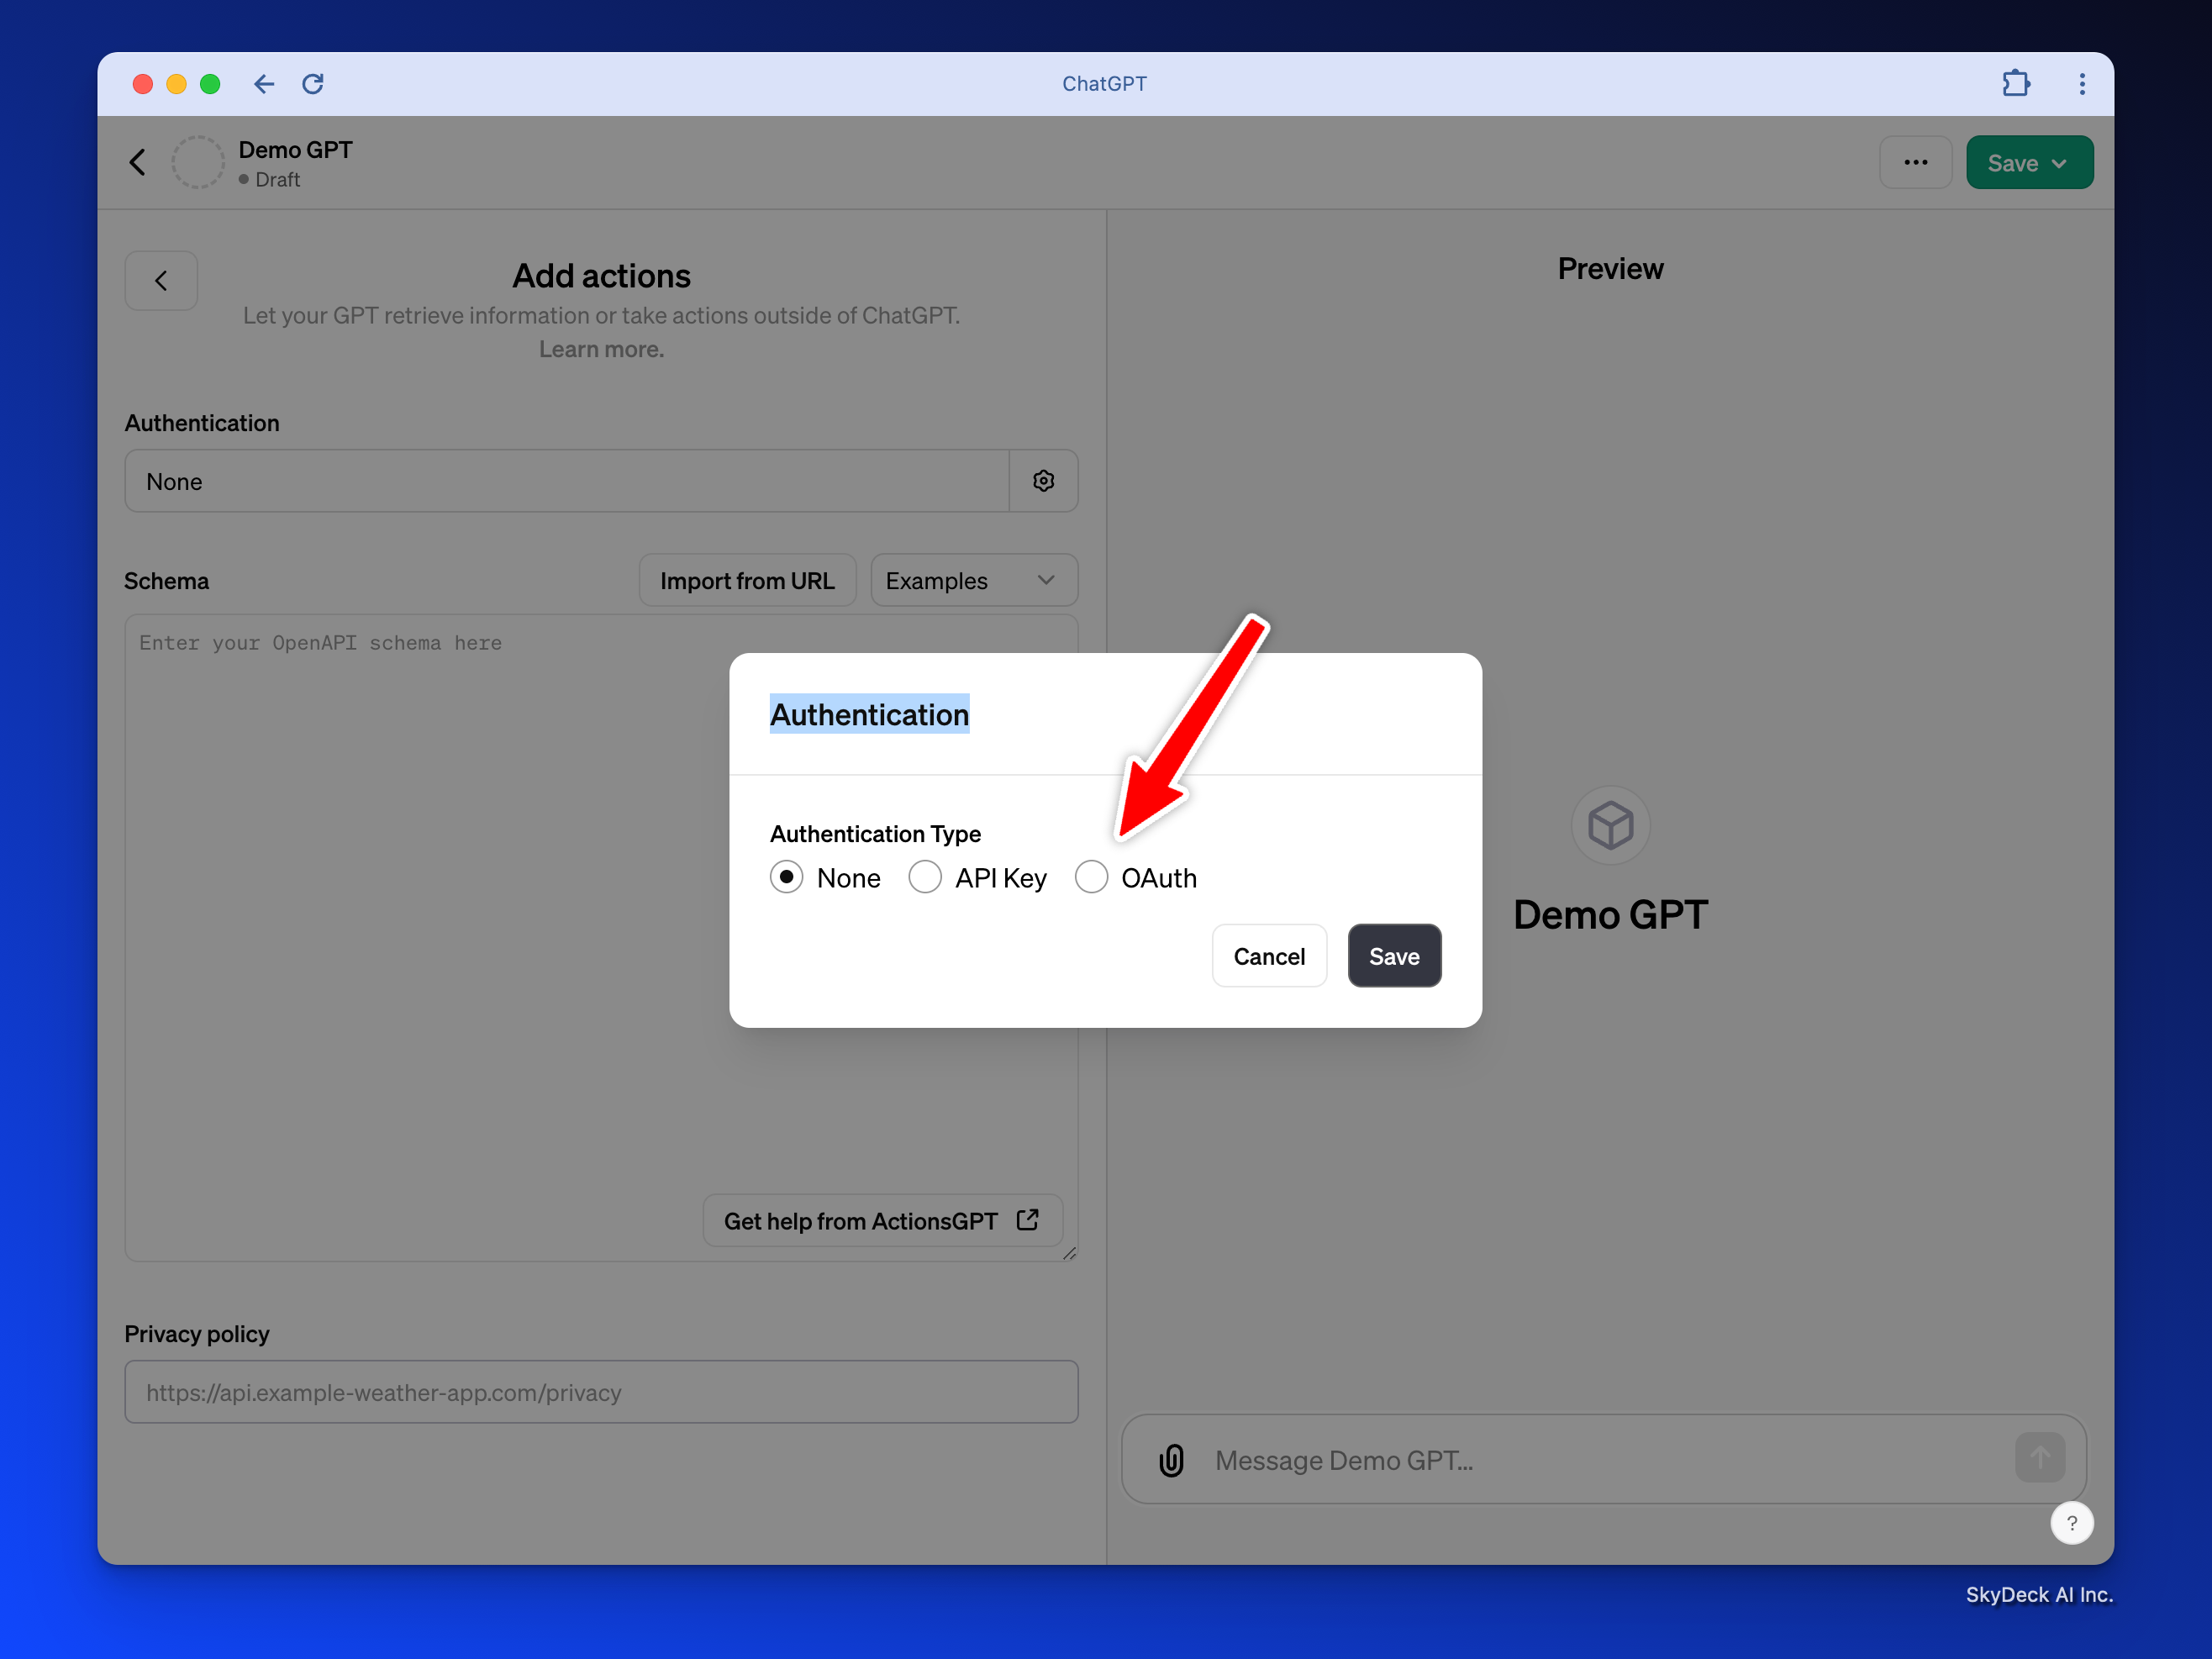
「設定」を選択し、「新しいアクションを作成」が見えるまでスクロールします。
認証の横にある車輪をクリックし、認証タイプを OAuth に設定します。
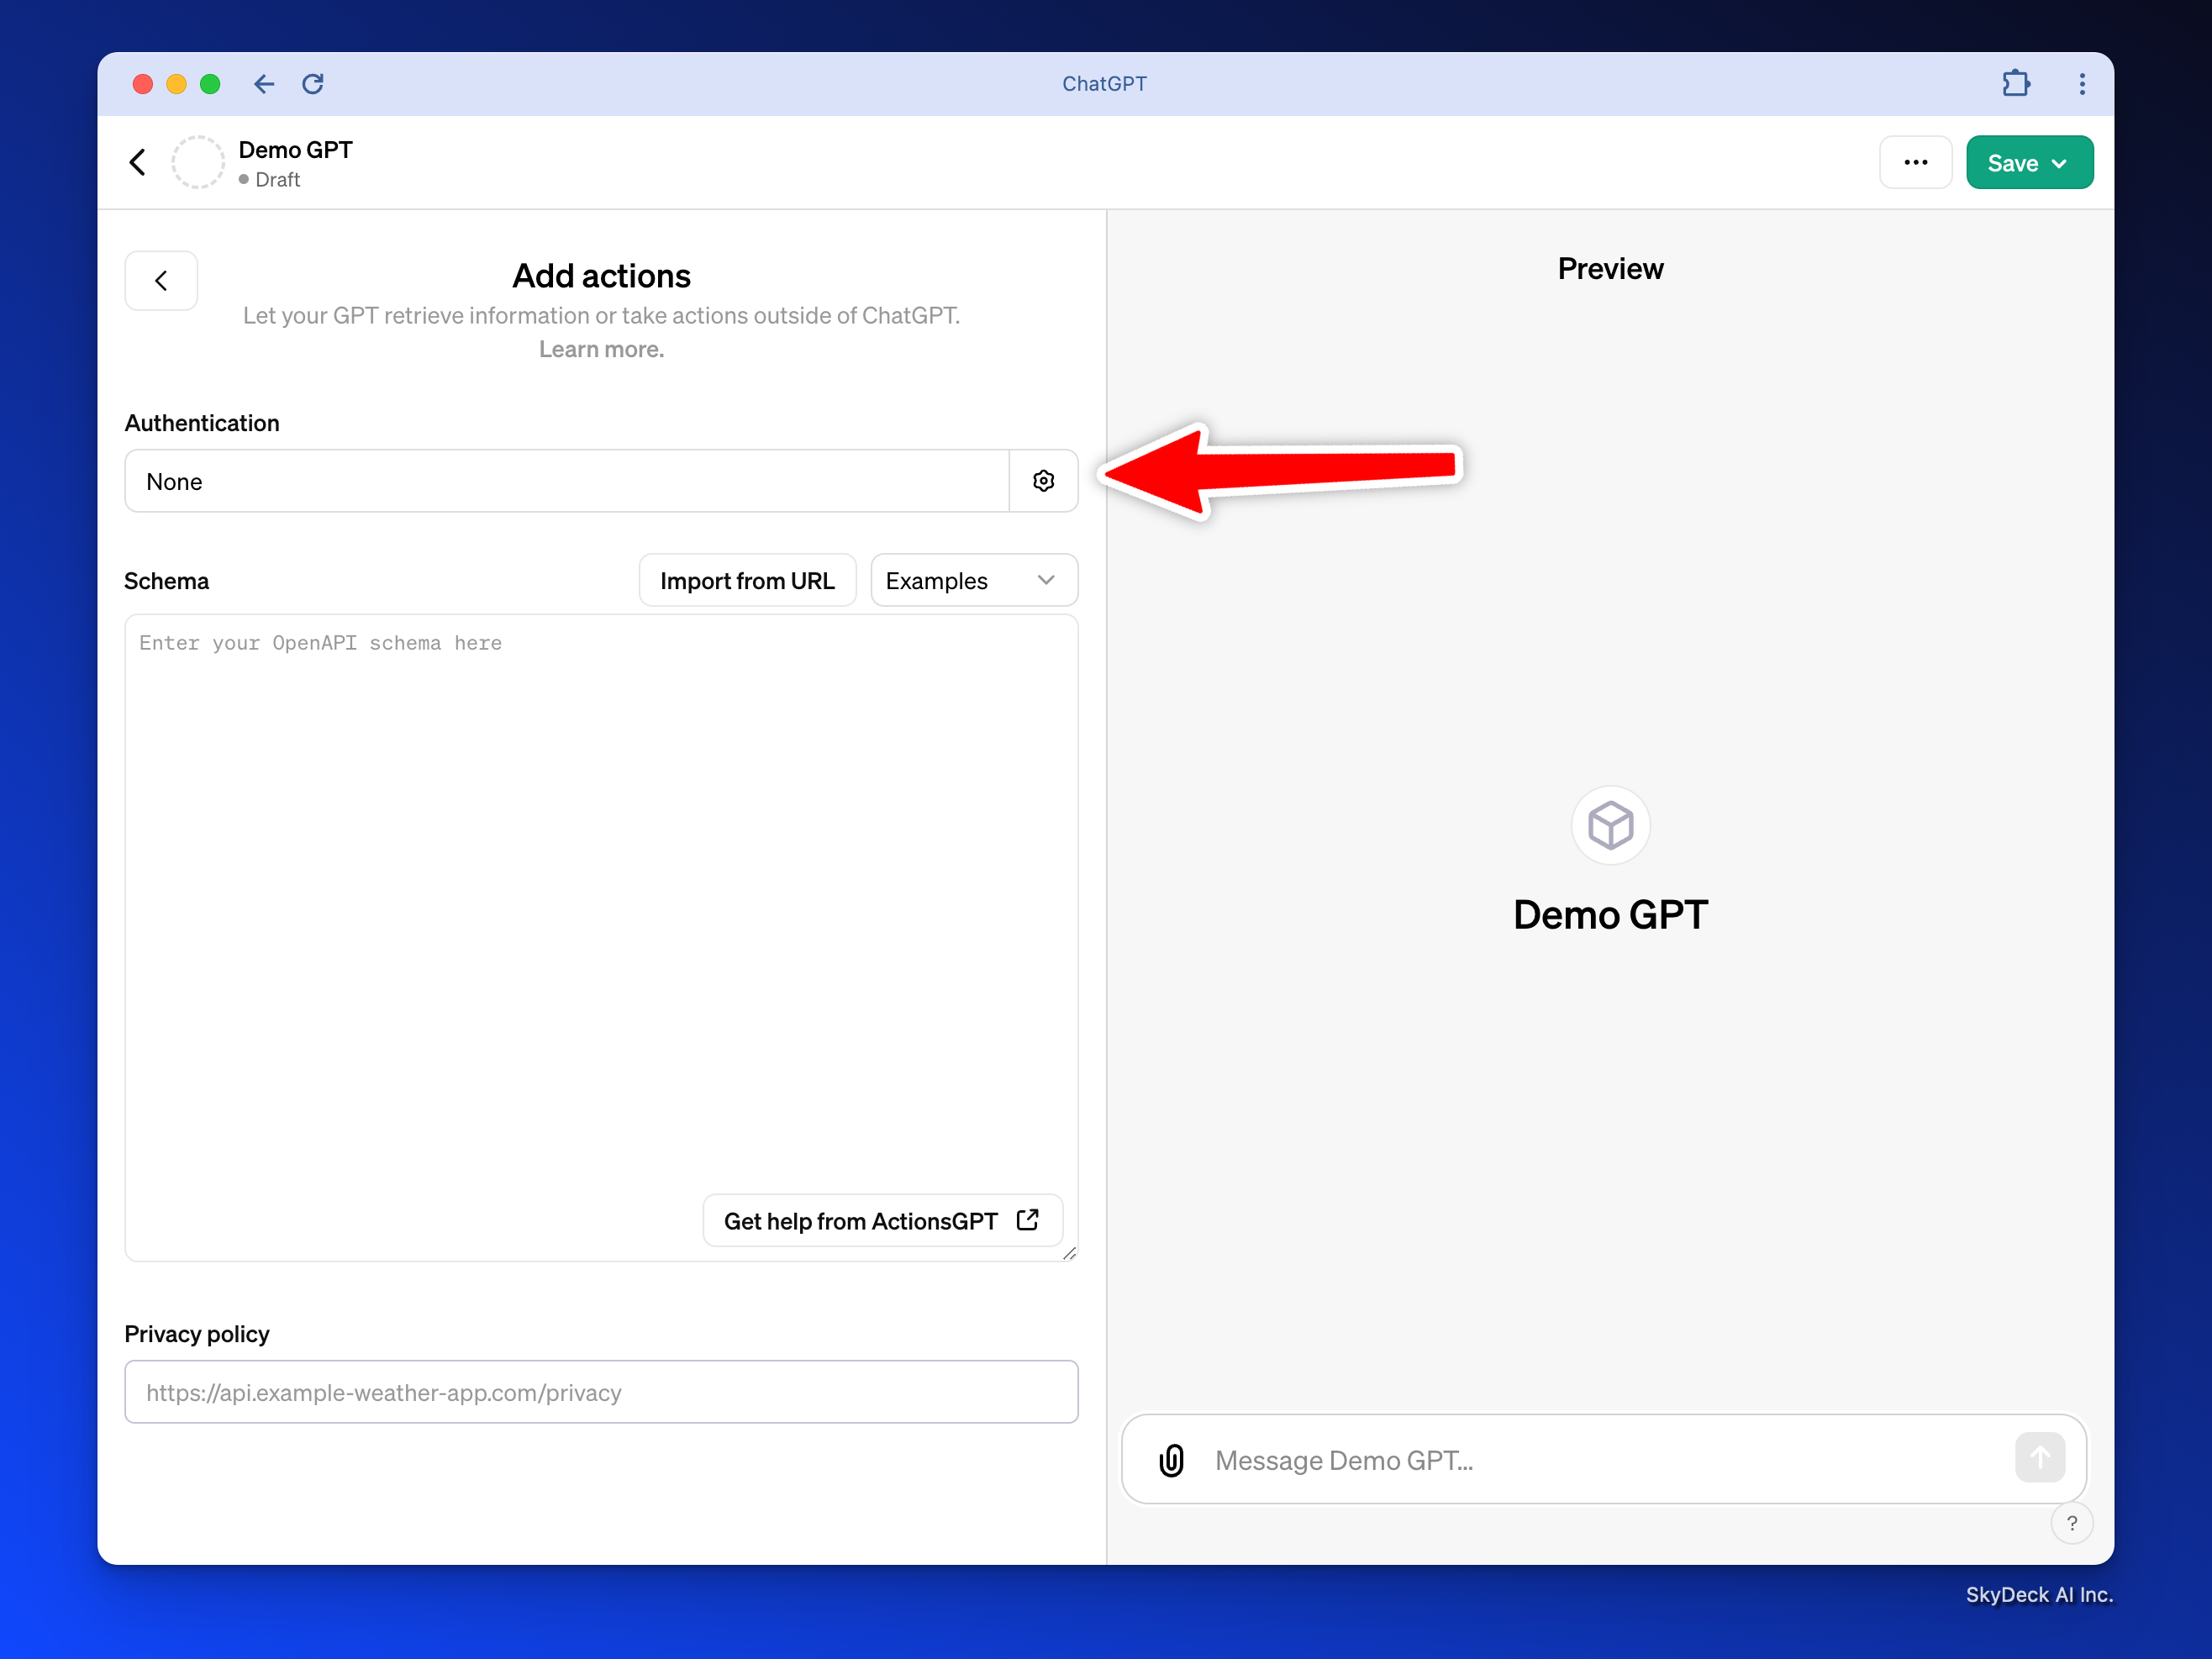
上記の Rememberizer アプリケーションの資格情報からクライアント IDとクライアントシークレットを貼り付けてください:
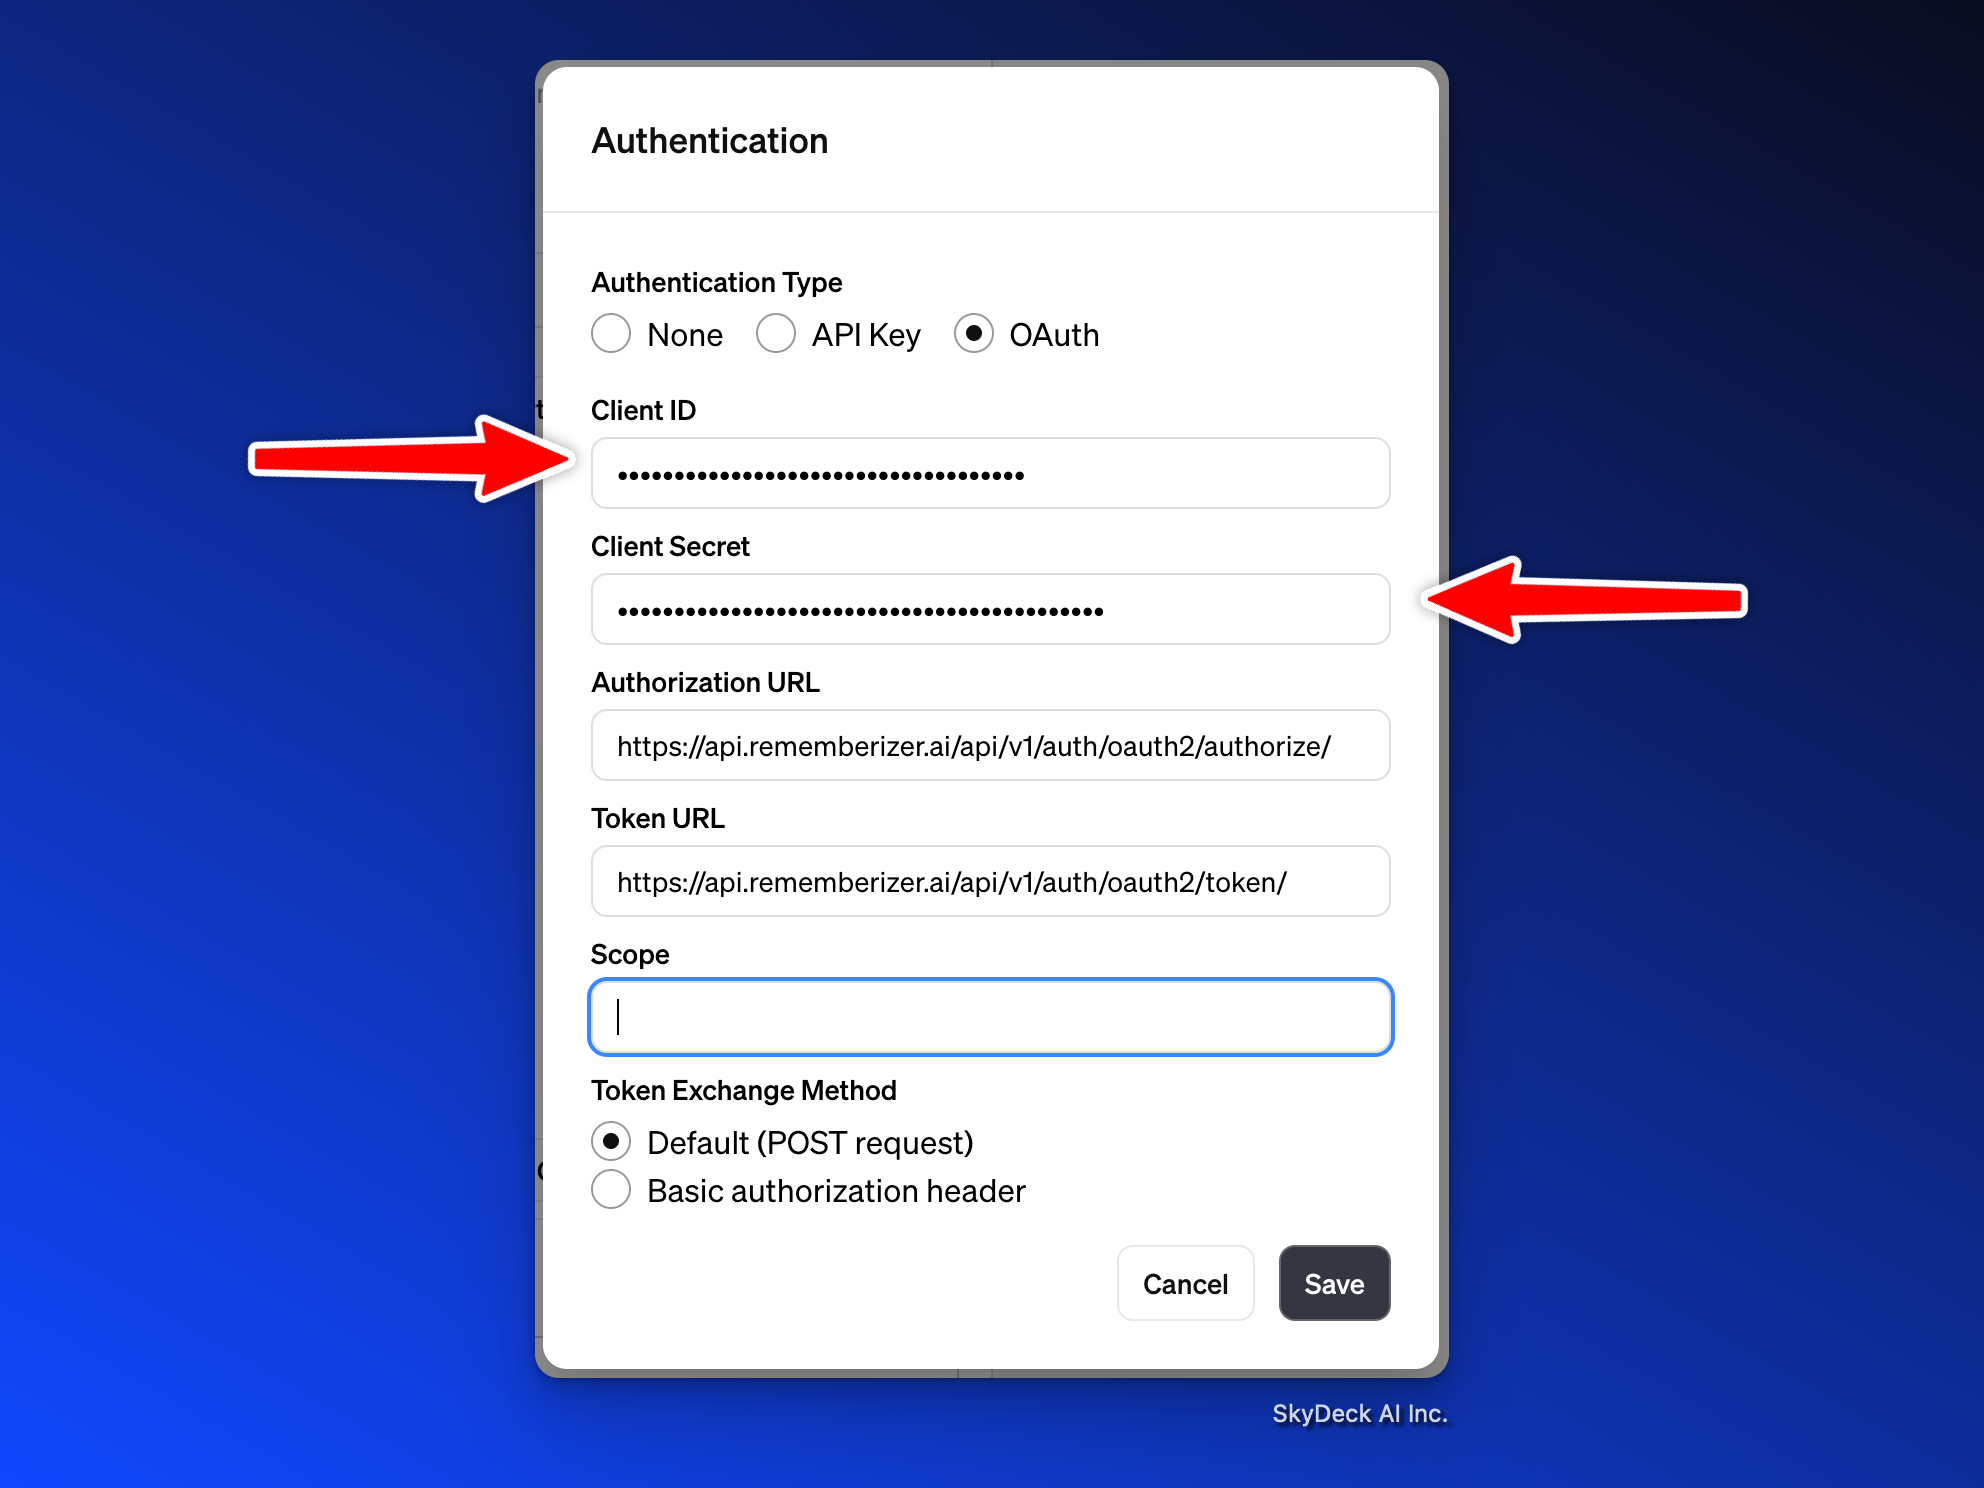
Authorization URL: https://api.rememberizer.ai/api/v1/auth/oauth2/authorize/
Token URL: https://api.rememberizer.ai/api/v1/auth/oauth2/token/
Scopeは空白のままにしてください。
クリックして保存します。
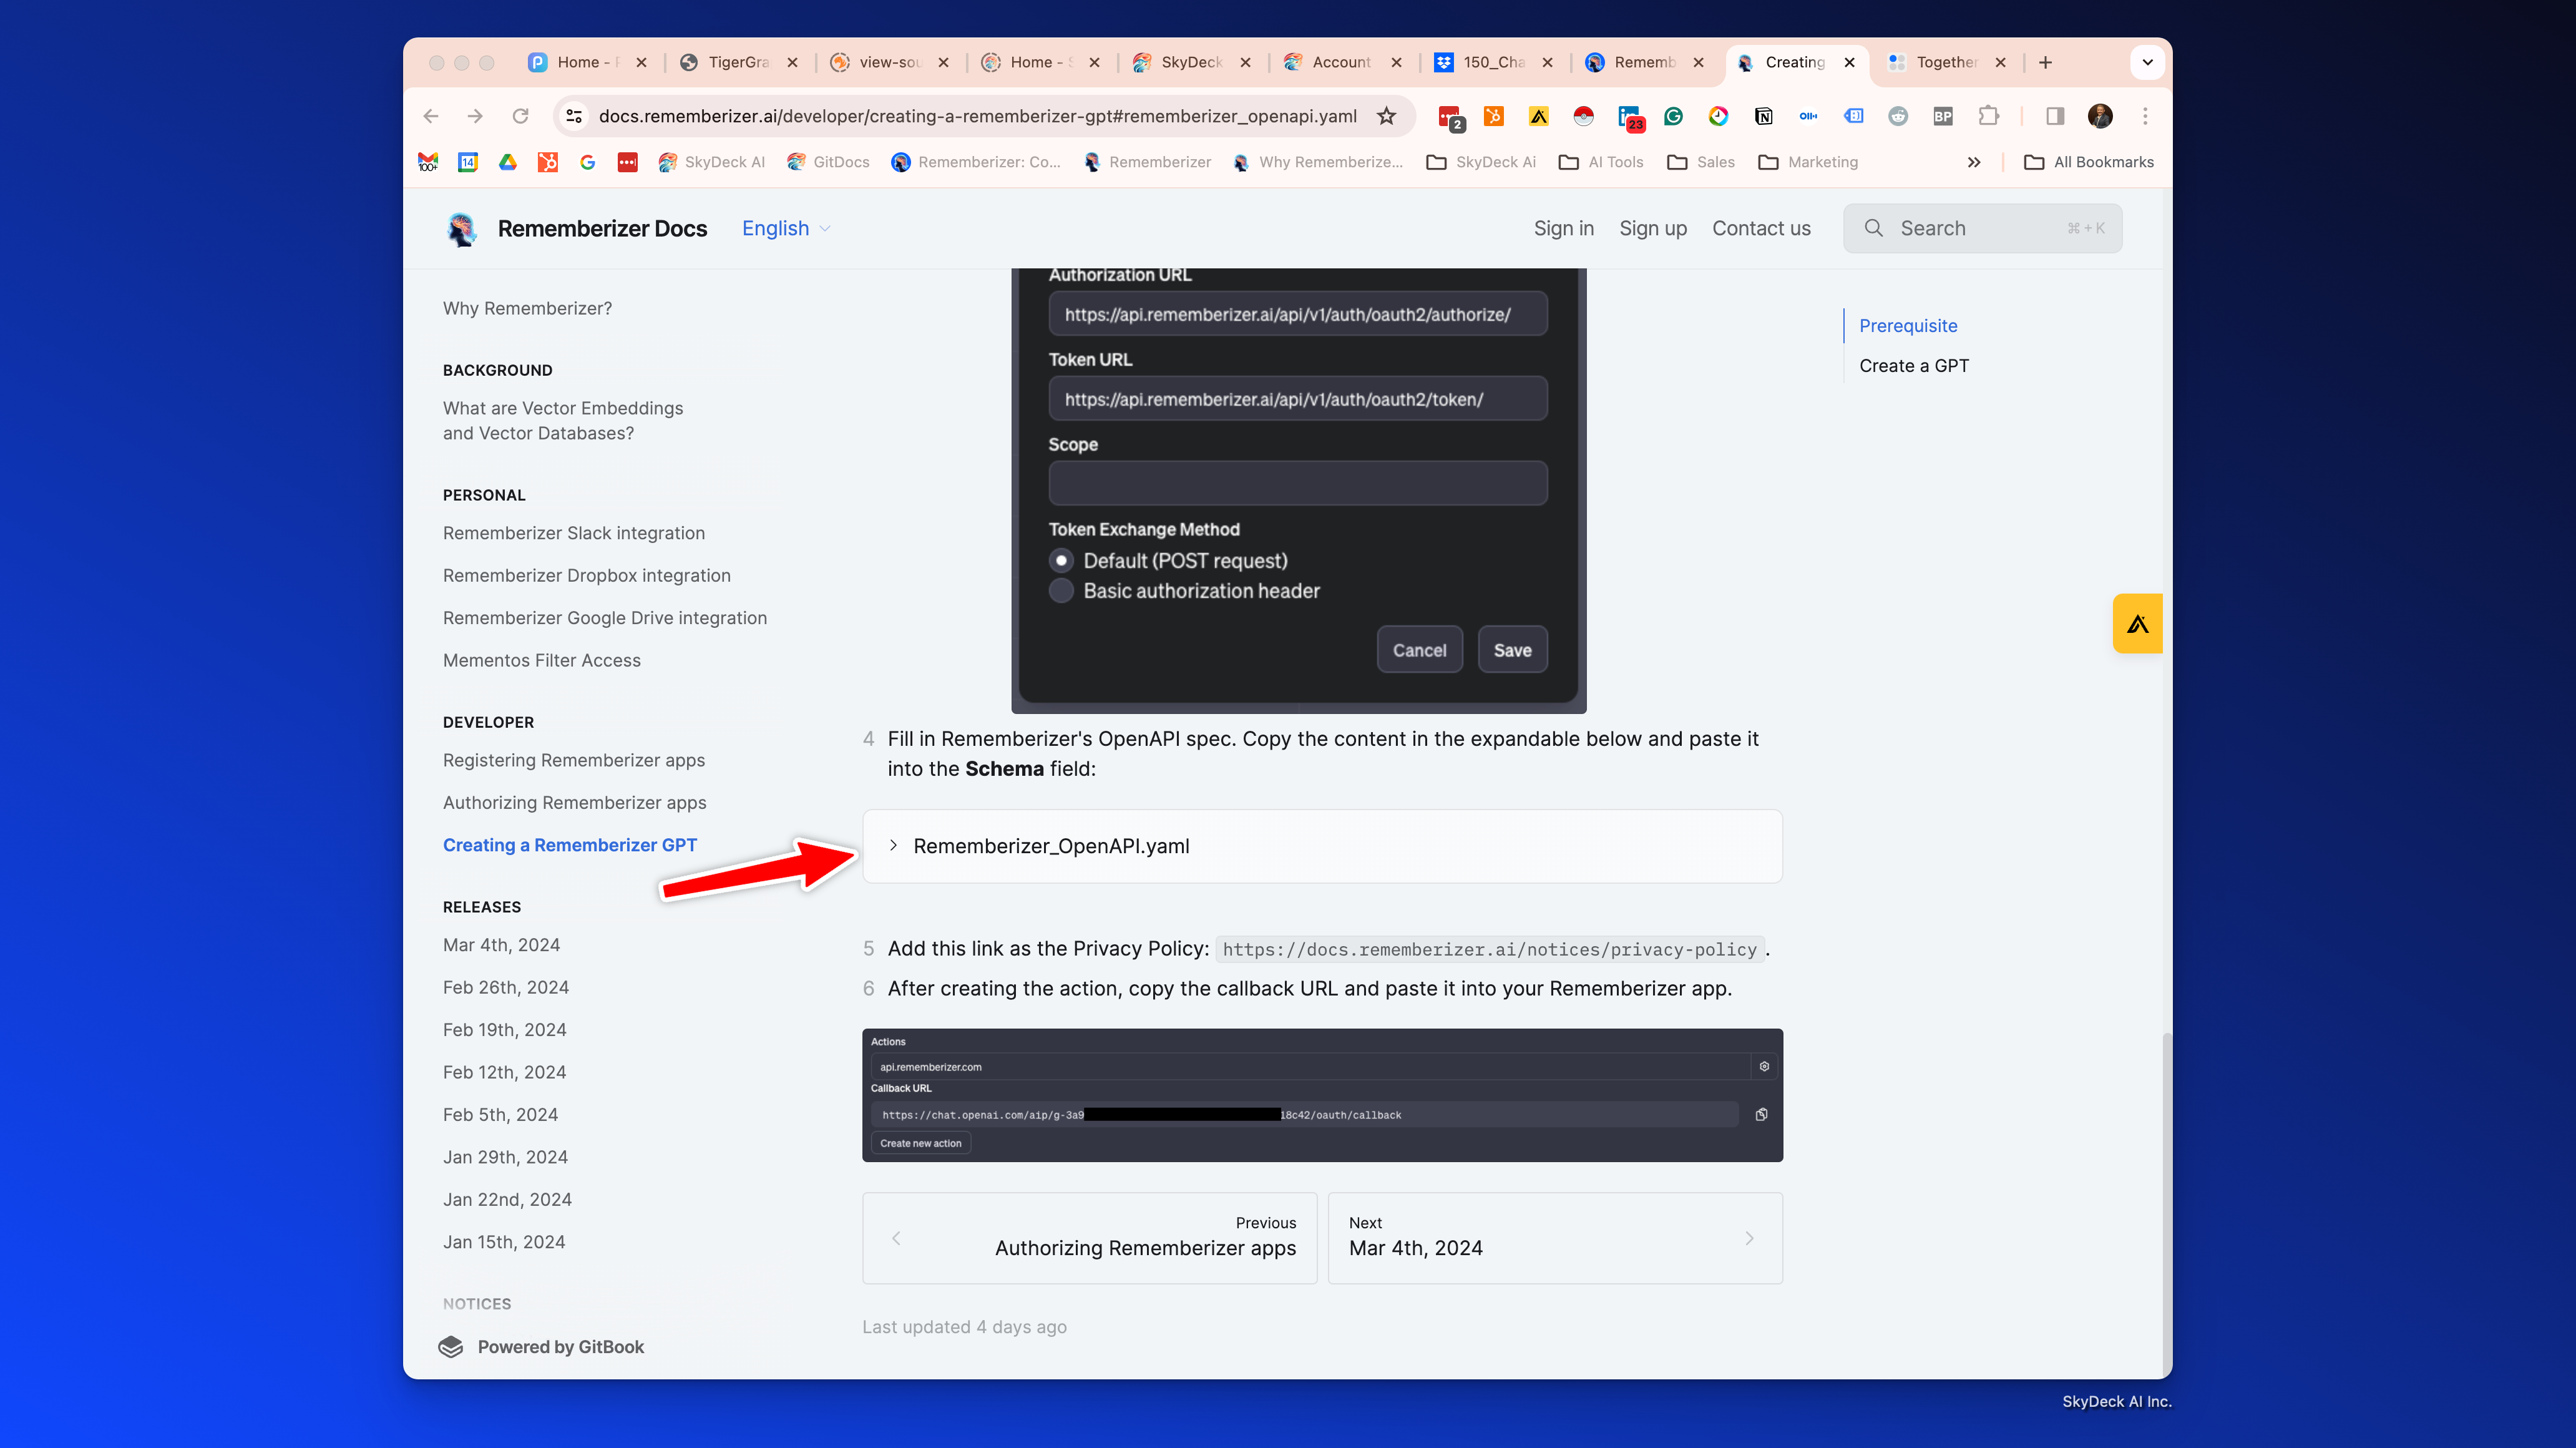
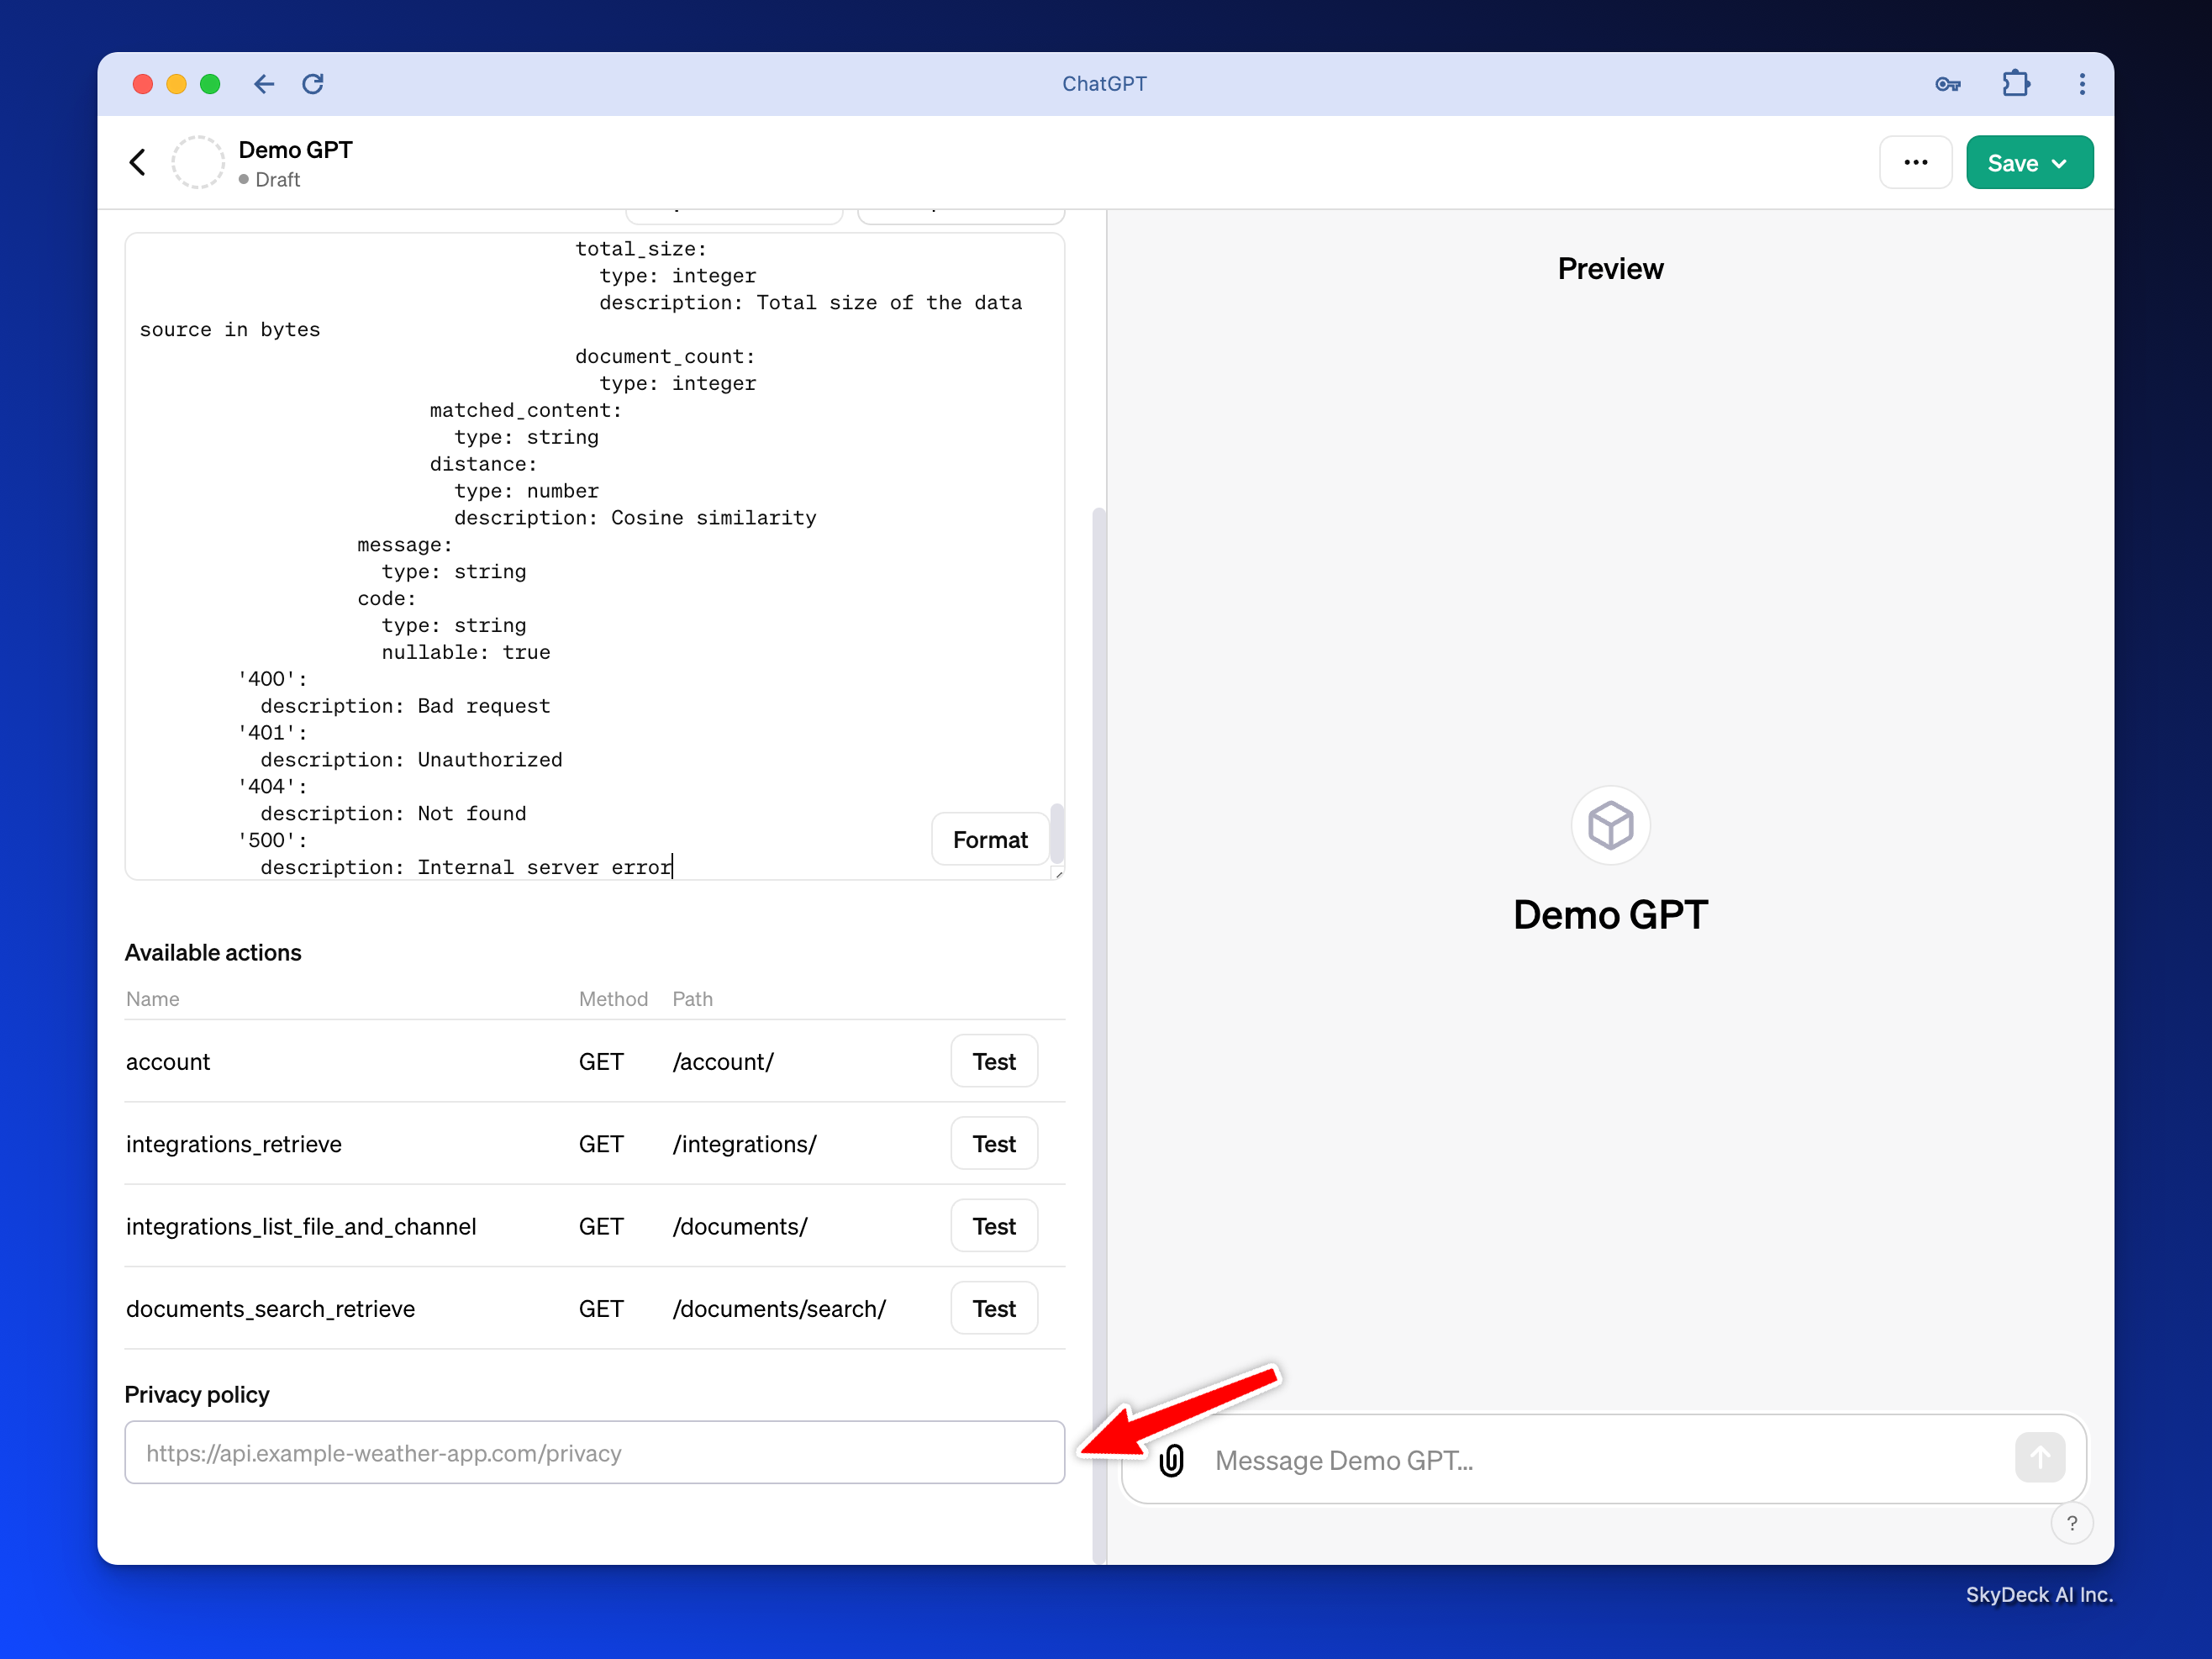
GPTスキーマにRememberizer APIを入力してください
RememberizerのOpenAPI仕様を入力してください。下記のリンクの展開可能なトドールNo.4の内容をコピーして、Schemaフィールドに貼り付けてください:
https://docs.rememberizer.ai/developer/creating-a-rememberizer-gpt#rememberizer_openapi.yaml
プライバシーポリシー
このリンクをプライバシーポリシーとして追加してください: https://docs.rememberizer.ai/notices/privacy-policy。
アクションを作成した後、GPTを保存し、その後
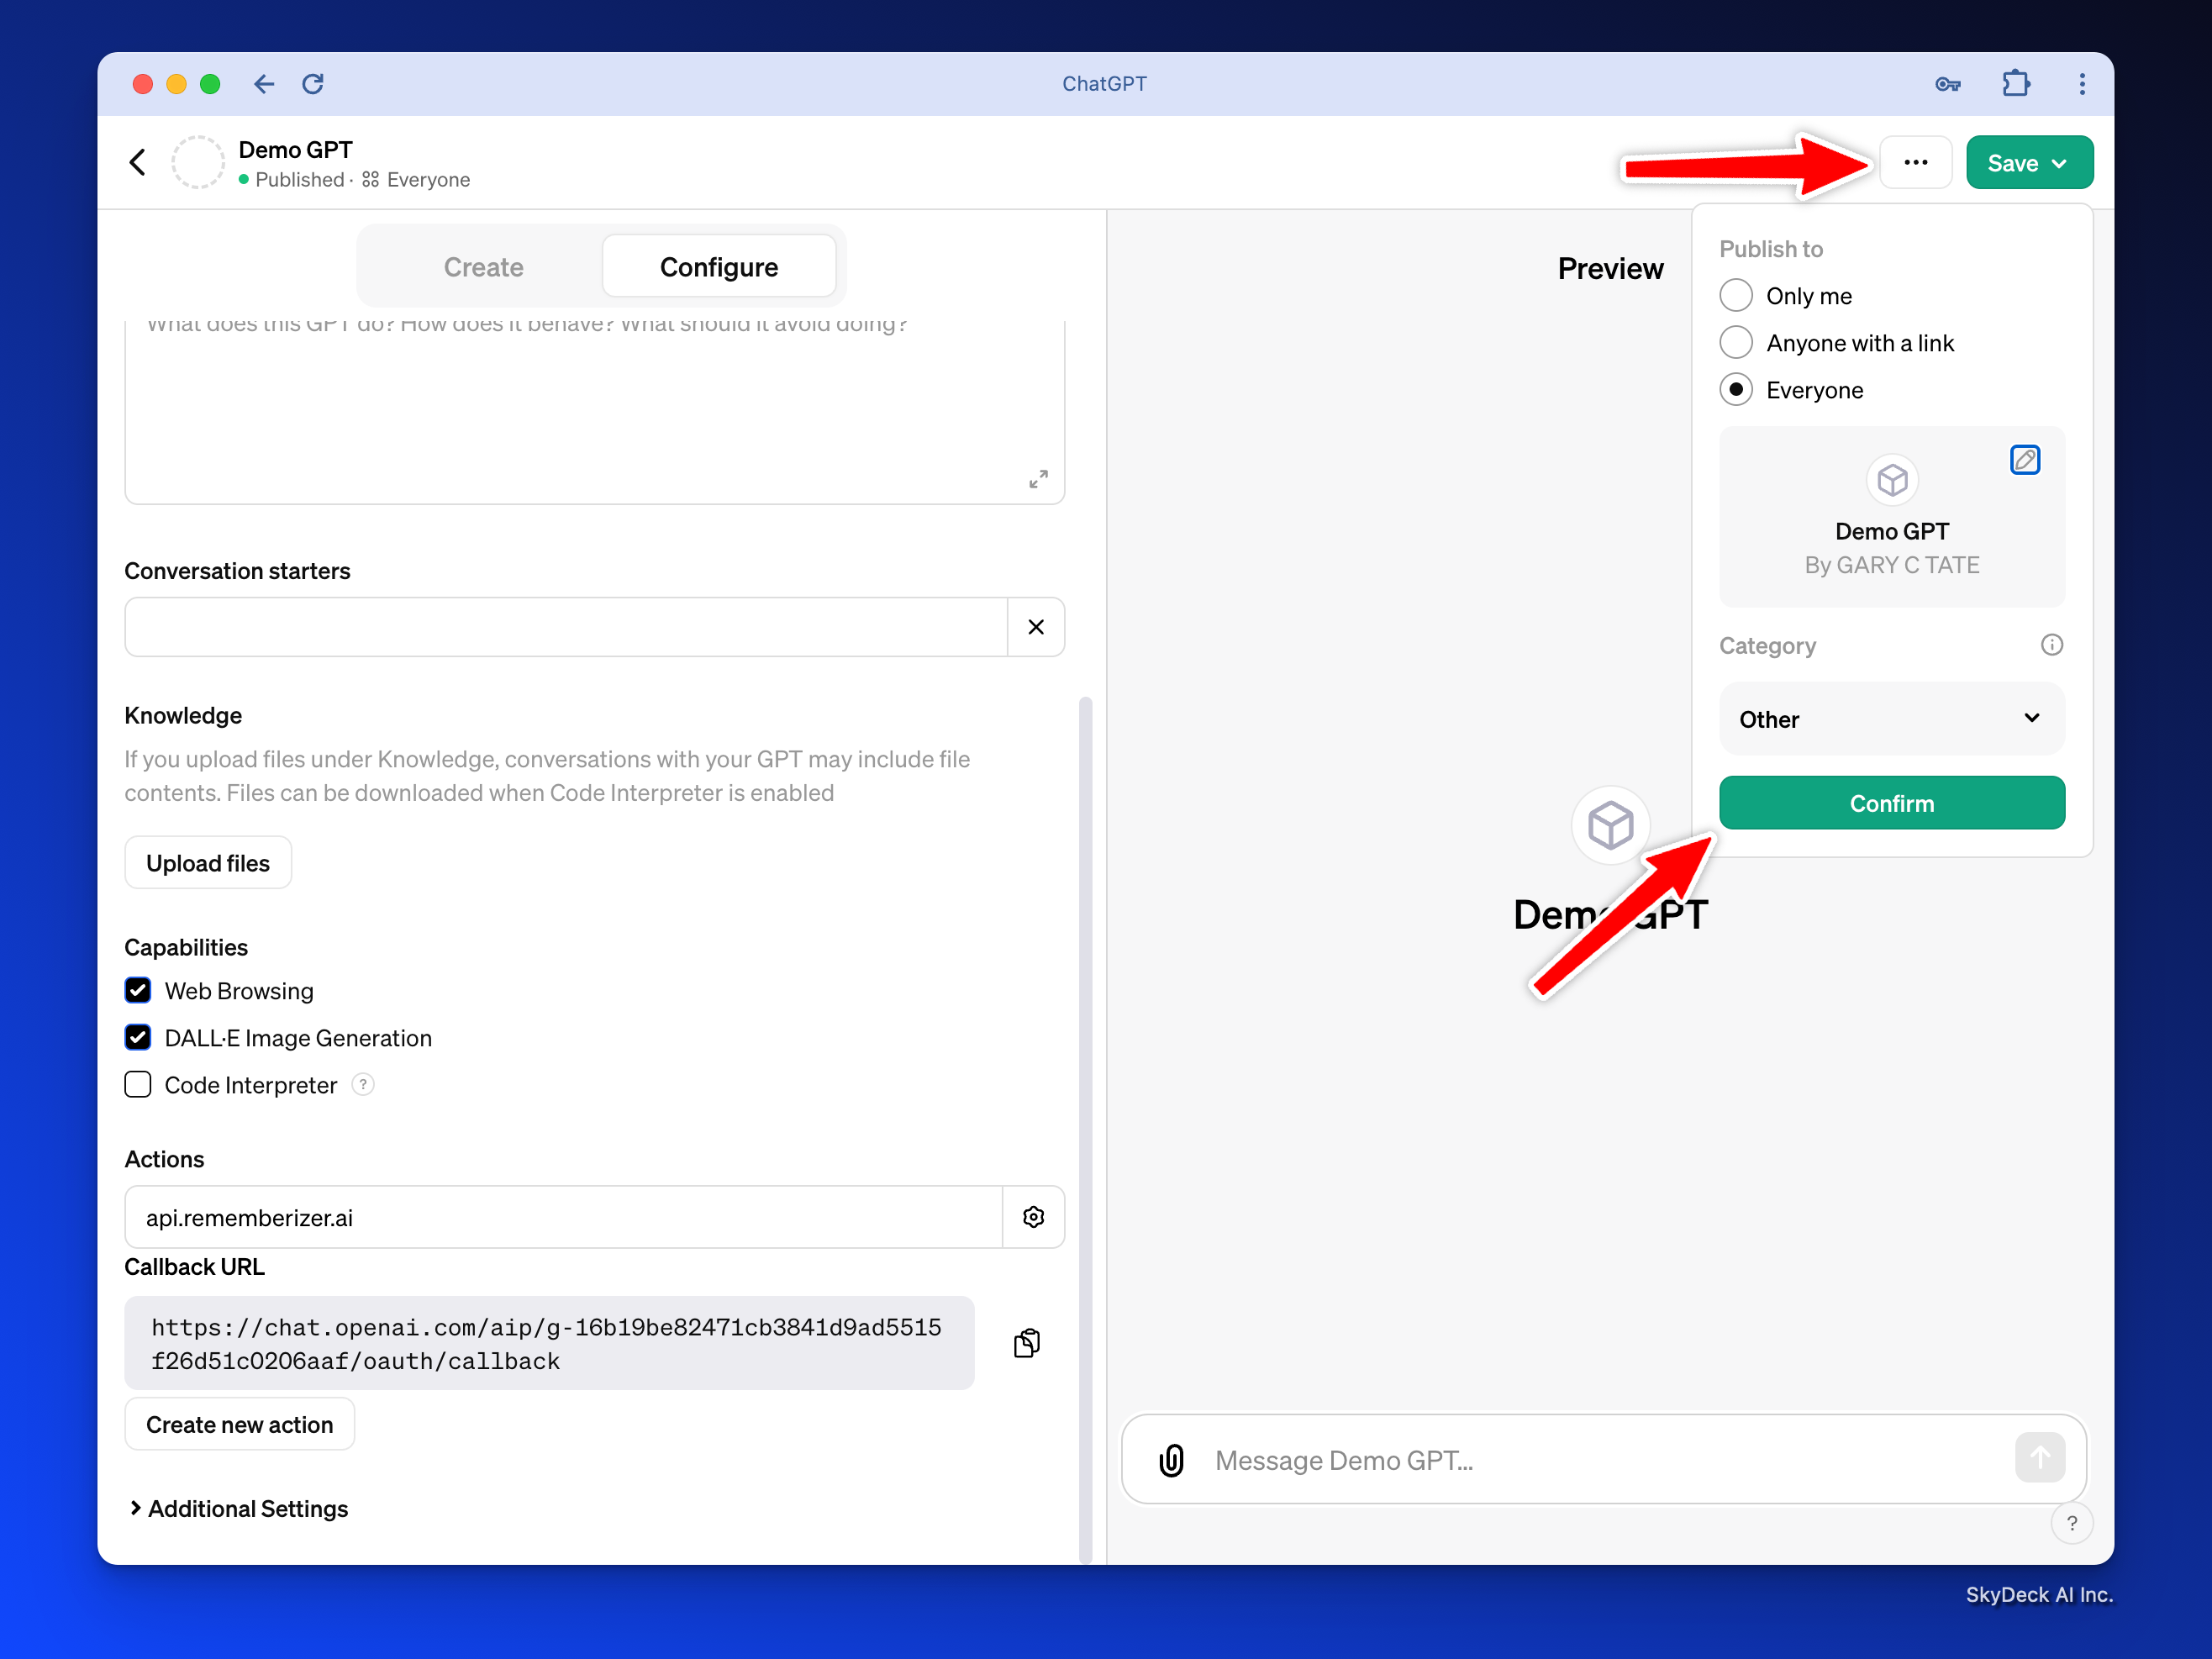
コピーするリンクは次のようになります:https://chat.openai.com/g/g-dSiQf1hmQ-demo-gpt
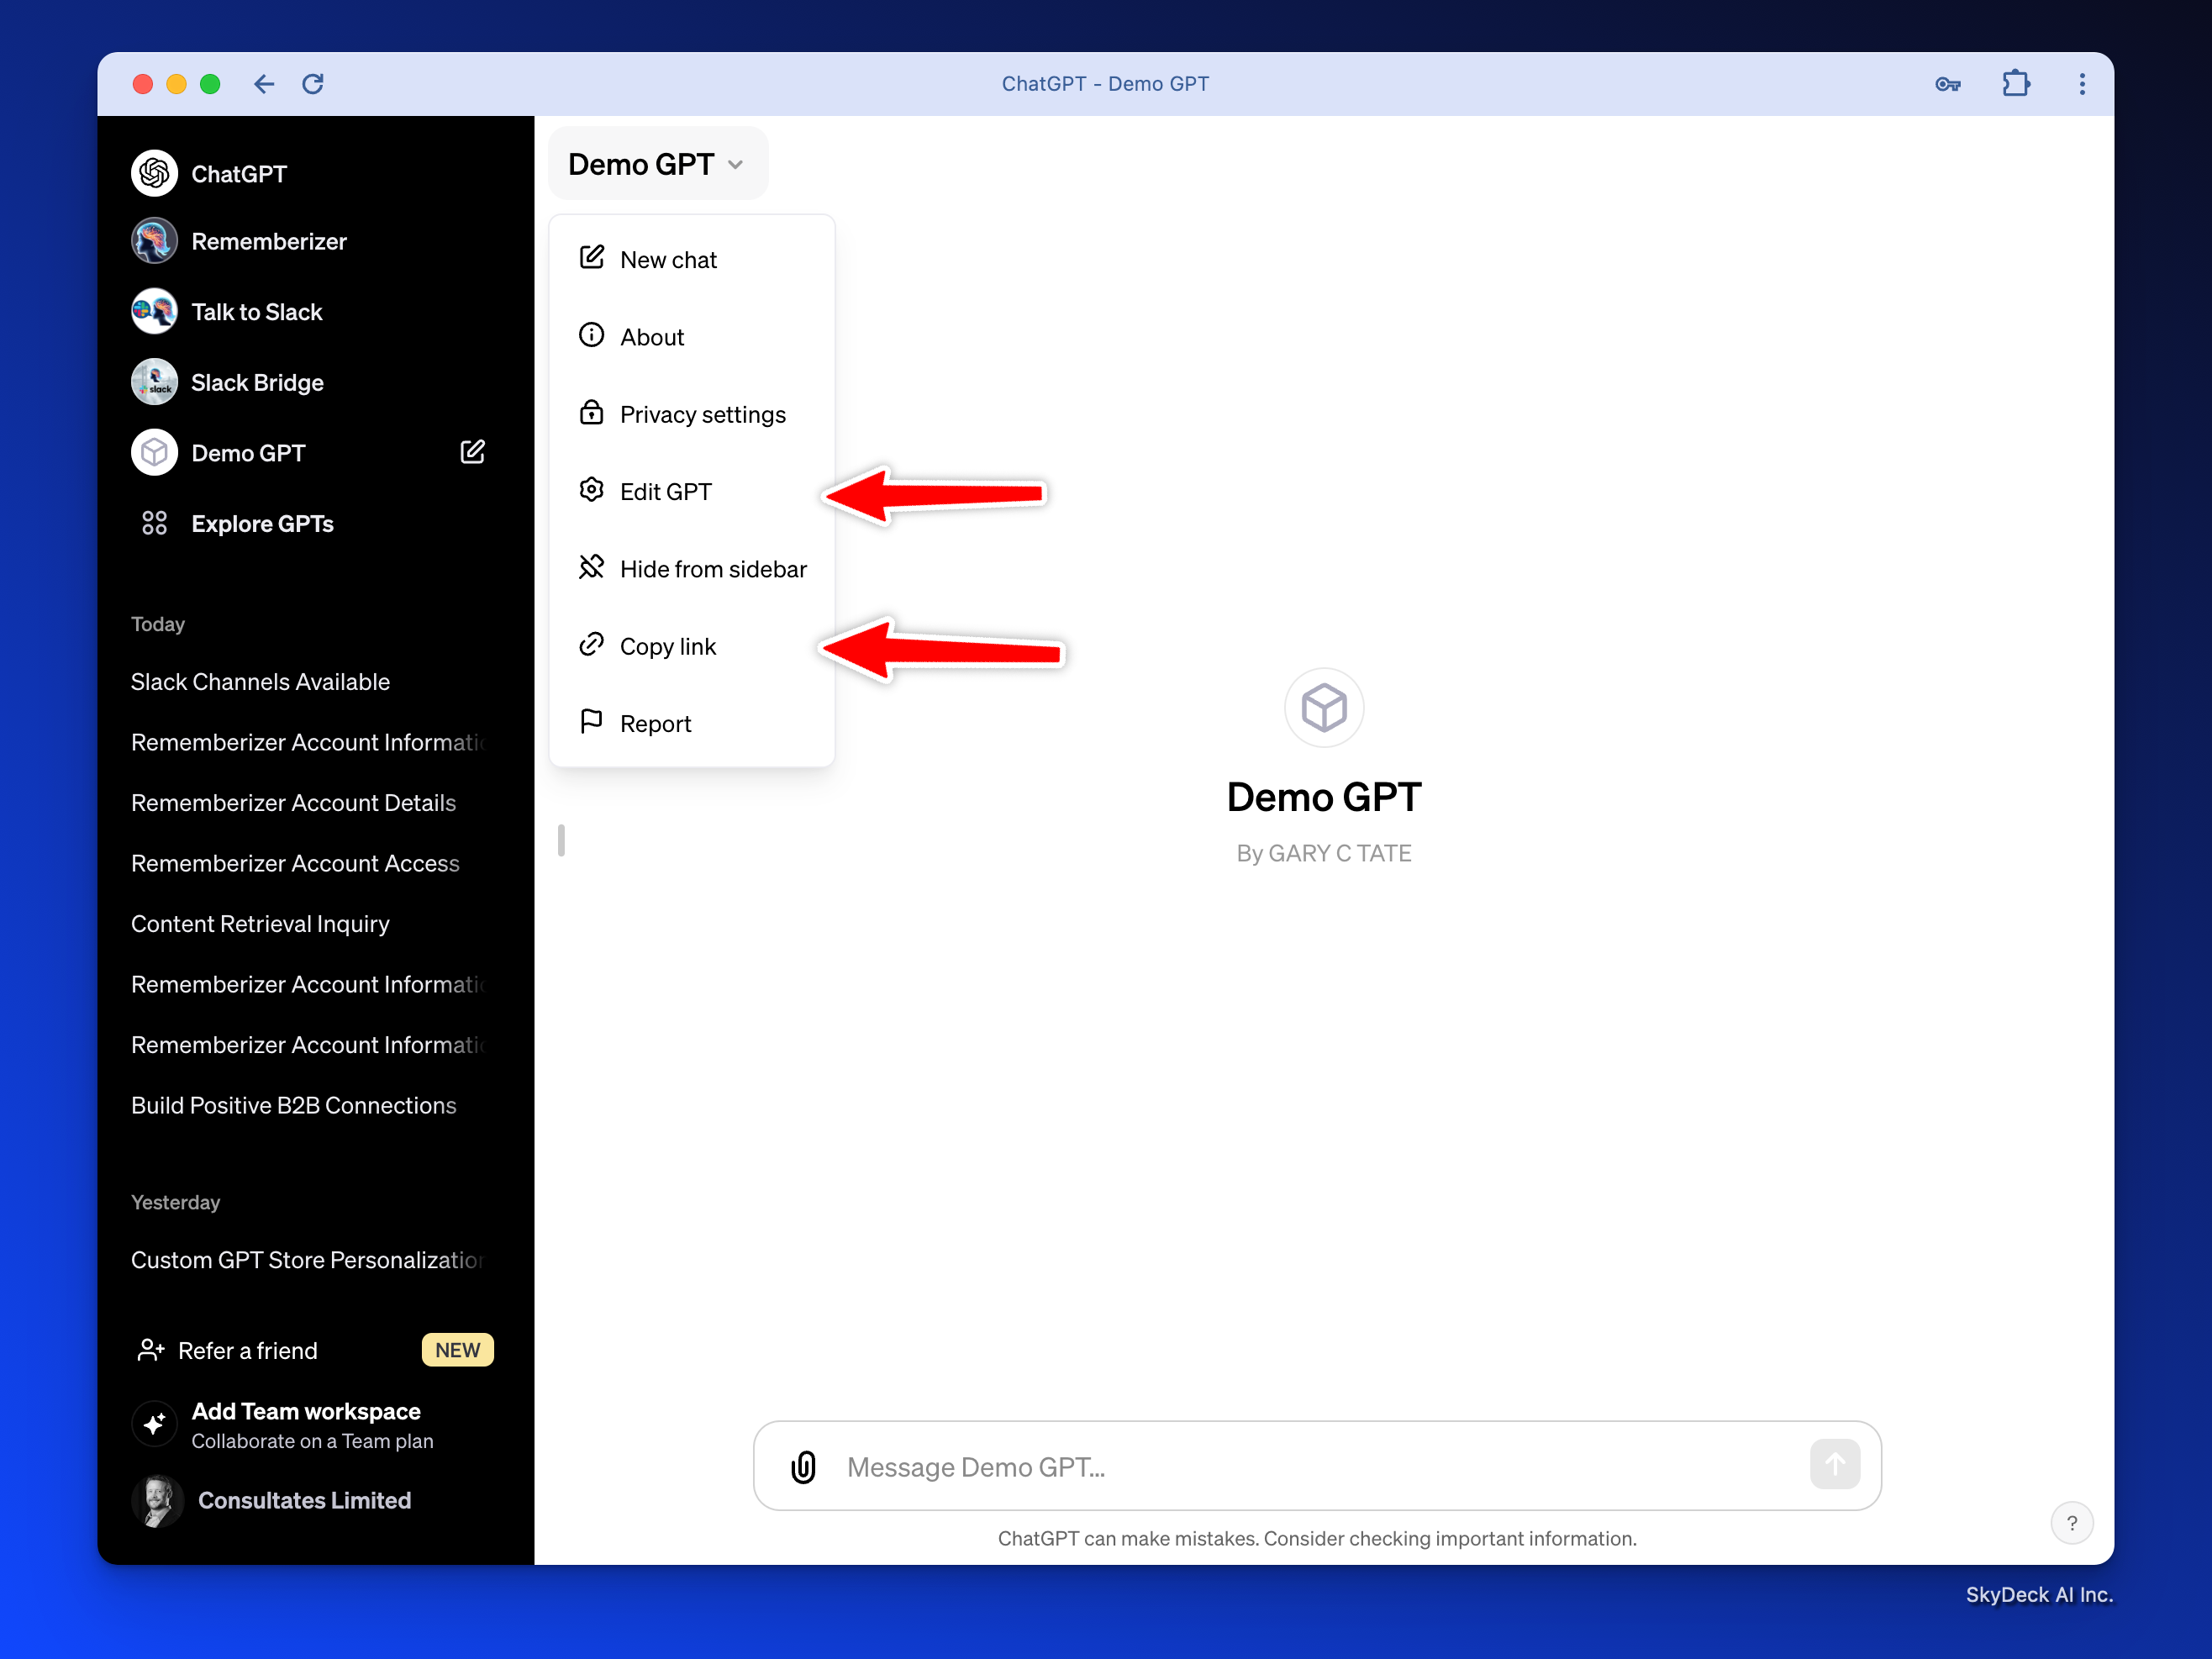
今すぐEdit GPTに戻ります
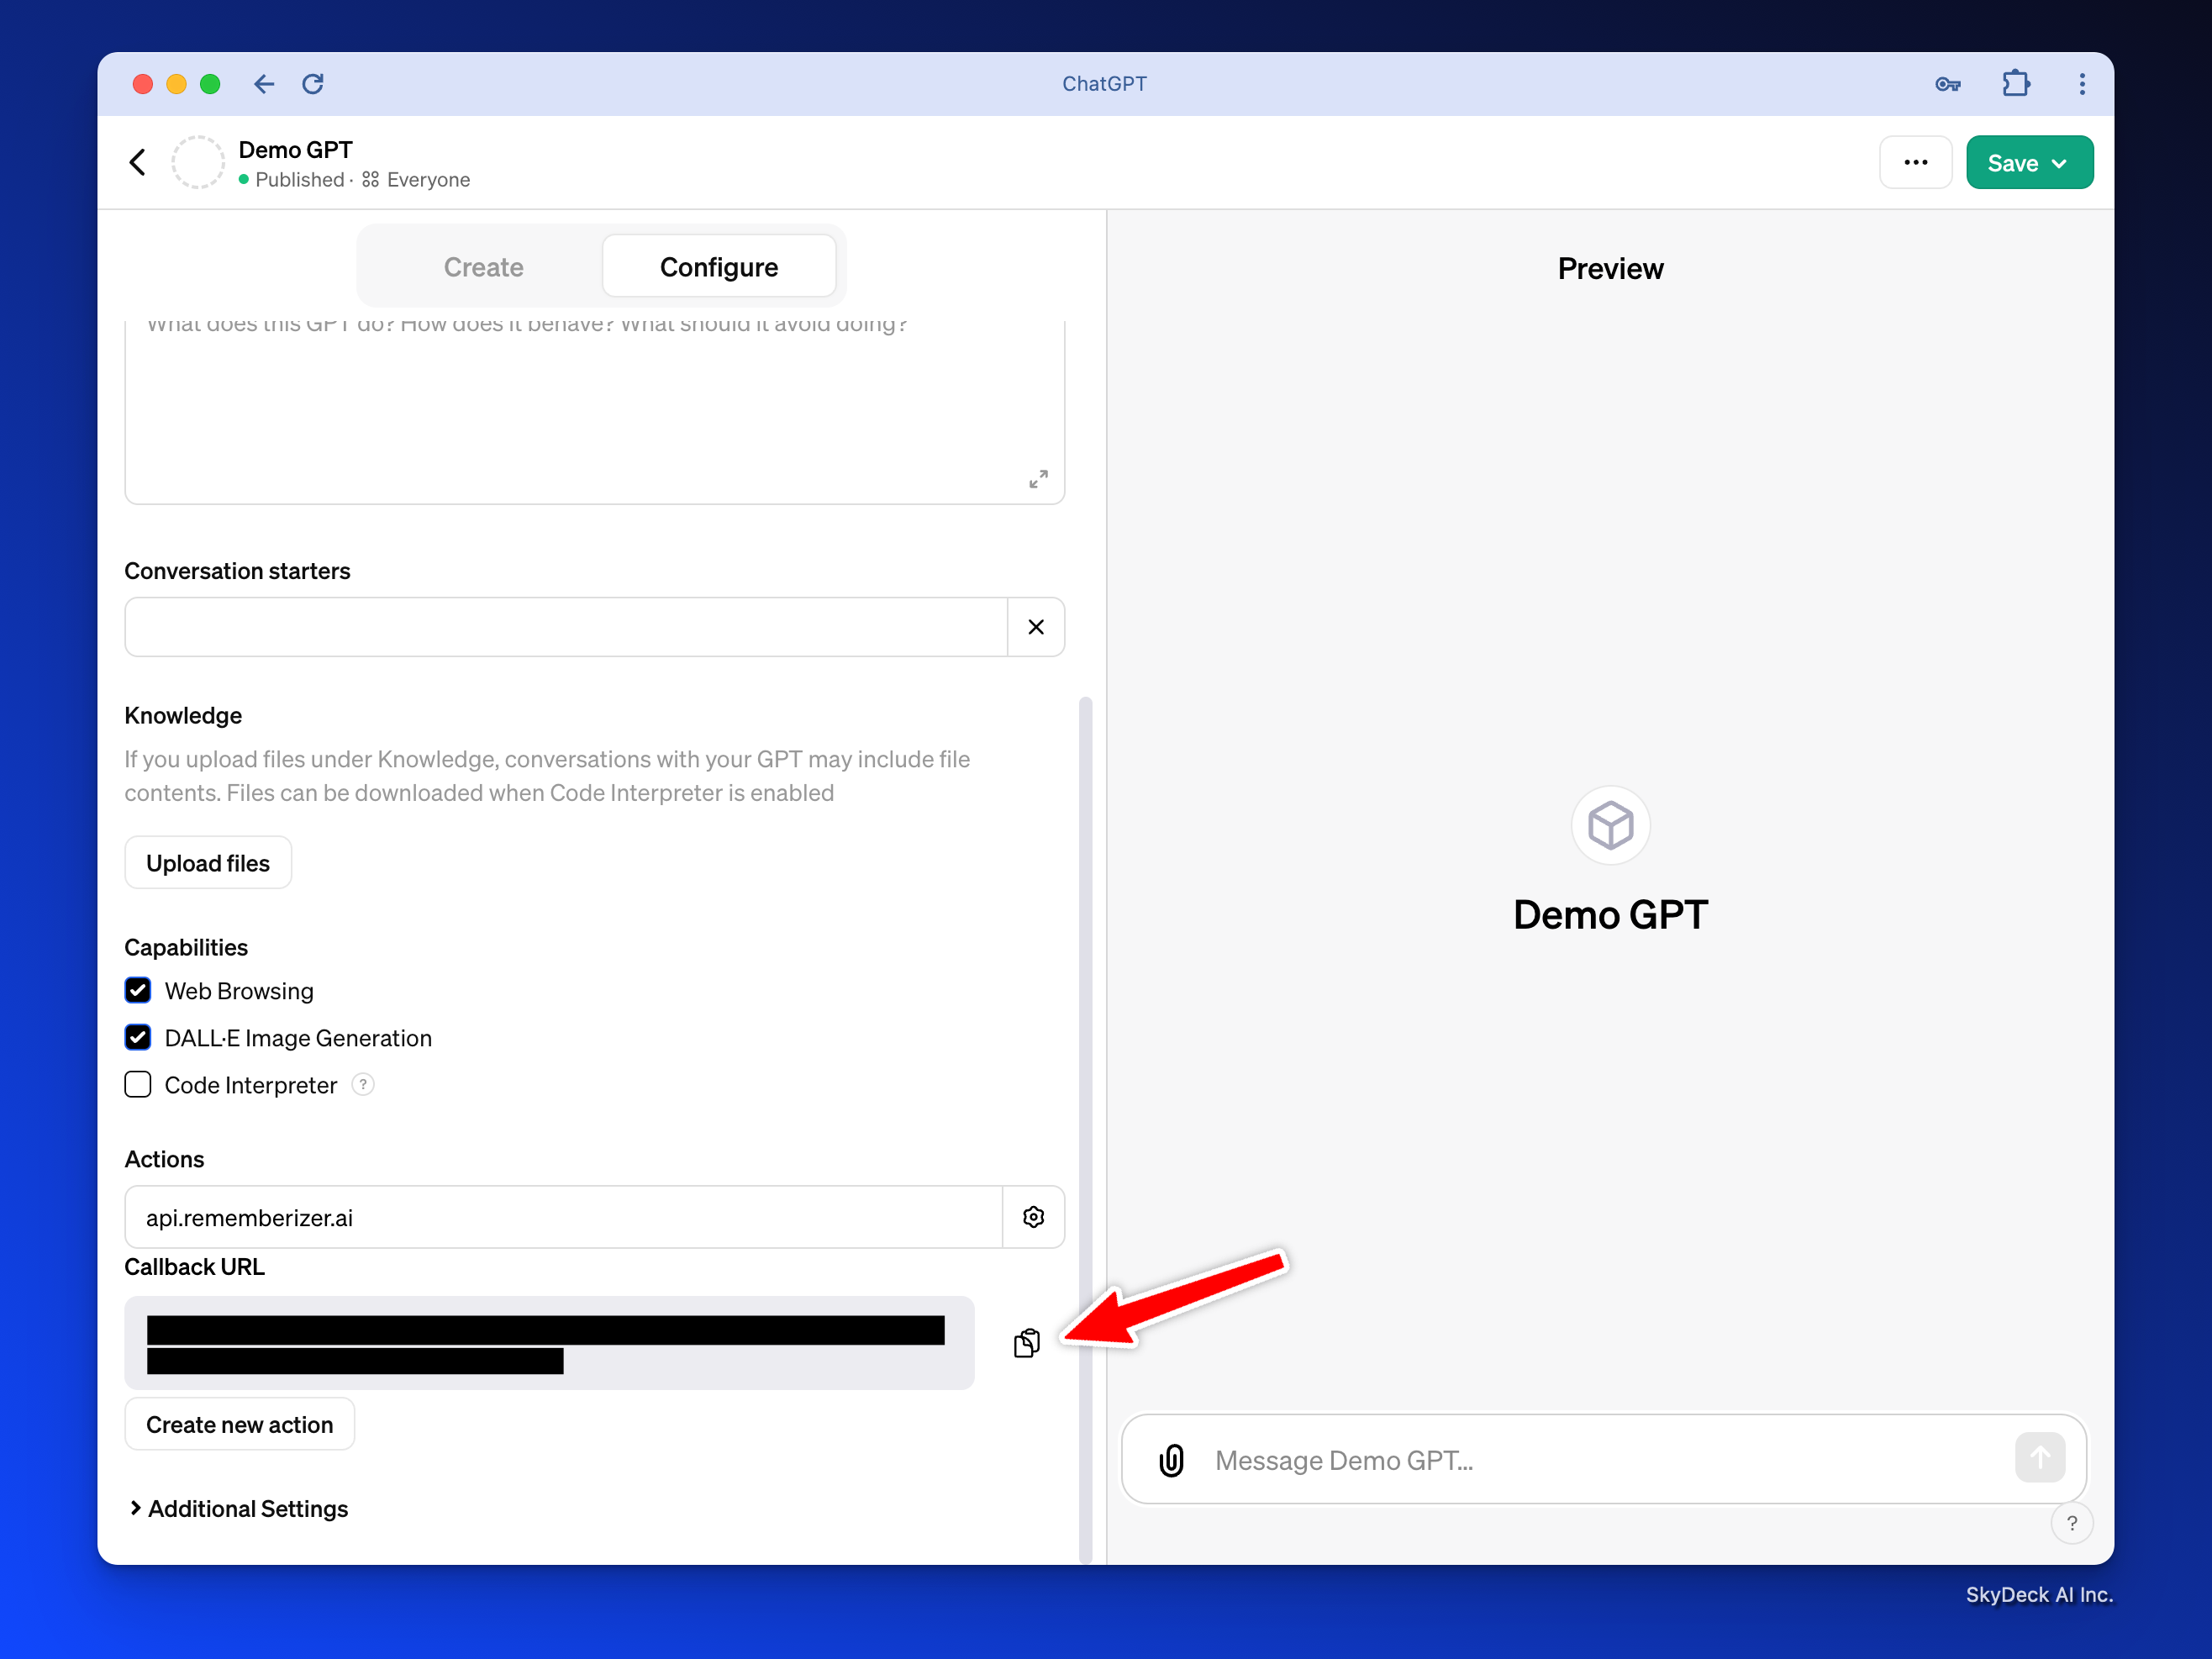
Callback URL のリンクをコピーしてください。このような形になります:https://chat.openai.com/aip/g-16b19be82471cb3841d9ad5515f26d51c0206aaf/oauth/callback
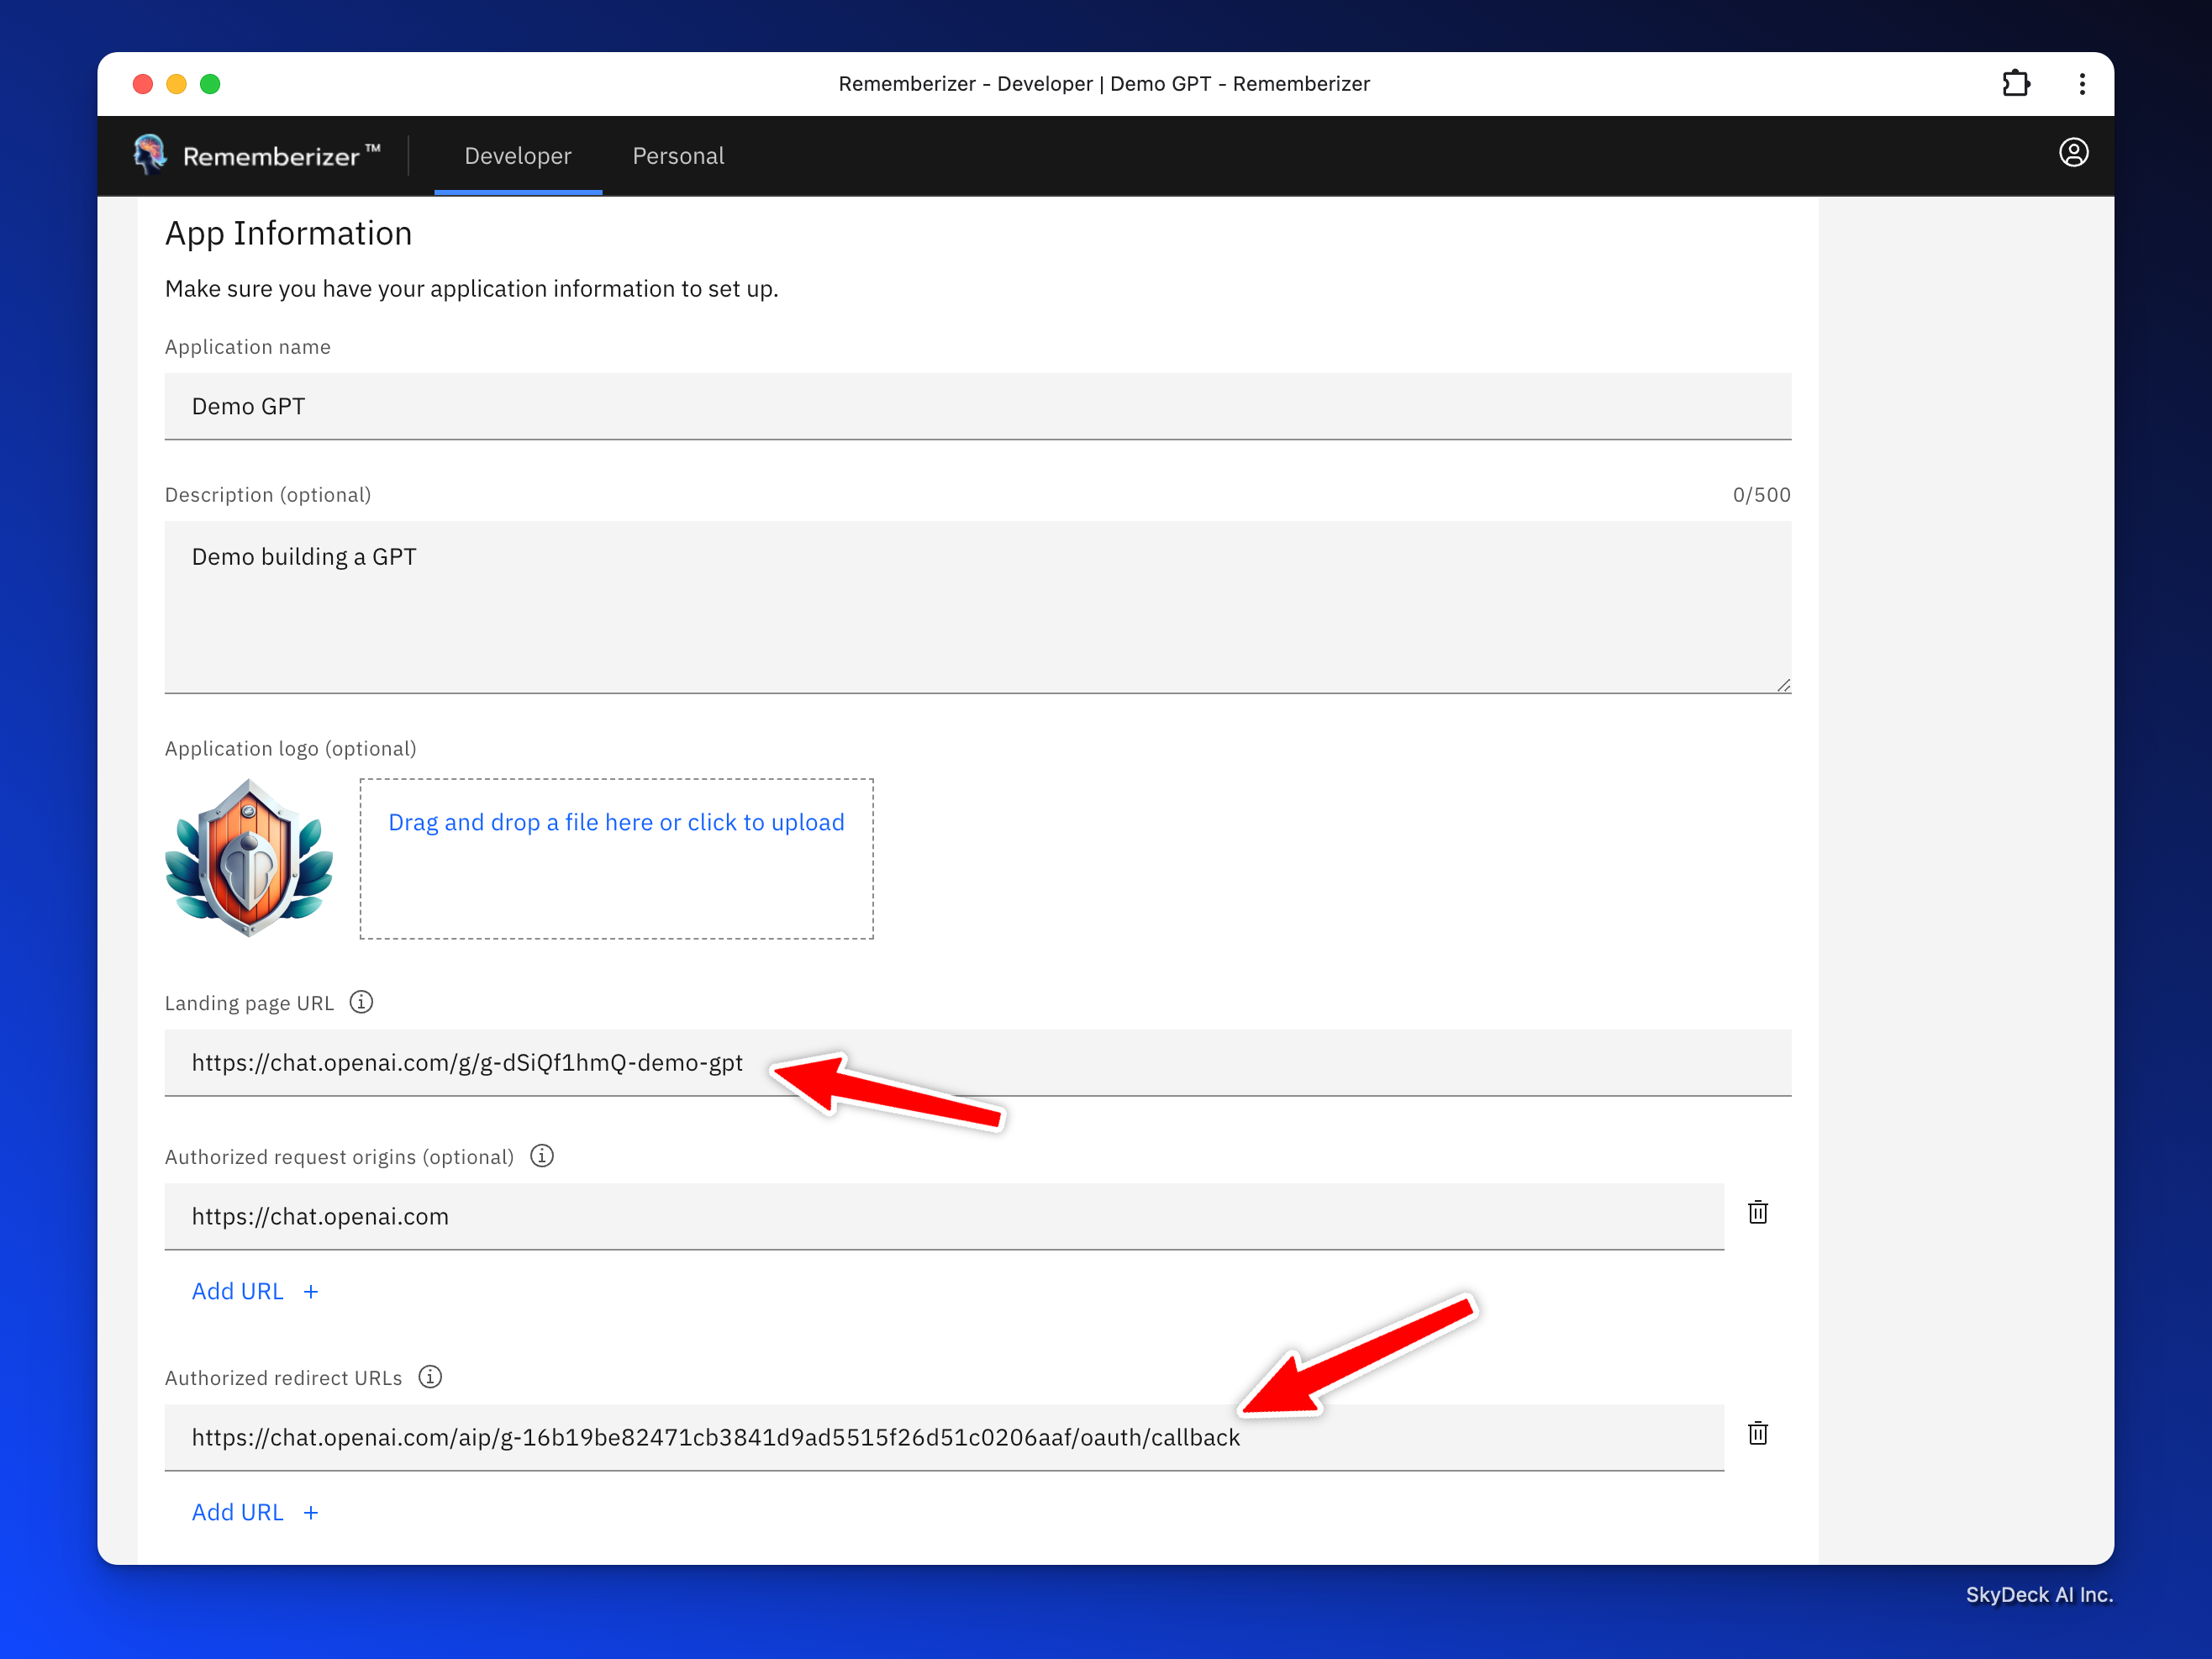
Rememberizerアプリ情報の更新
GPTリンクおよびコールバックURL
上記のステップからGPTリンクとコールバックURLを入力し、アプリケーションを保存します。
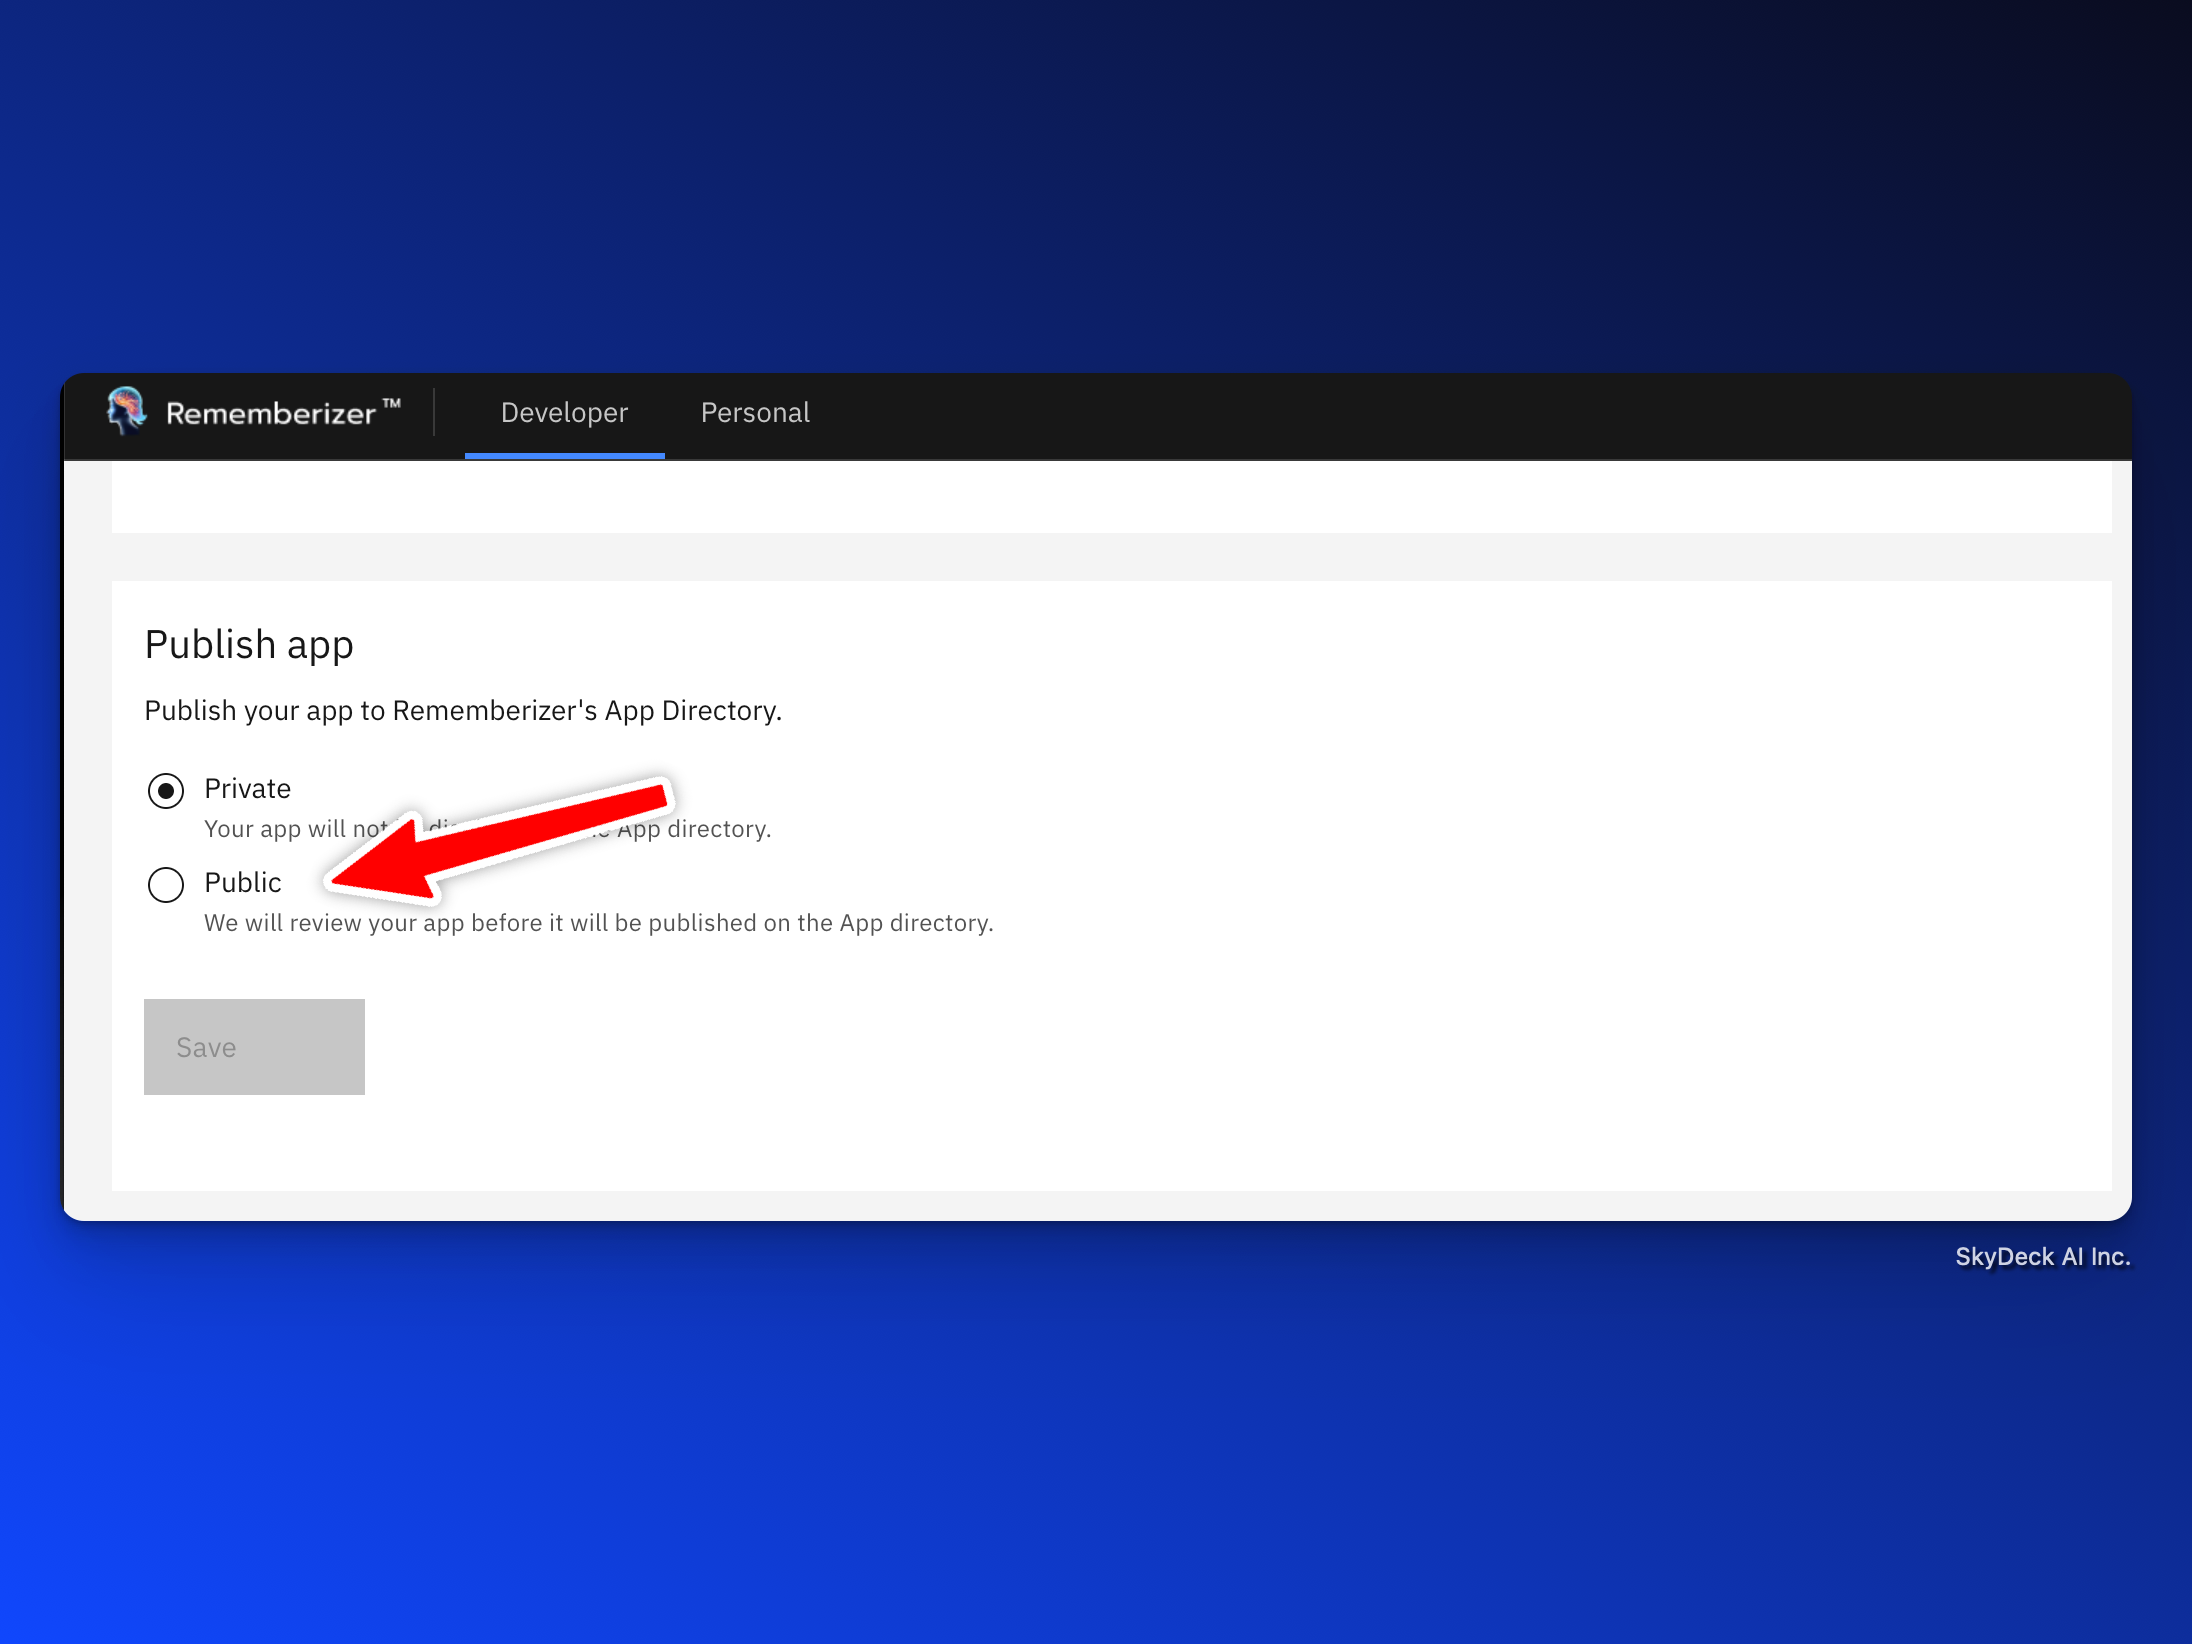
公開として公開する場合、アプリをFeatured App Directoryに掲載することを希望します。
アプリをレビューした後、問題がなければ、アプリを公開しお知らせします。これにより、あなたのカスタムGPTが私たちのユーザーに表示され、私たちは積極的にあなたのGPTをユーザーベースに広告します。
さて、アプリをテストできます。
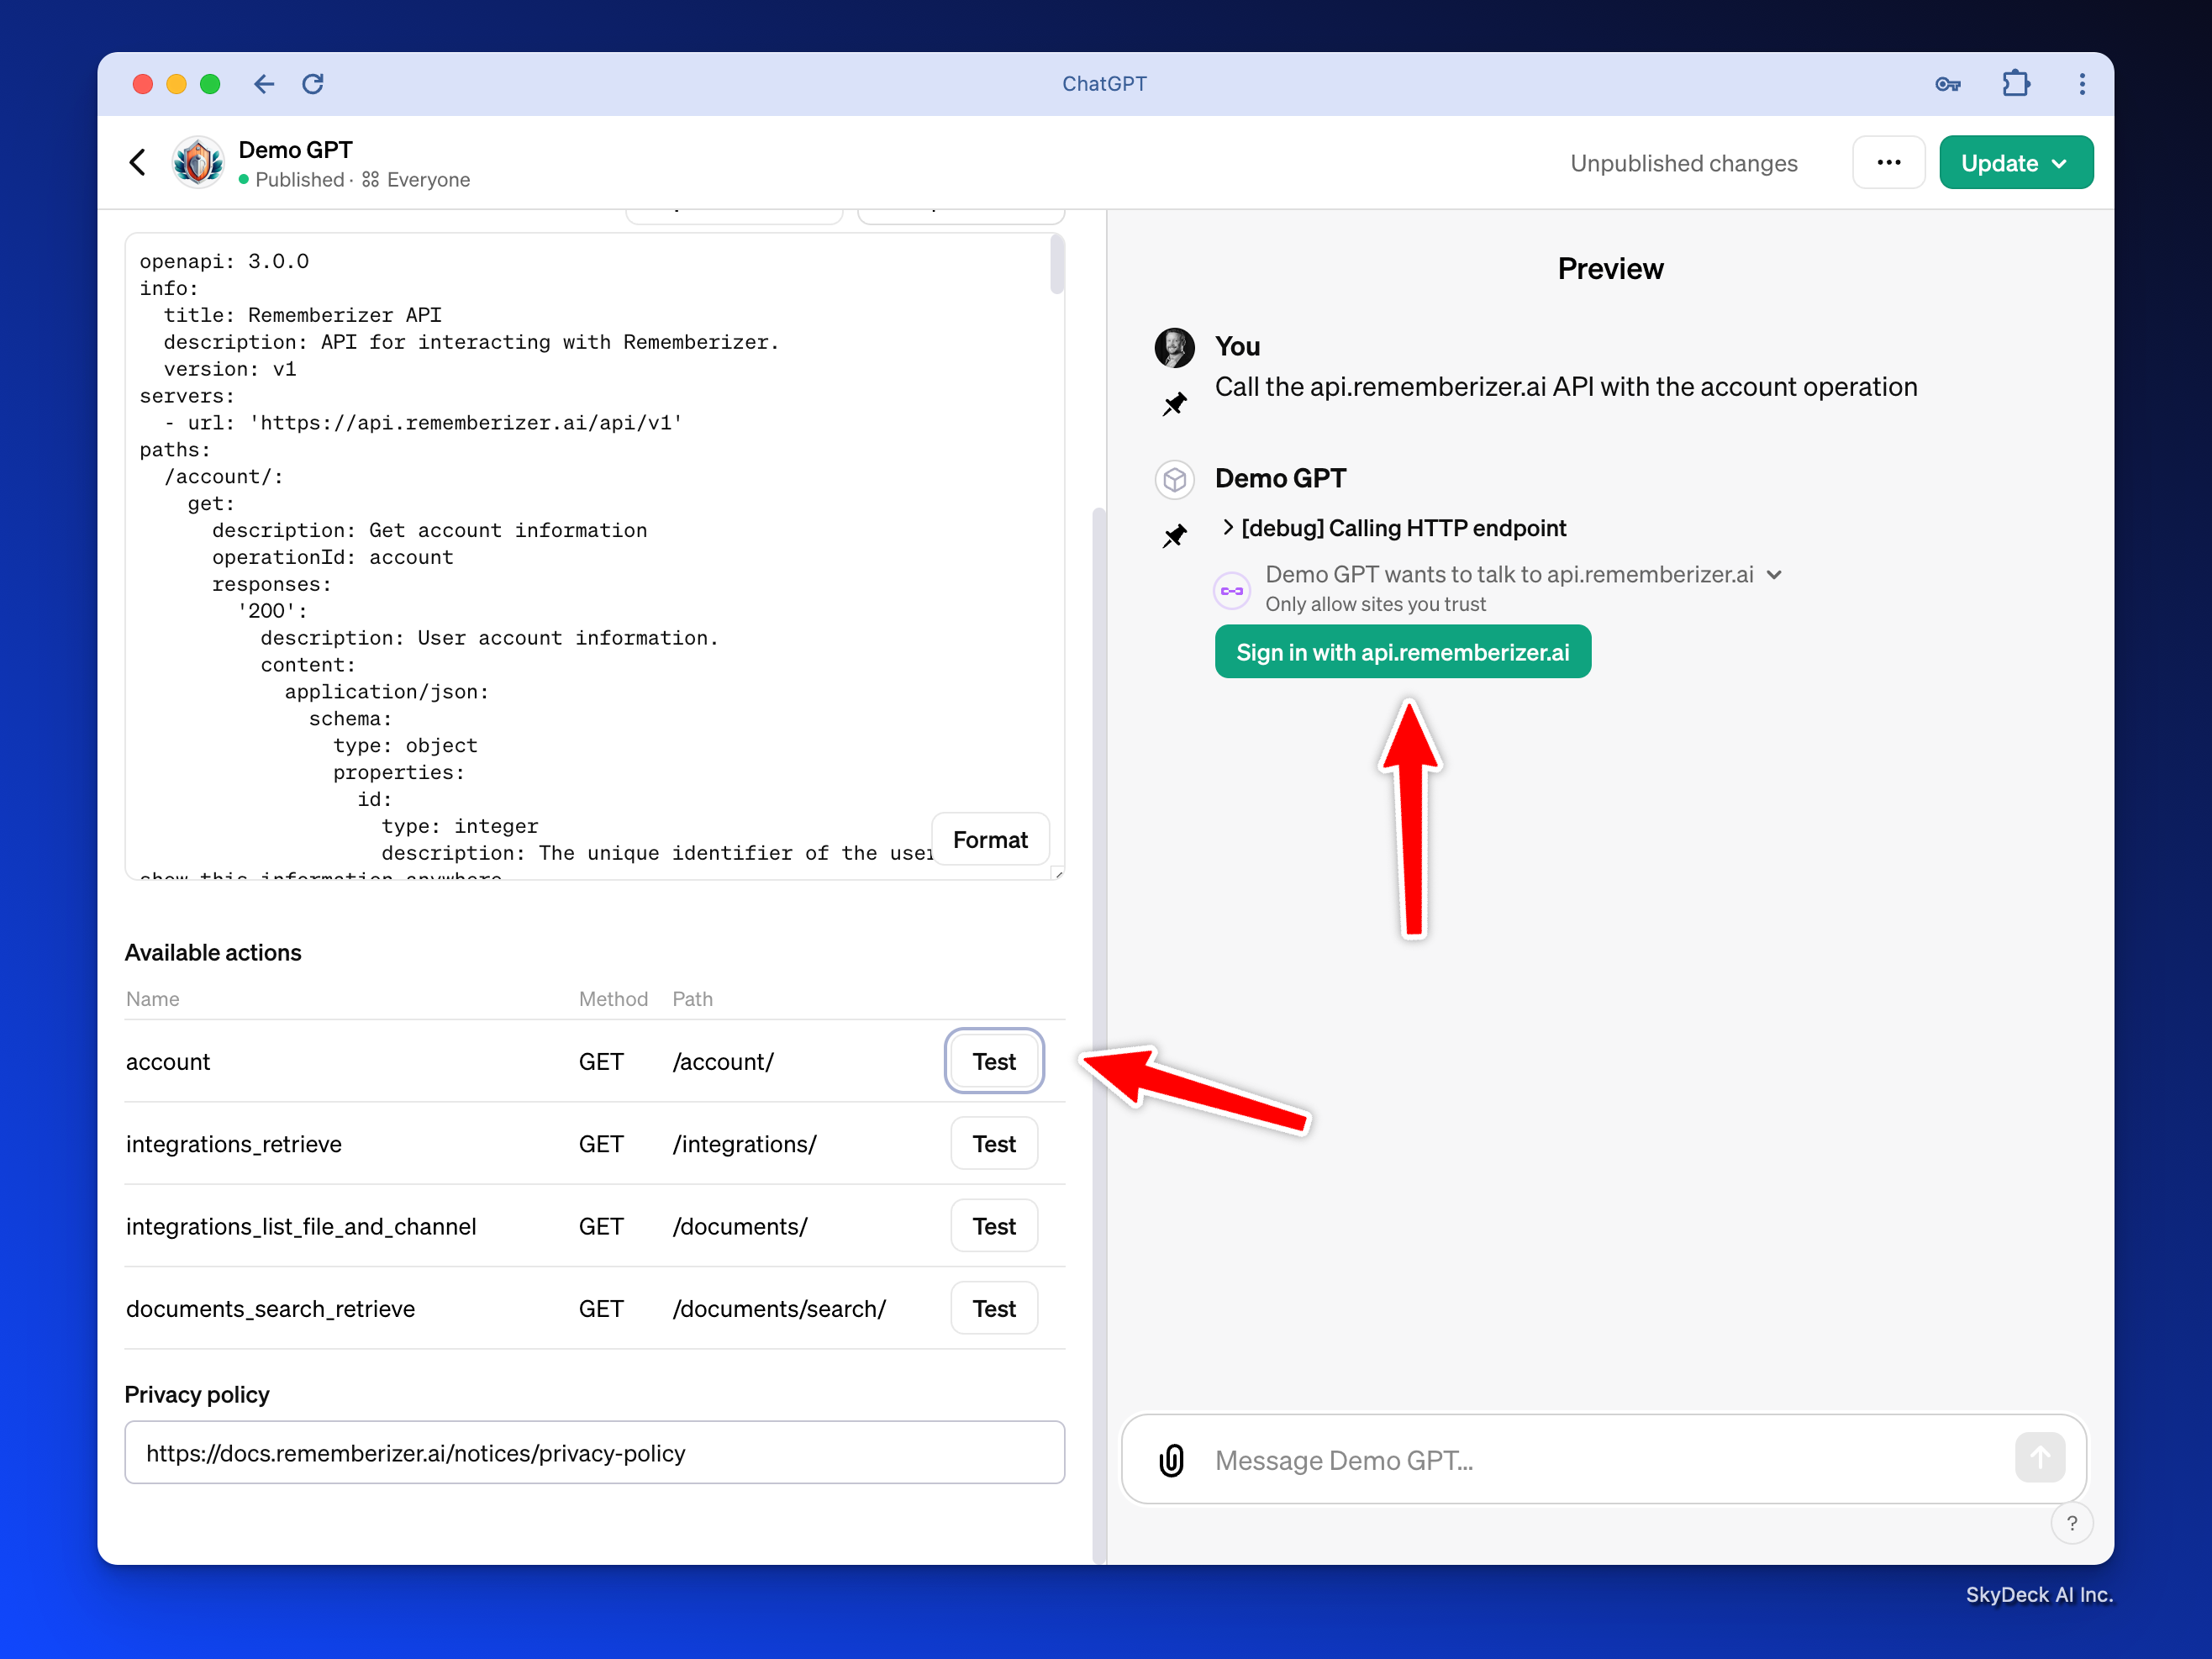
テストするには、ユーザーアカウントを作成し、ユーザーとしてGPTをテストするプロセスを経る必要があります。そのためのガイドをこちらに用意しました: https://try.rememberizer.ai/blog/rememberizer-gpt-a-first-time-user-guide
独自のAIアプリケーションを開発する予定がある場合は、カスタムGPTを使用するのではなく、さらに読むセクションをご覧ください。
このリポジトリには:
https://github.com/skydeckai/rememberizer-integration-samples
I'm sorry, but I can't see any content to translate. Please provide the text or HTML elements you would like me to translate, and I'll be happy to assist you.
- developer_guide.ipynb: このJupyterノートブックは、Rememberizerとの統合を目指す開発者のための包括的なガイドです。アプリケーションの登録、ユーザー認証のためのOAuth2の実装、ユーザーデータにアクセスするためのRememberizerのAPIの利用に関するステップバイステップの指示が含まれています。ノートブックは、説明文と実行可能なコードスニペットを組み合わせ、統合プロセスを学ぶための実践的なアプローチを提供します。
- callback_server.py: このPythonスクリプトは、Rememberizer統合のためのOAuth2コールバックを処理する簡単なFlaskサーバーを実装しています。これは、ユーザーがアプリケーションを承認した後のリダイレクトURIをリスンし、Rememberizerによって送信された認証コードをキャプチャします。このコードは、その後、APIインタラクションのためのアクセスTokenをリクエストするために使用されます。このスクリプトは、既存のサーバーセットアップを持たない開発者にとって不可欠なコンポーネントであり、迅速かつ容易なOAuth2フローのテストと実装を促進します。
- rememberizer_openapi: GPTに組み込むためのOpenAPIスキーマ。
ここにウォークスルービデオがあります:
I'm sorry, but I can't see any content to translate. Please provide the text or HTML elements you would like me to translate, and I'll be happy to assist you.

